Make these fun reflection acrylic ornaments this Christmas – these ornaments make great gifts!
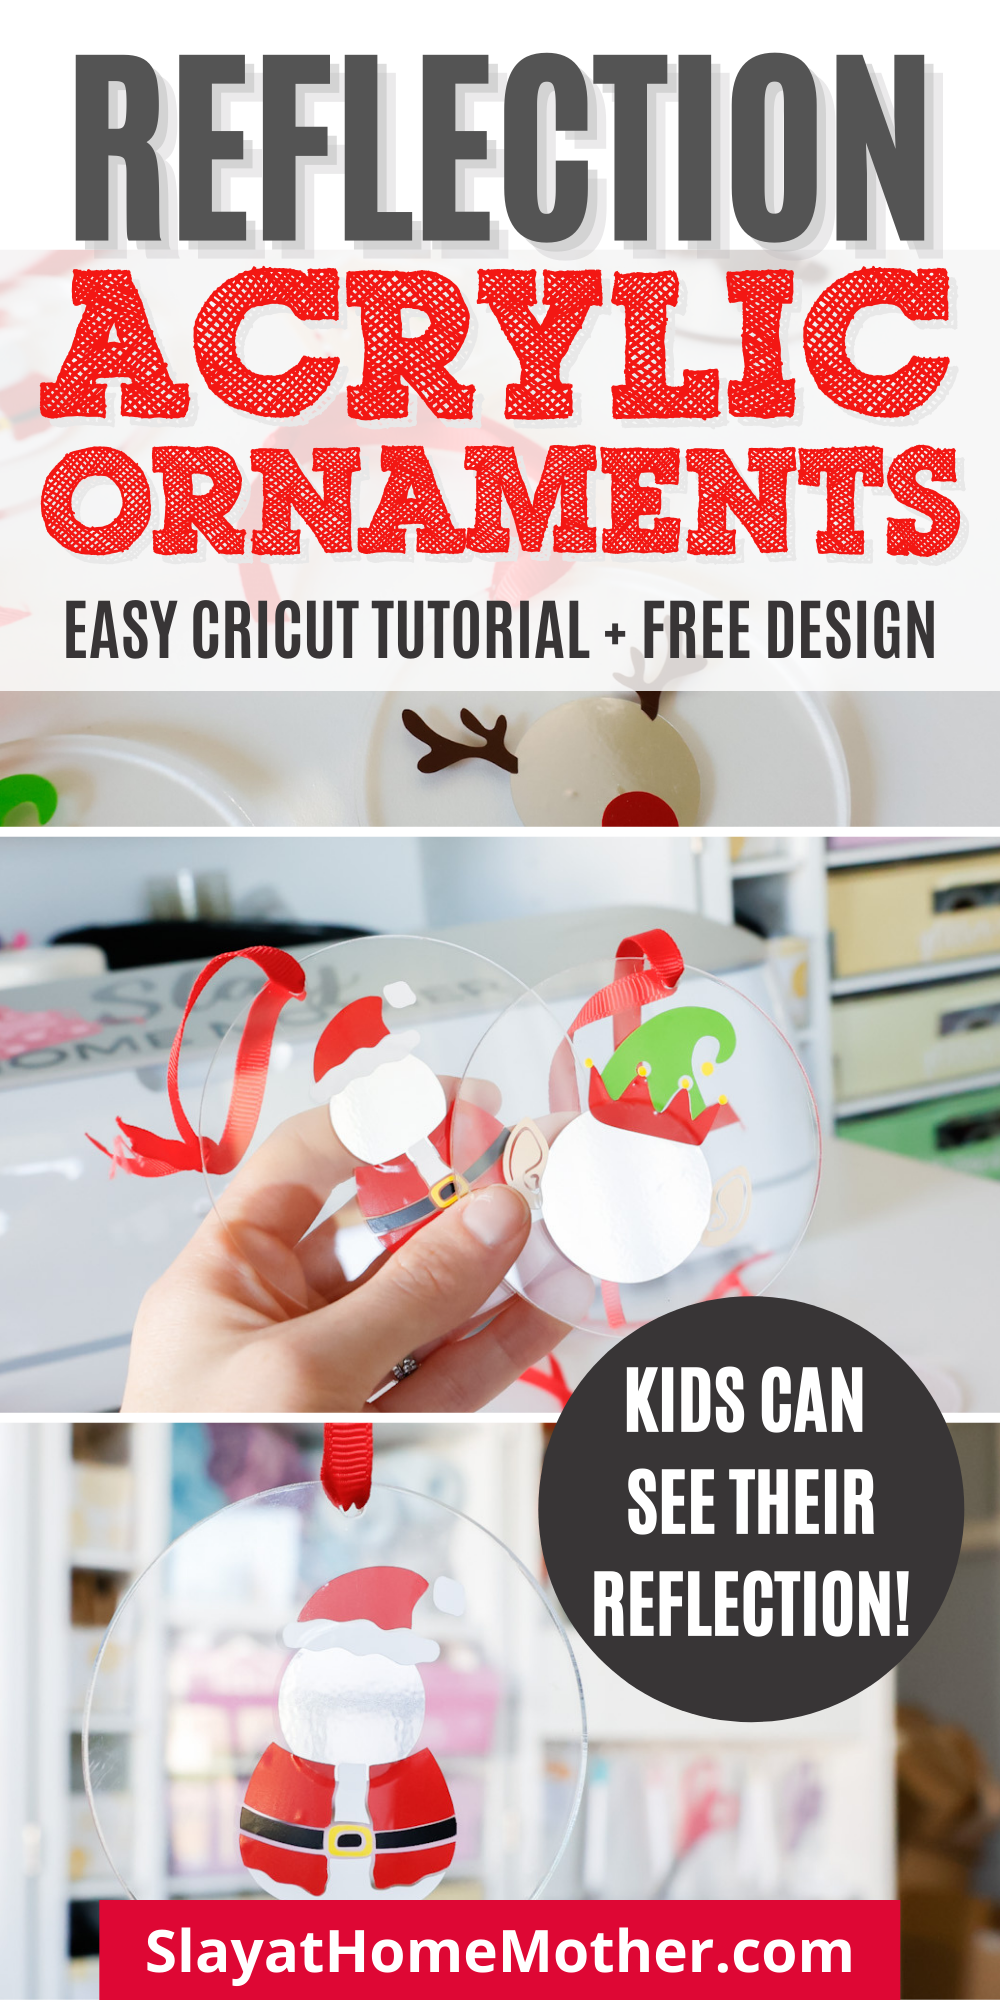
Reflection Ornaments – A Unique Christmas Acrylic Ornament Idea
These ornaments are a fun Christmas DIY!
Kids and adults alike can look at these acrylic ornaments and see their reflection in the image.
Pretend to be an elf, Santa, Rudolph, a Christmas wreath, and more with these fun ornaments!
These would make an amazing holiday gift, as well, for neighbors or friends.
*This post contains affiliate links, however, all opinions are my own, as always.
What You’ll Need To Make These Reflection Ornaments
Here’s what I used for this craft…
- Cricut machine (I’m using the Maker 3, but this is Explore Air machine-compatible)
- fine-point blade and housing (this is the blade that comes with your machine)
- adhesive foil (I used the Silver color)
- white permanent vinyl
- red permanent vinyl
- green permanent vinyl
- yellow permanent vinyl
- tan permanent vinyl
- brown permanent vinyl
- black permanent vinyl
- LightGrip mat
- regular transfer tape
- weeder
- acrylic discs (here are the ones I used)
- ribbon of your choice
For my vinyl colors, I used Tomato Red, Lime Green, Stone Yellow, Black, White, Coffee, and Gold.
The black, white, coffee, and gold colors are available in the Basics Sampler vinyl pack from Cricut – this is a great way to save on these essential colors, especially if you plan on using them for just this project!
Access The Free Design For These Acrylic Blank Ornaments
Here is the free Design Space link for this project.
I ended up using some images from the Cricut Access subscription, which I highly recommend if you are an avid and frequent crafter like I am!
Cricut Access saves me so much time searching for the perfect image to use in my designs and offers over 150,000+ designs to choose from, as well as over 500+ fonts.
Why Adhesive Foil?
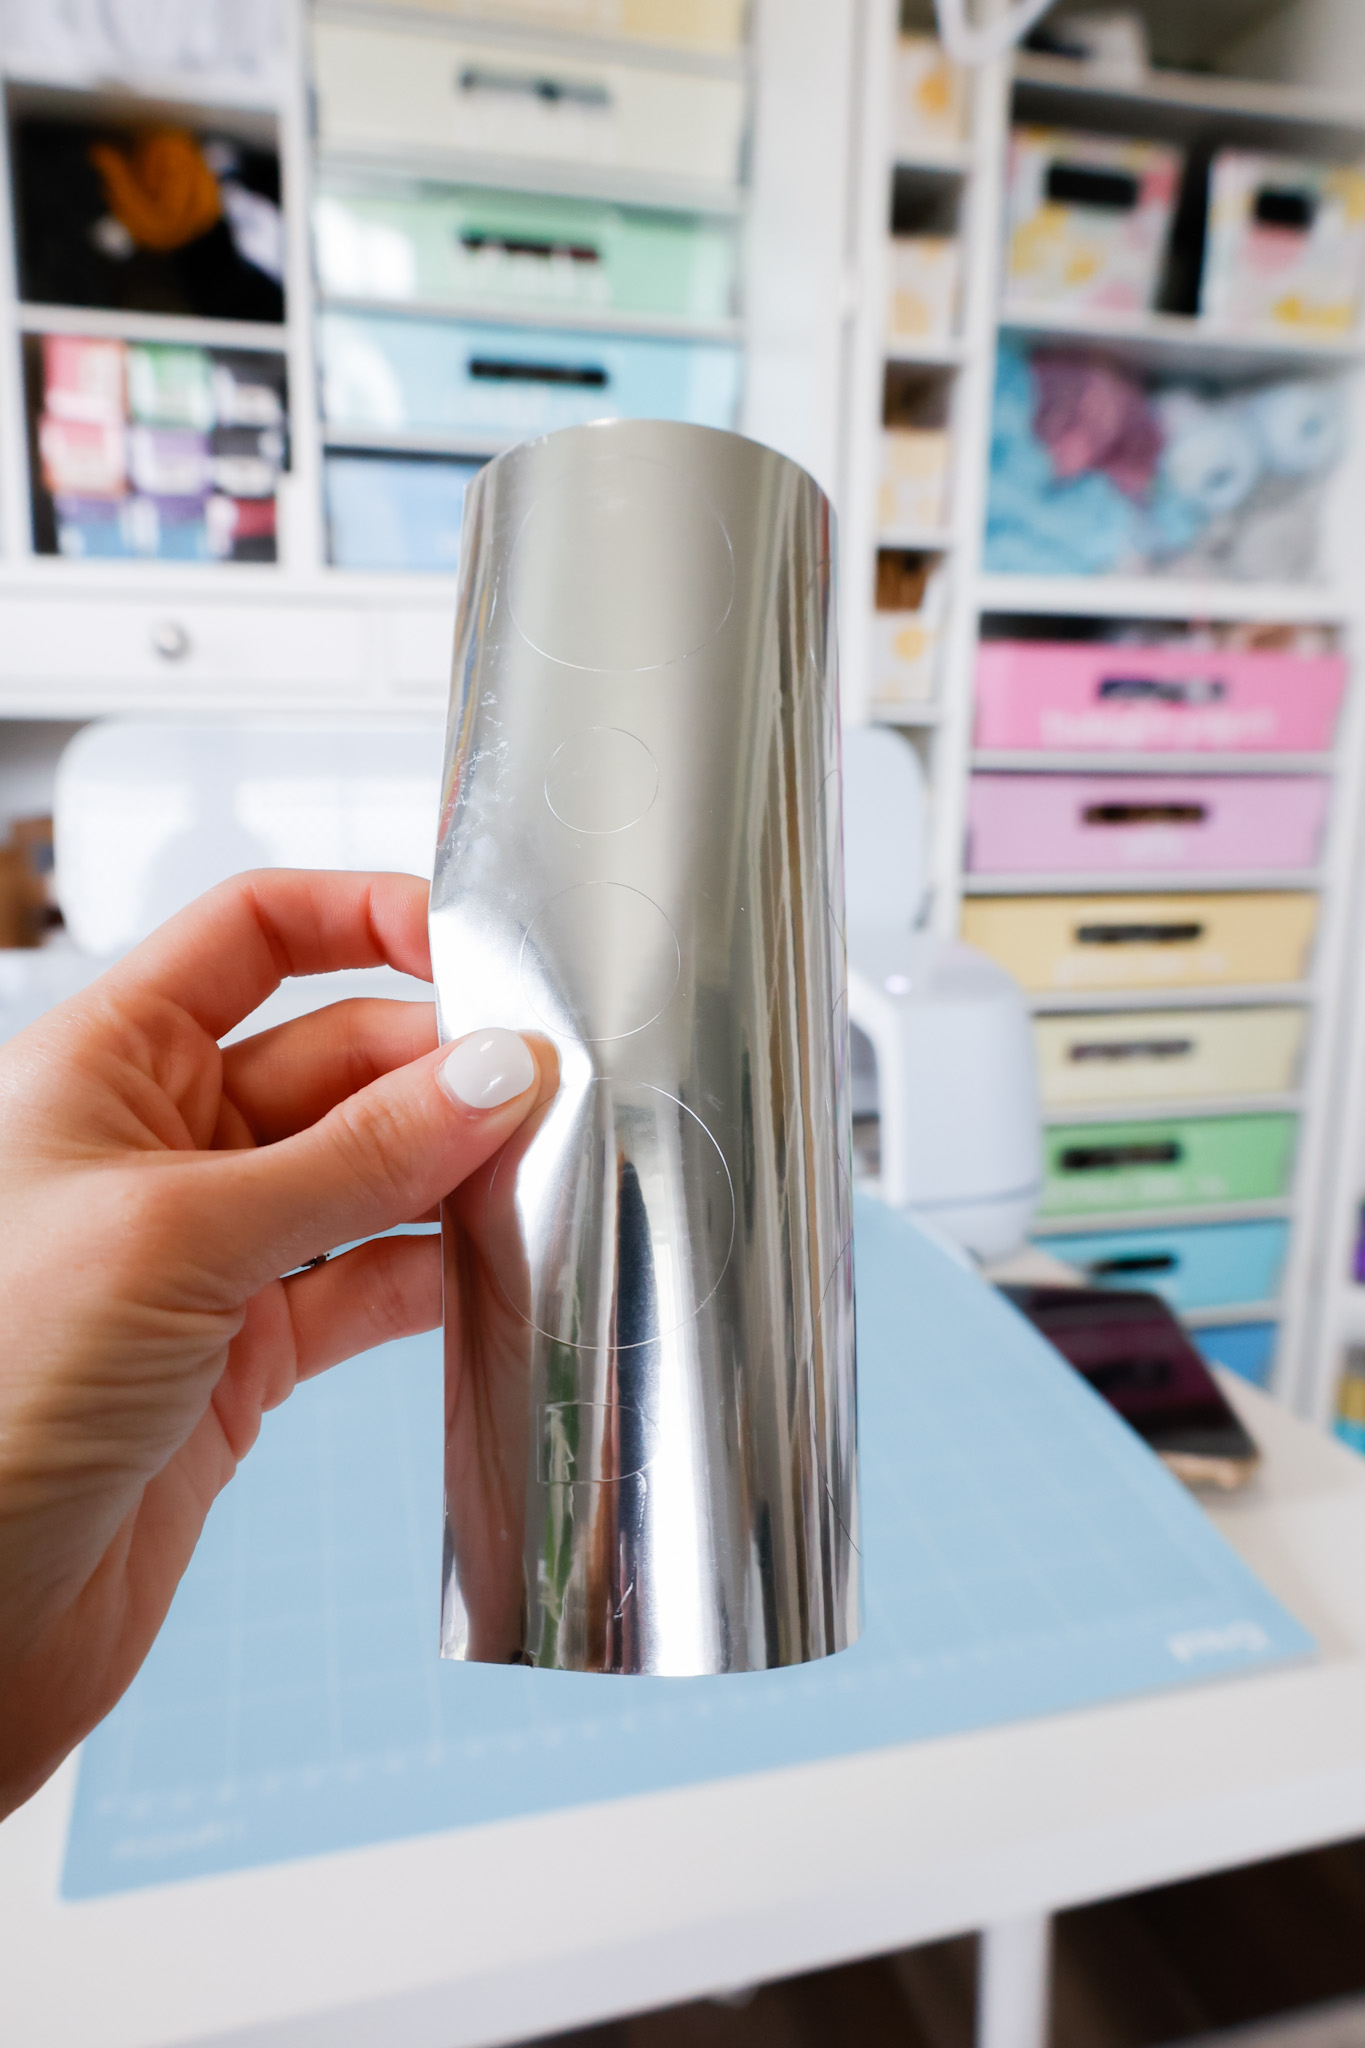
Adhesive foil (at least the Cricut brand that I’m using) has a reflective surface and works as a makeshift mirror.
This makes it perfect for this project!
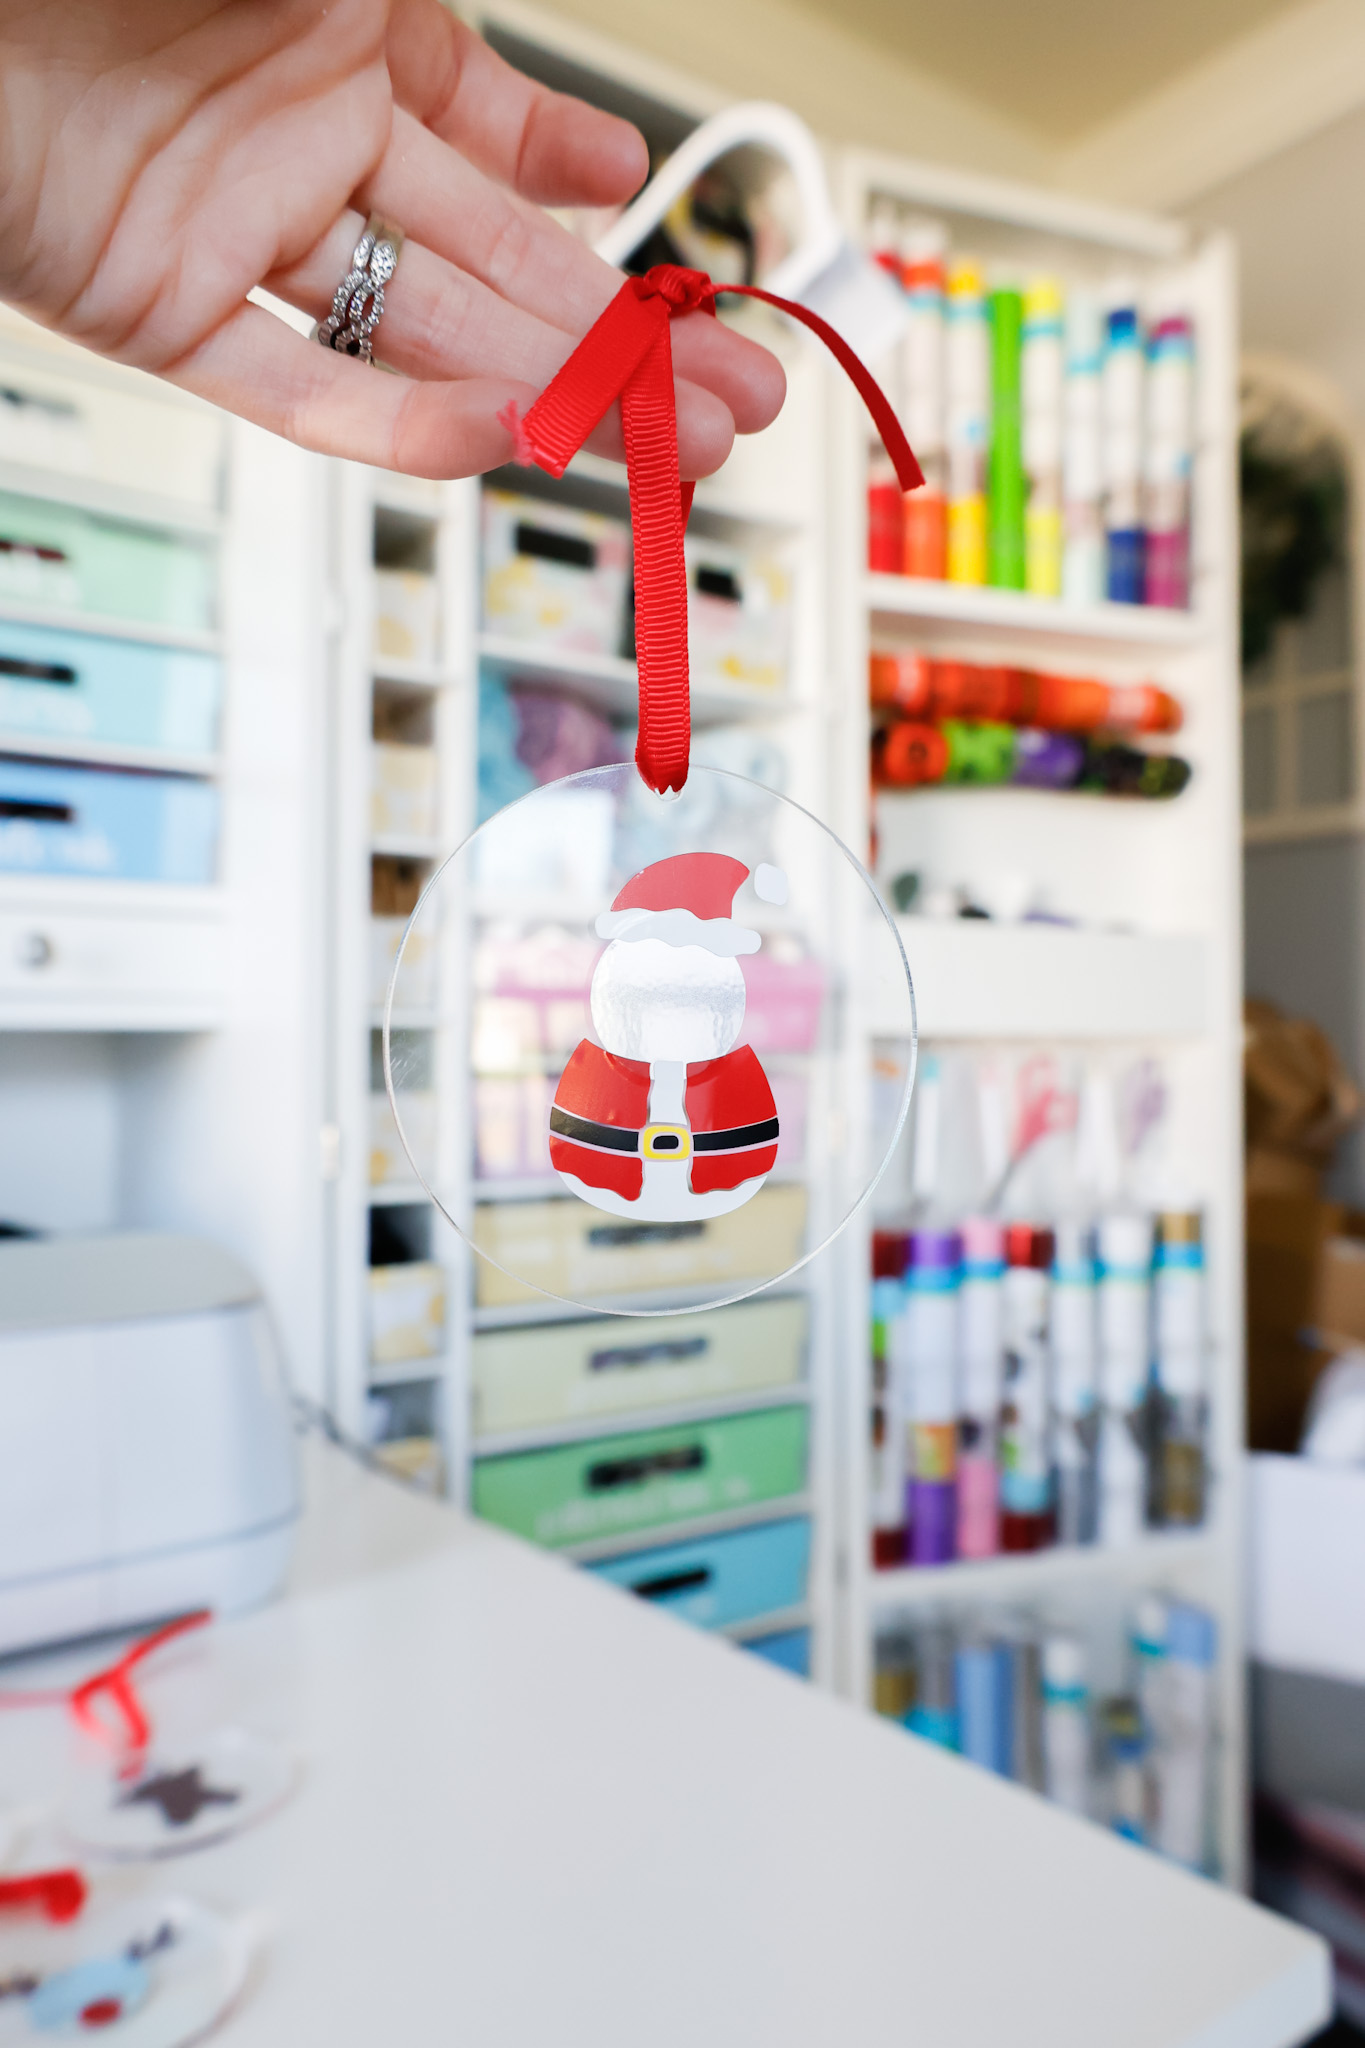
I had the idea to use it as a mirror for certain designs so that when our kids looked at them, they could see themselves in the ornament!
I knew they would love it.
Picturing themselves as Santa, Rudolph, or being inside a gingerbread house is so fun for them.
The adhesive on this adhesive foil is also super strong, which is great because the material is thicker than vinyl.
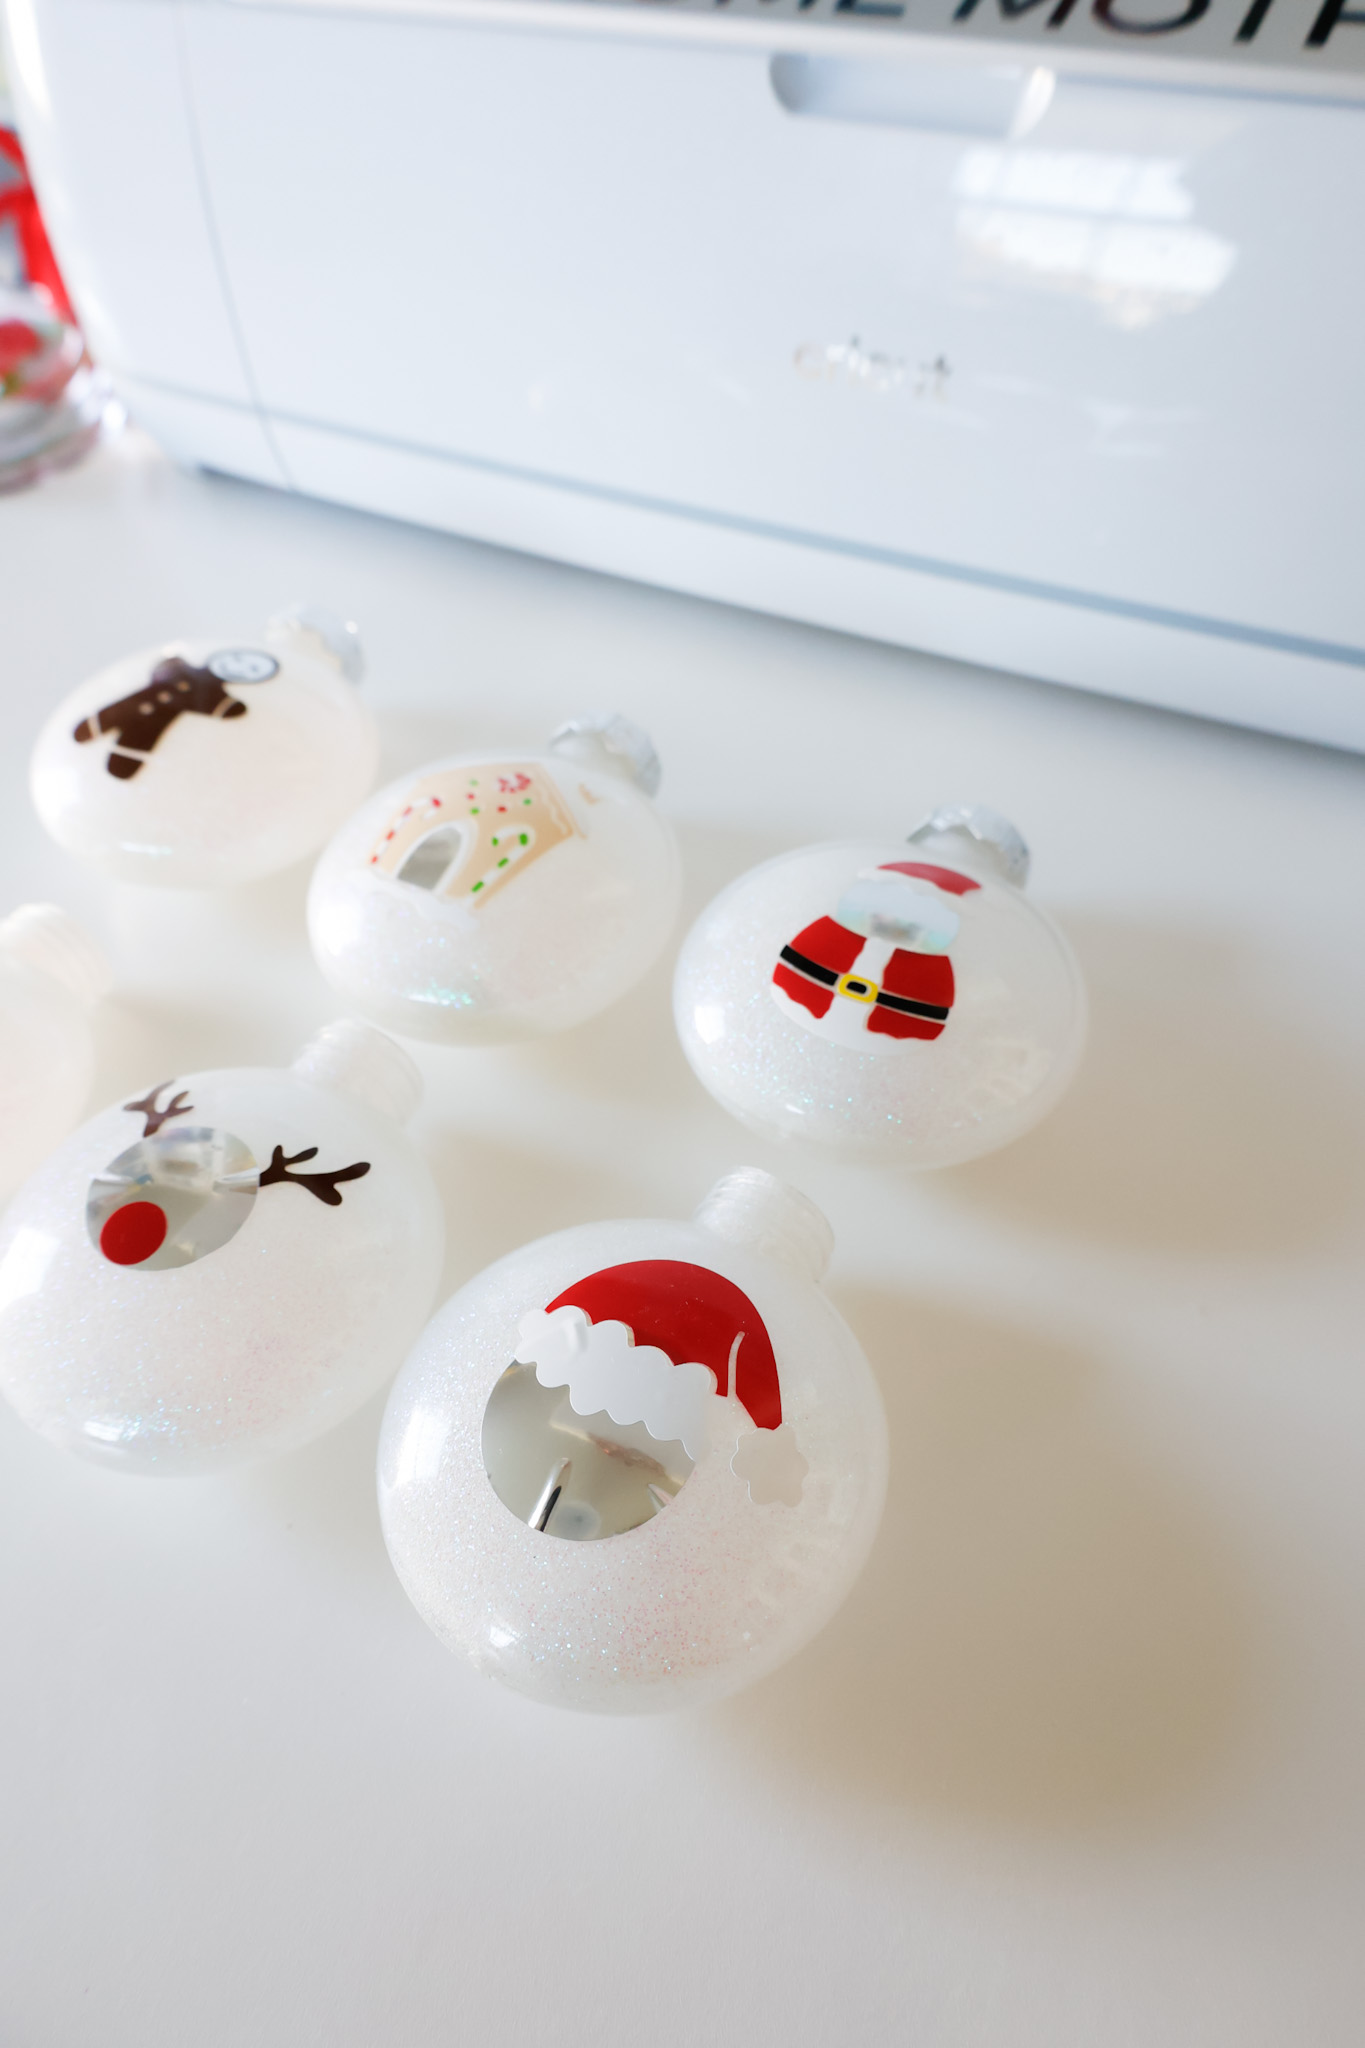
How To Make Reflection Ornaments
If you are making these acrylic ornaments with your own design, pick one where you can easily incorporate the reflection bit into it.
For instance, I chose these designs…
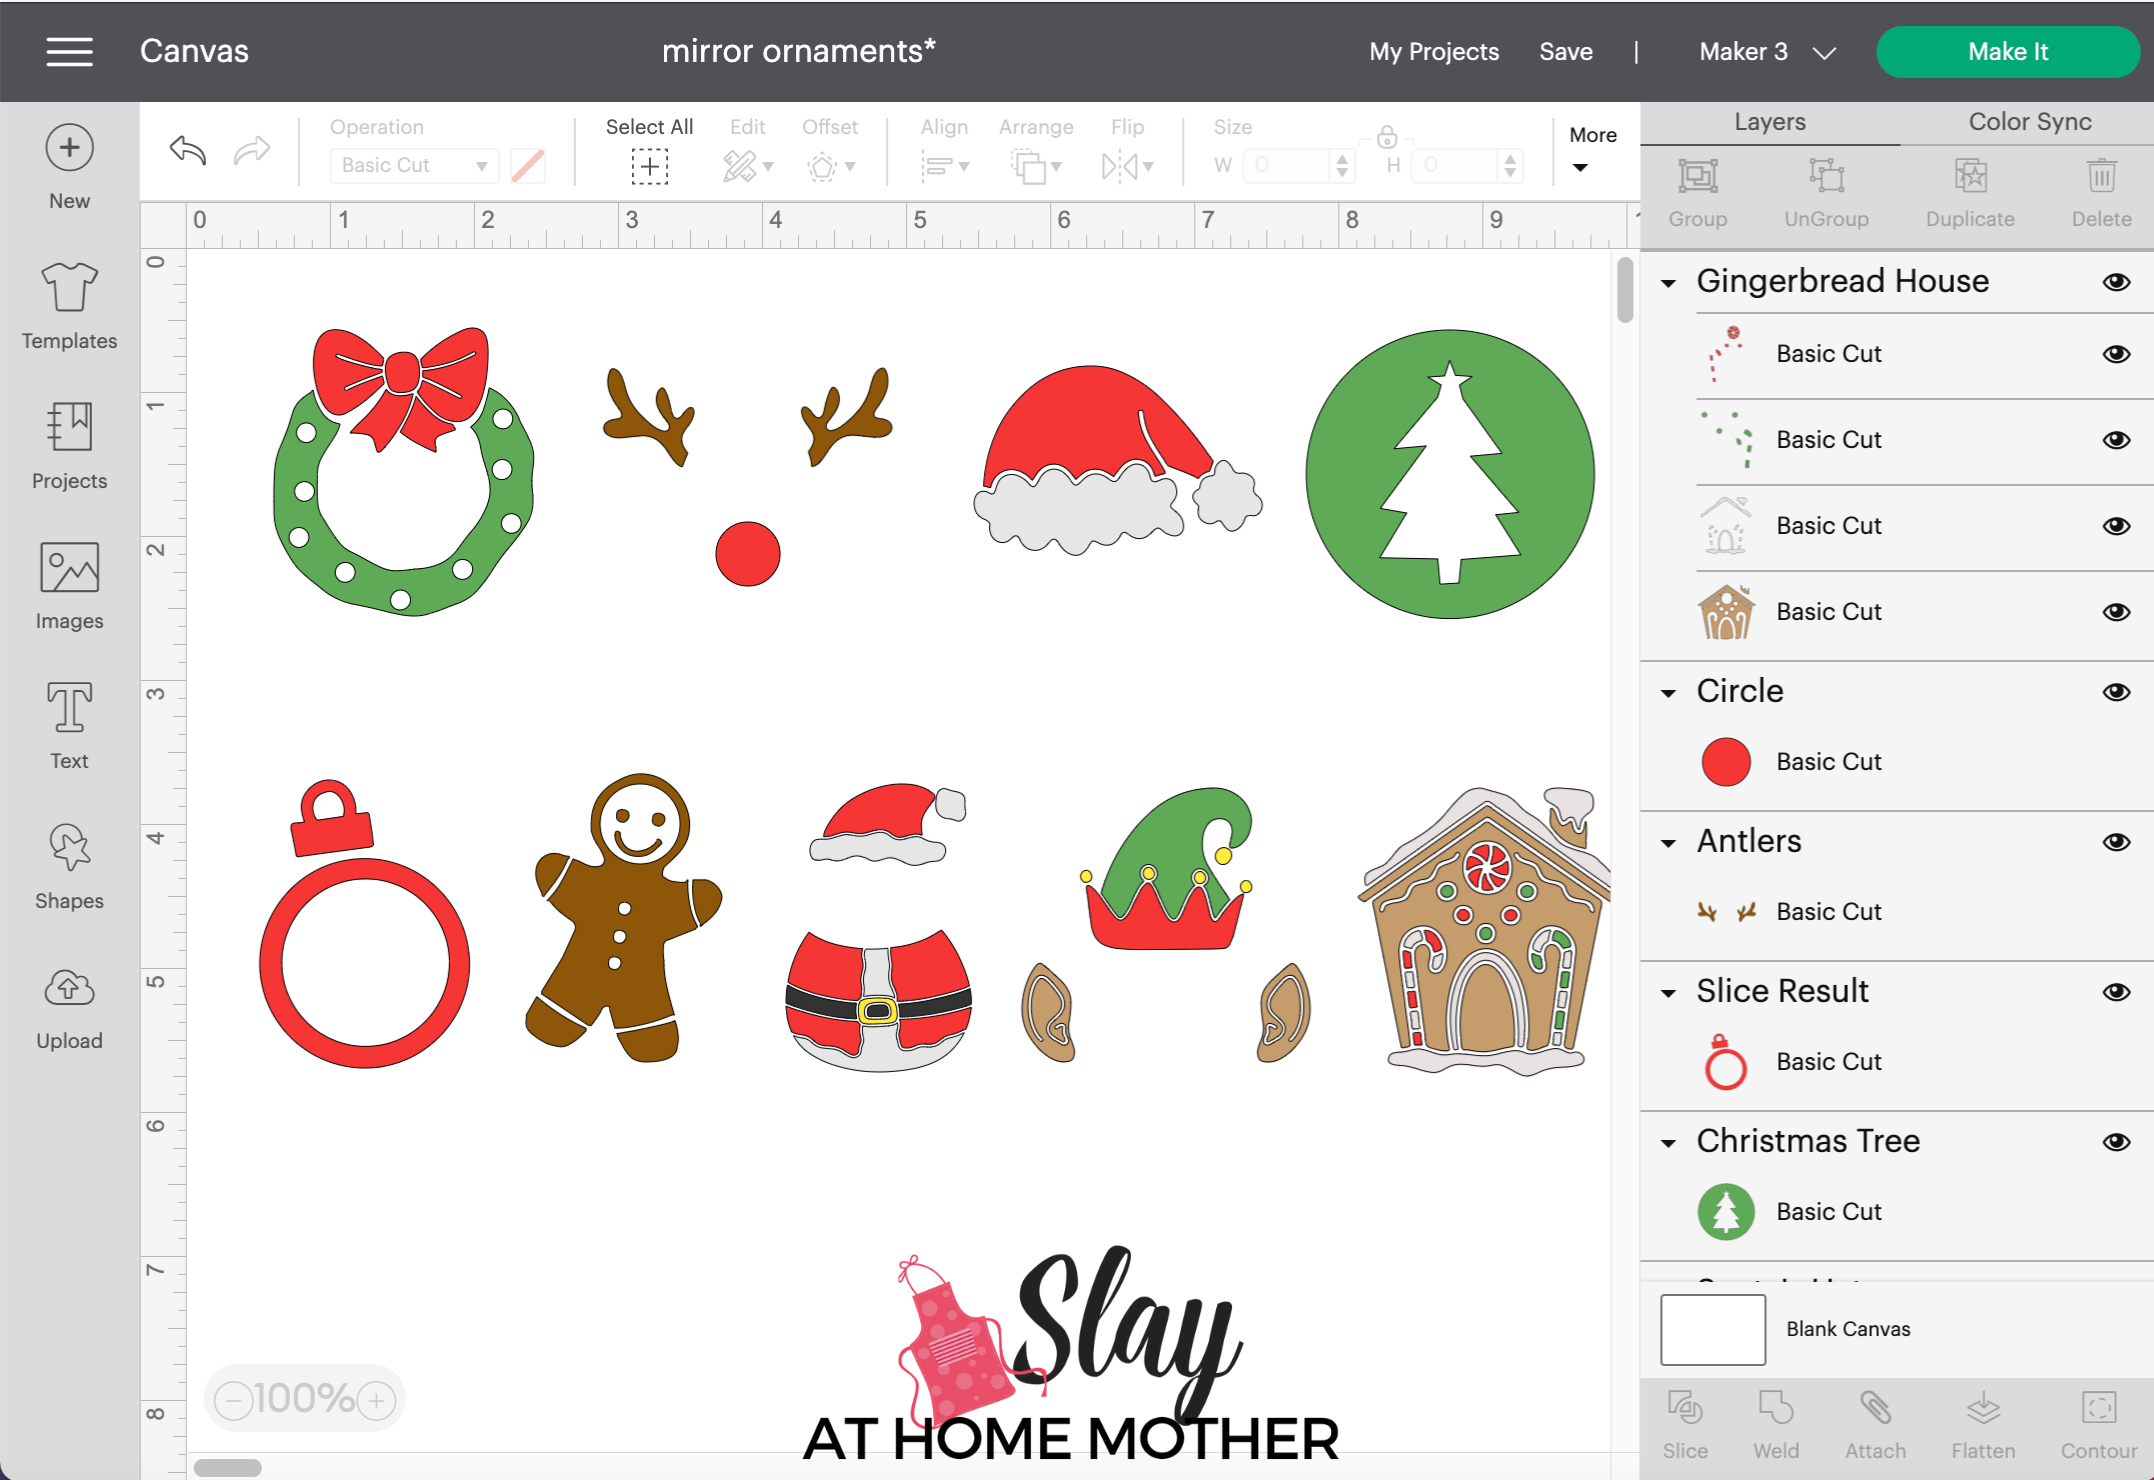
For each image, I chose to size them to neither the height nor width went above 2″.
Whichever measurement was larger, I set to 2″ to ensure it would fit on the acrylic disc with room to spare.
Then, I made circles to fit the shapes I wanted so I knew how large to cut the adhesive foil for that mirror effect – this provides that quick illusion that YOU are in the ornament!
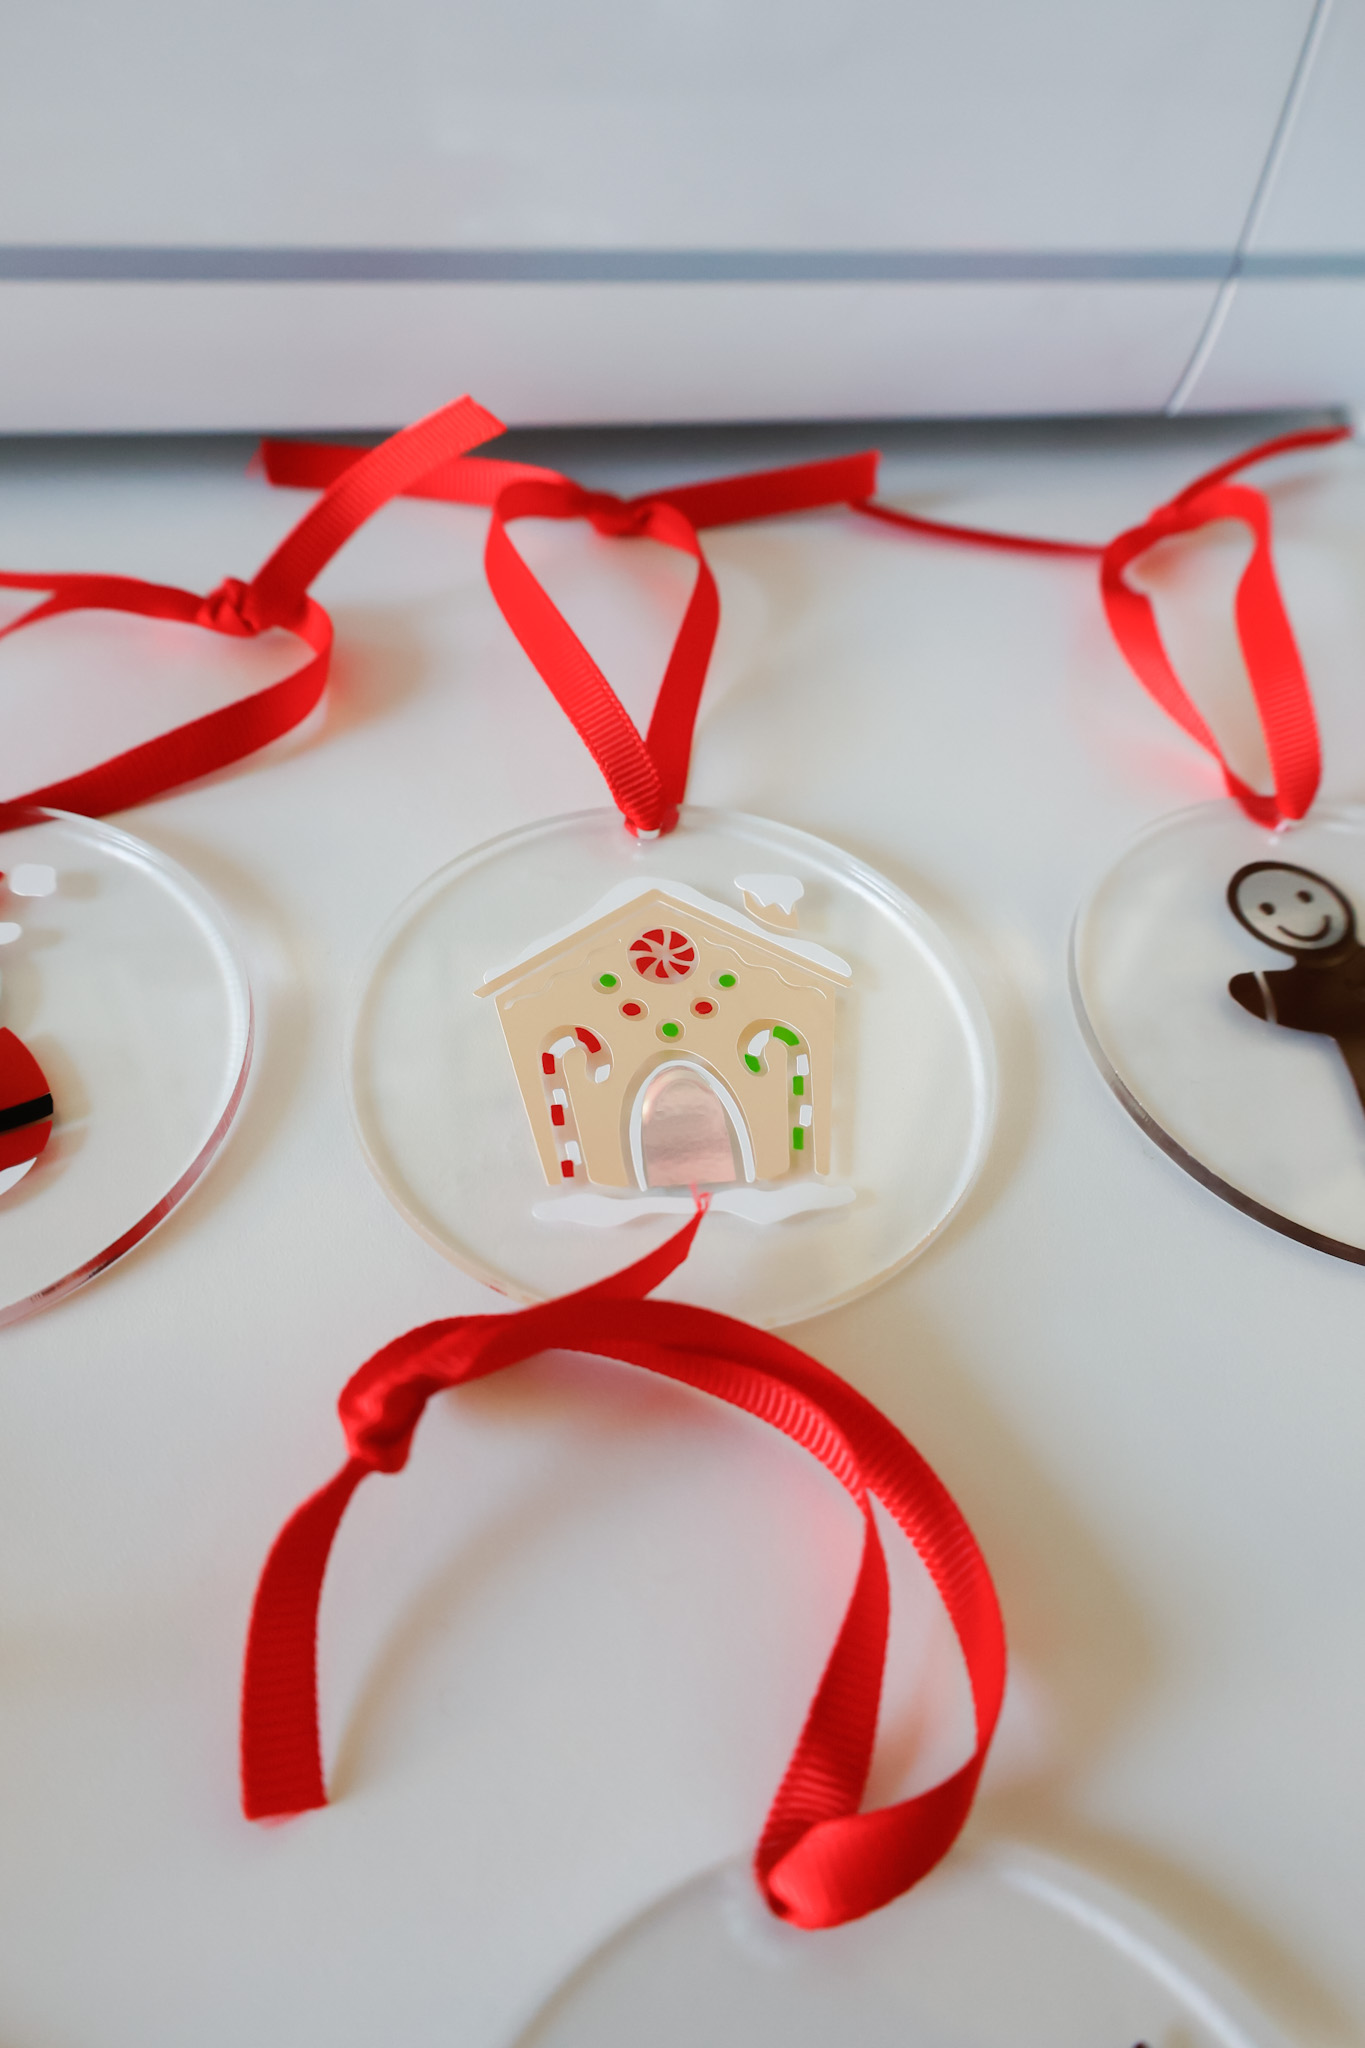
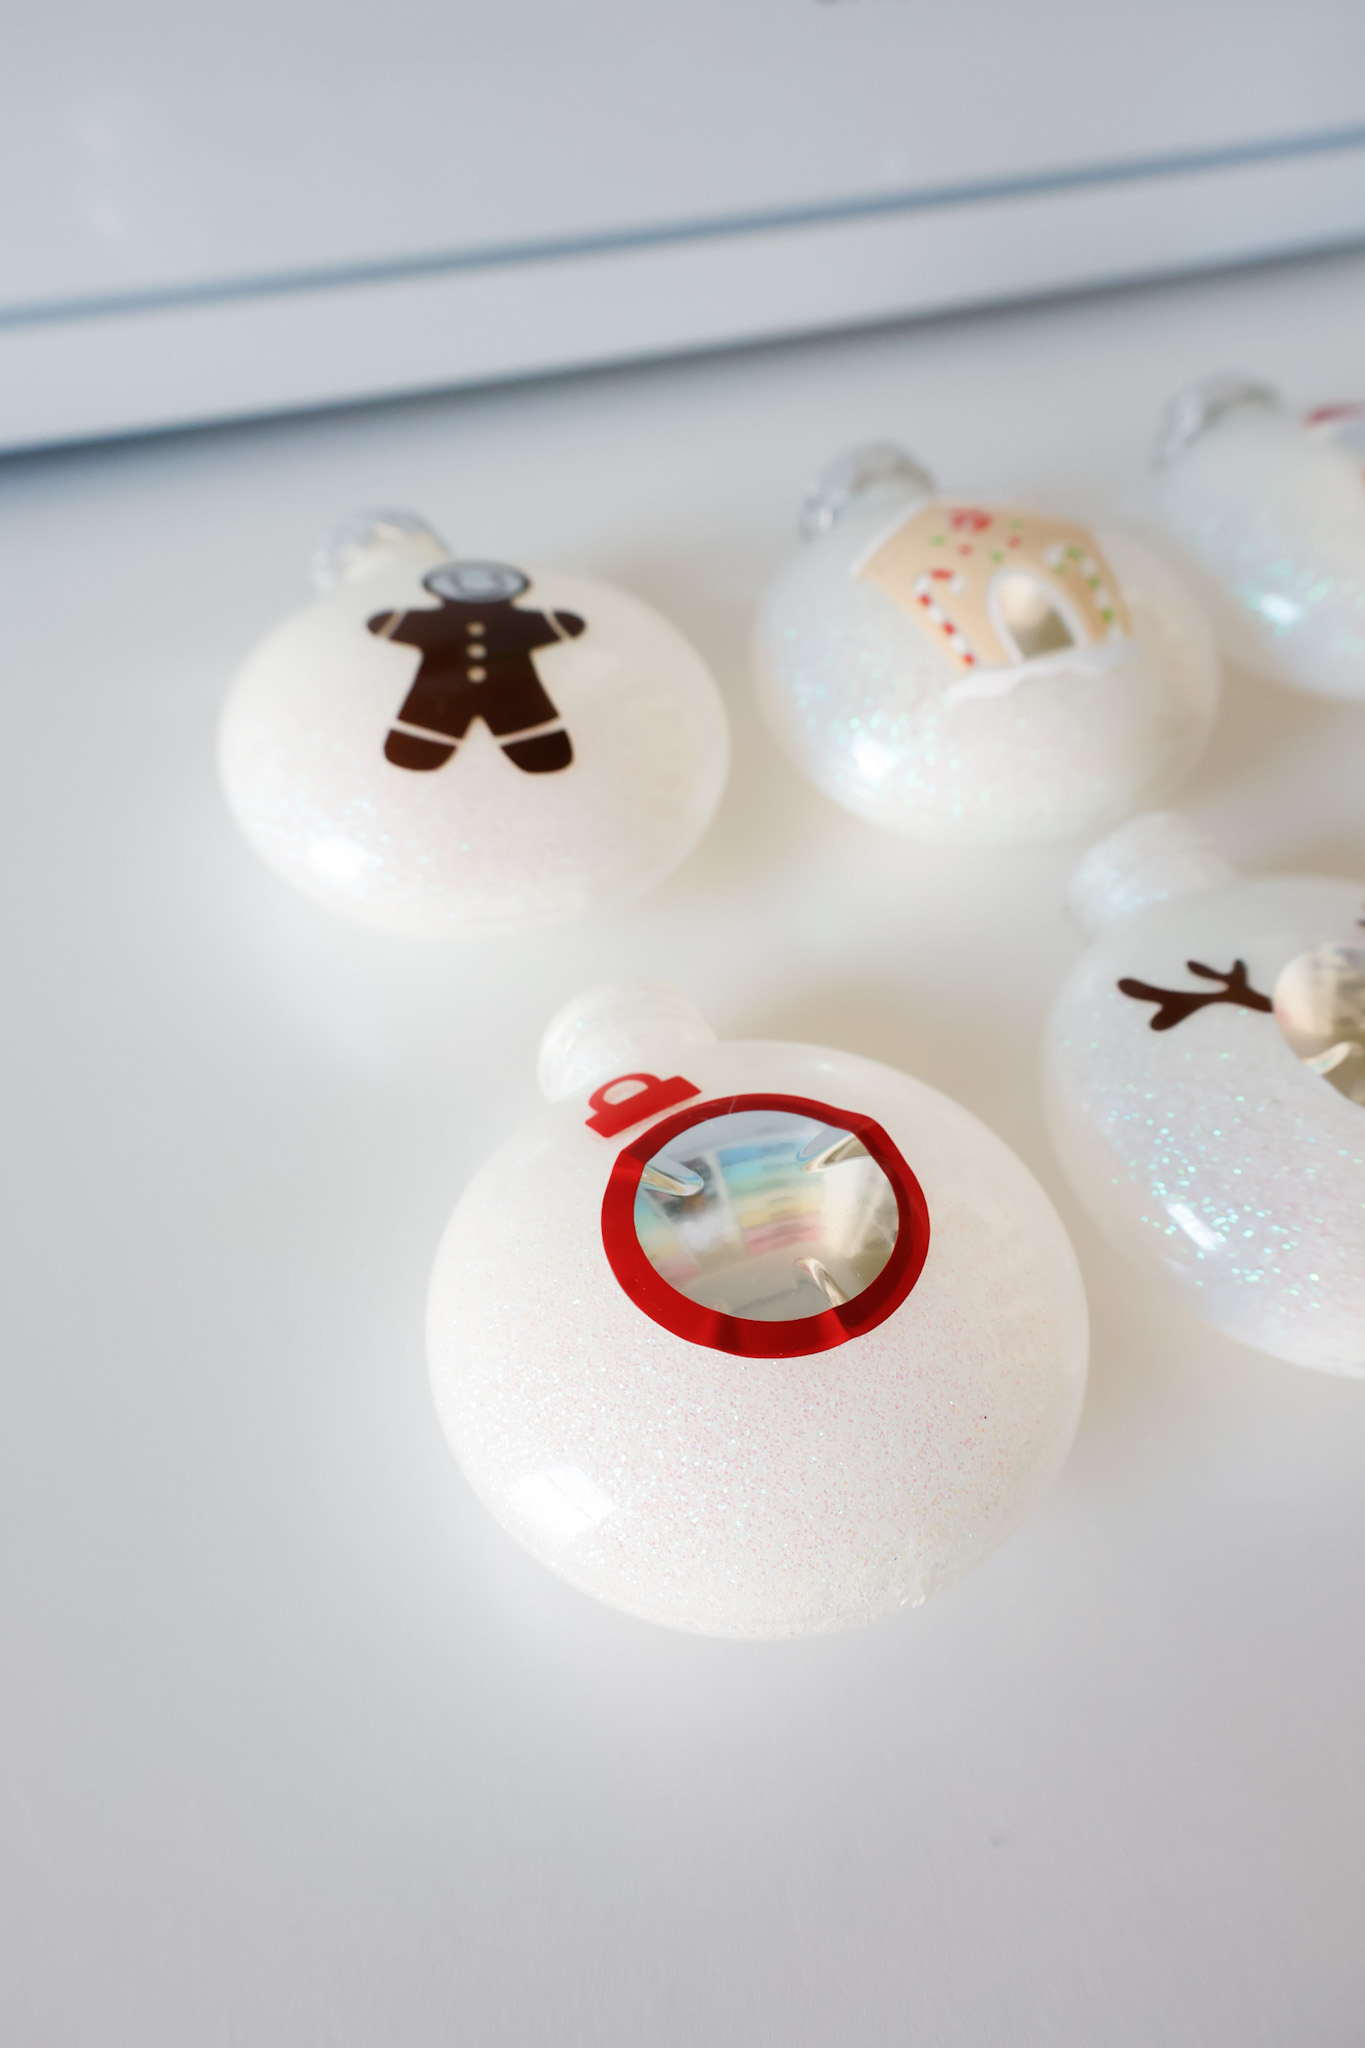
In the gingerbread house, I chose to make the doorway as the reflective part so my kids could see themselves in the house.
To replace the door, I welded two shapes together in Design Space (an unlocked circle to make an oval, and a square)…
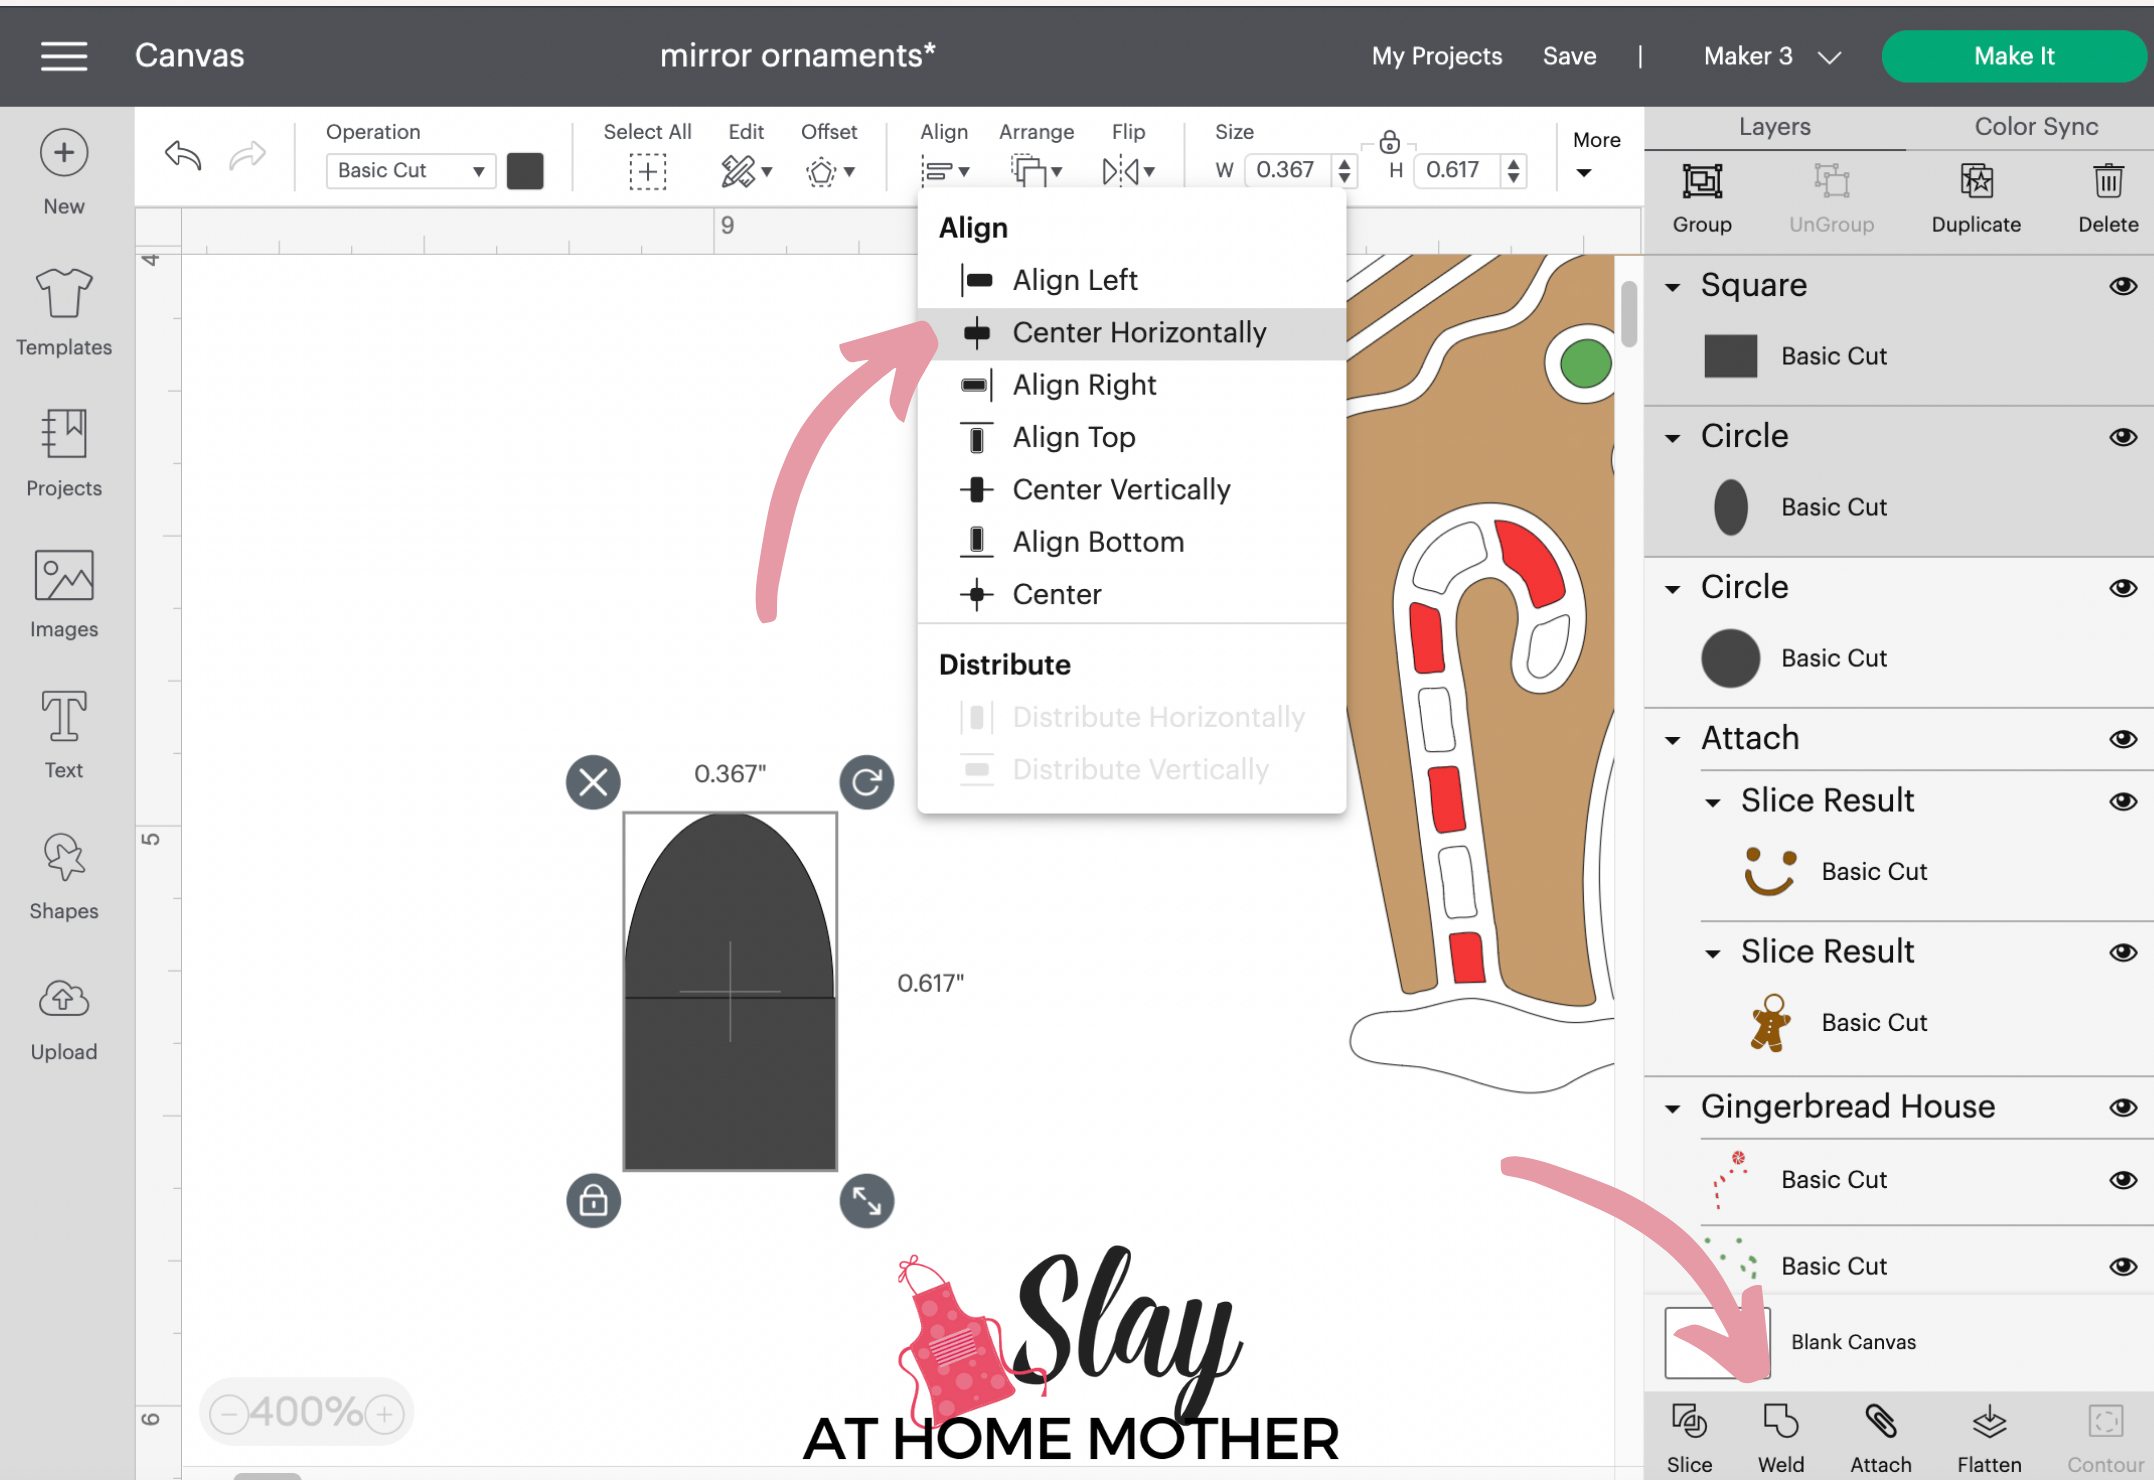
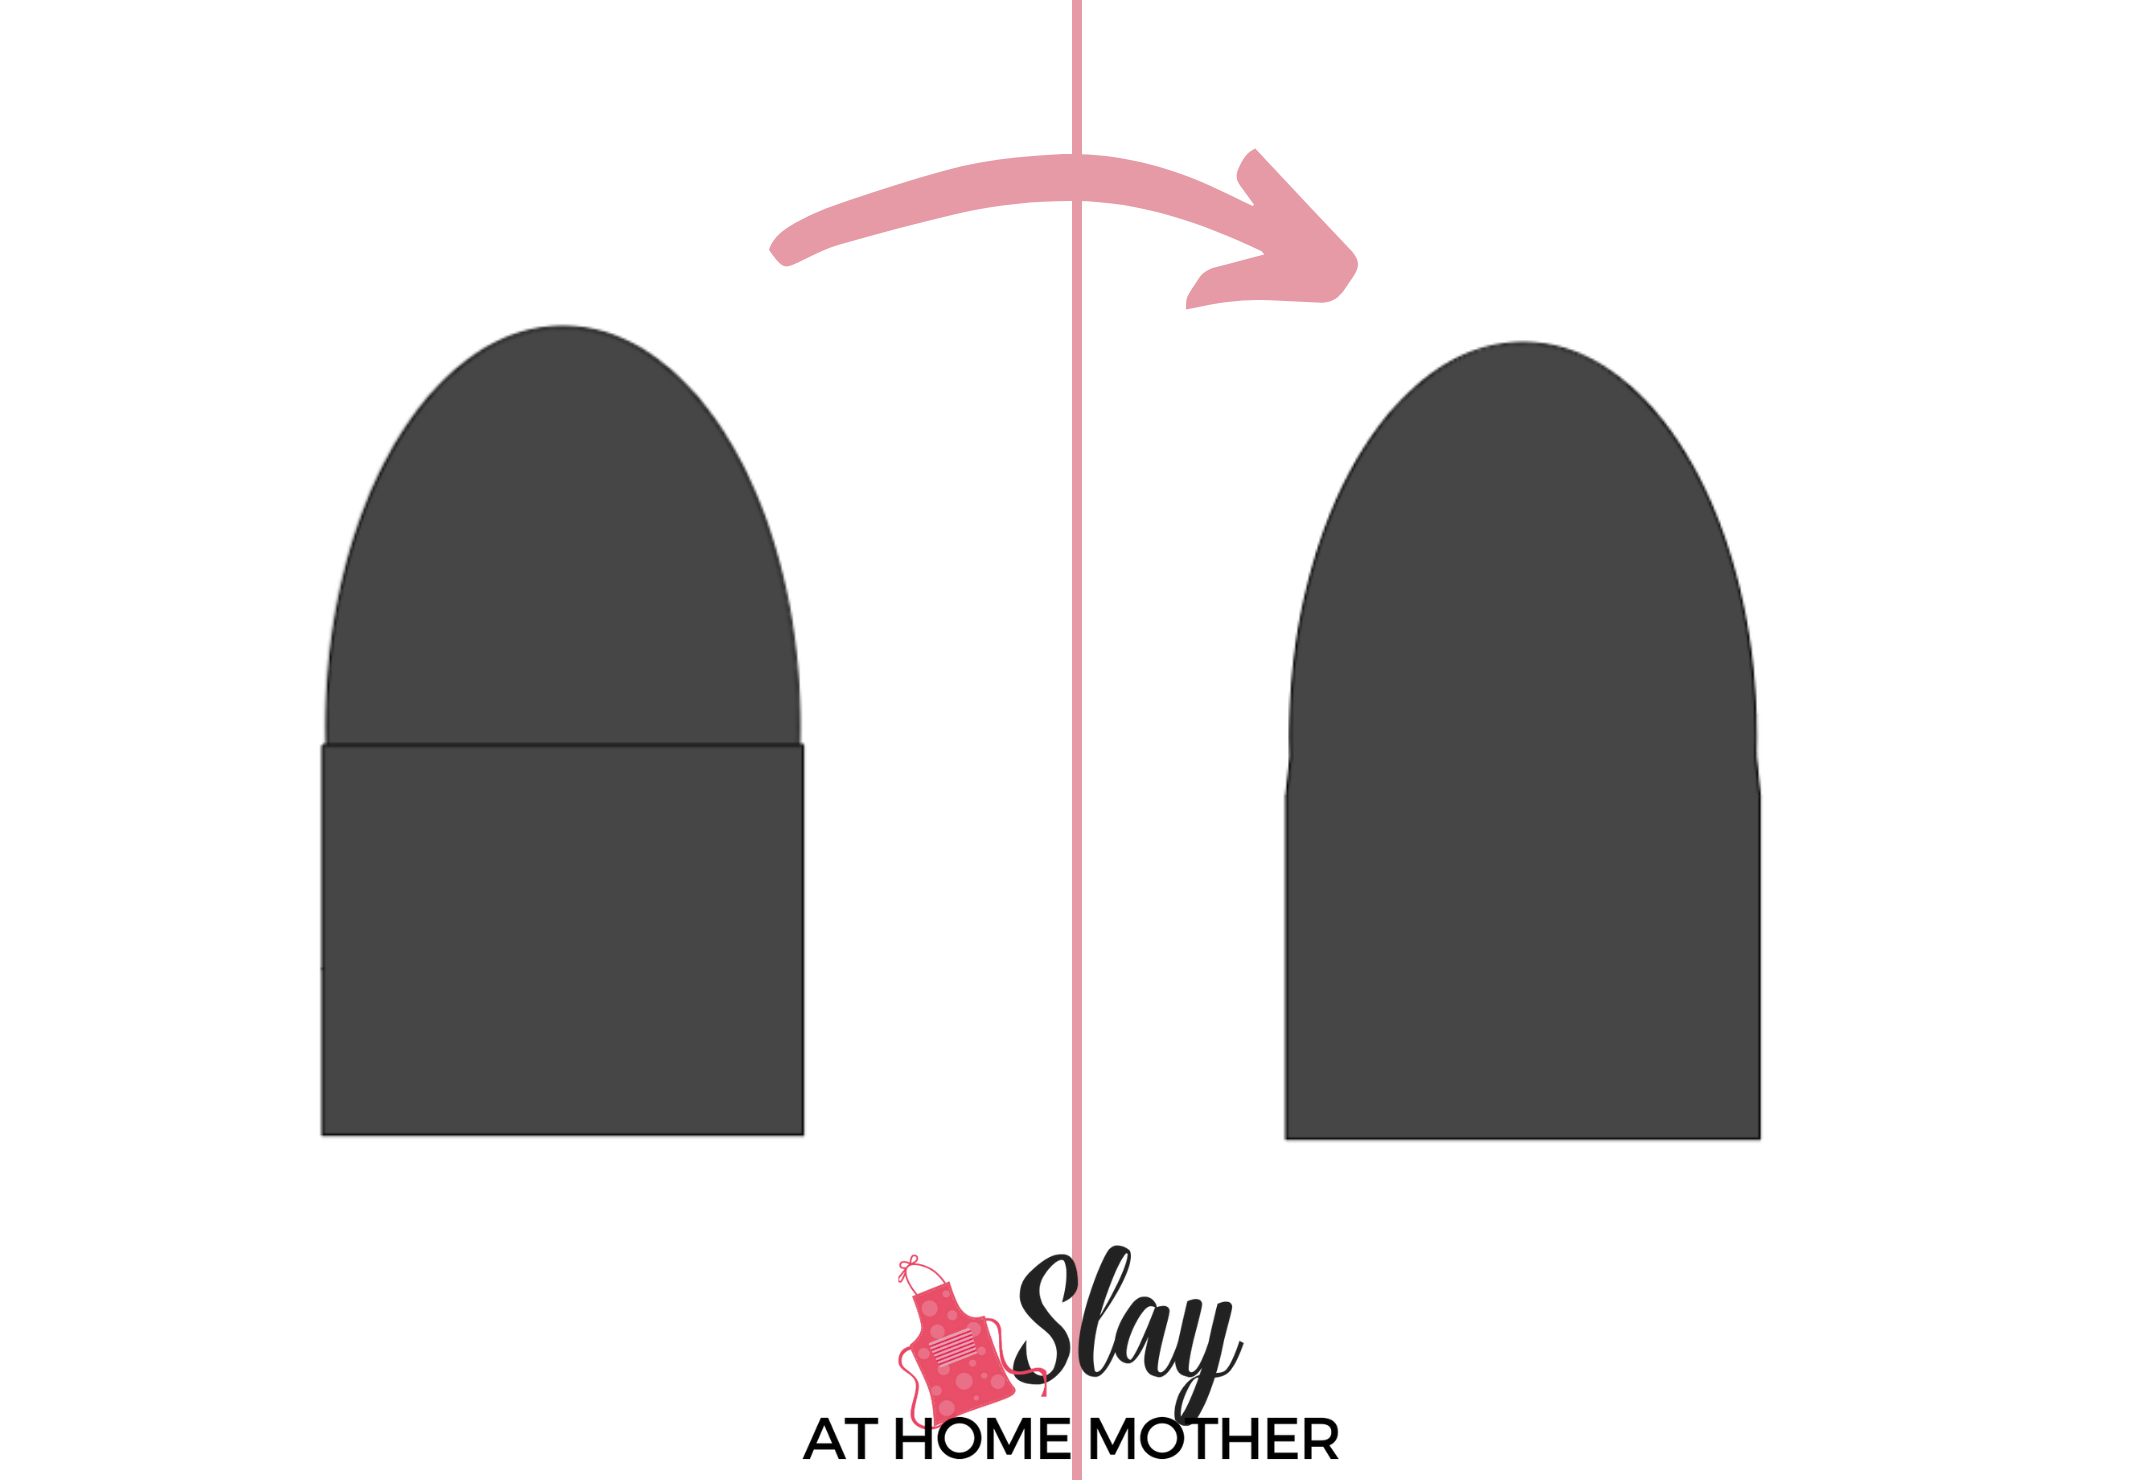
Here is the gingerbread house door on the acrylic ornament…
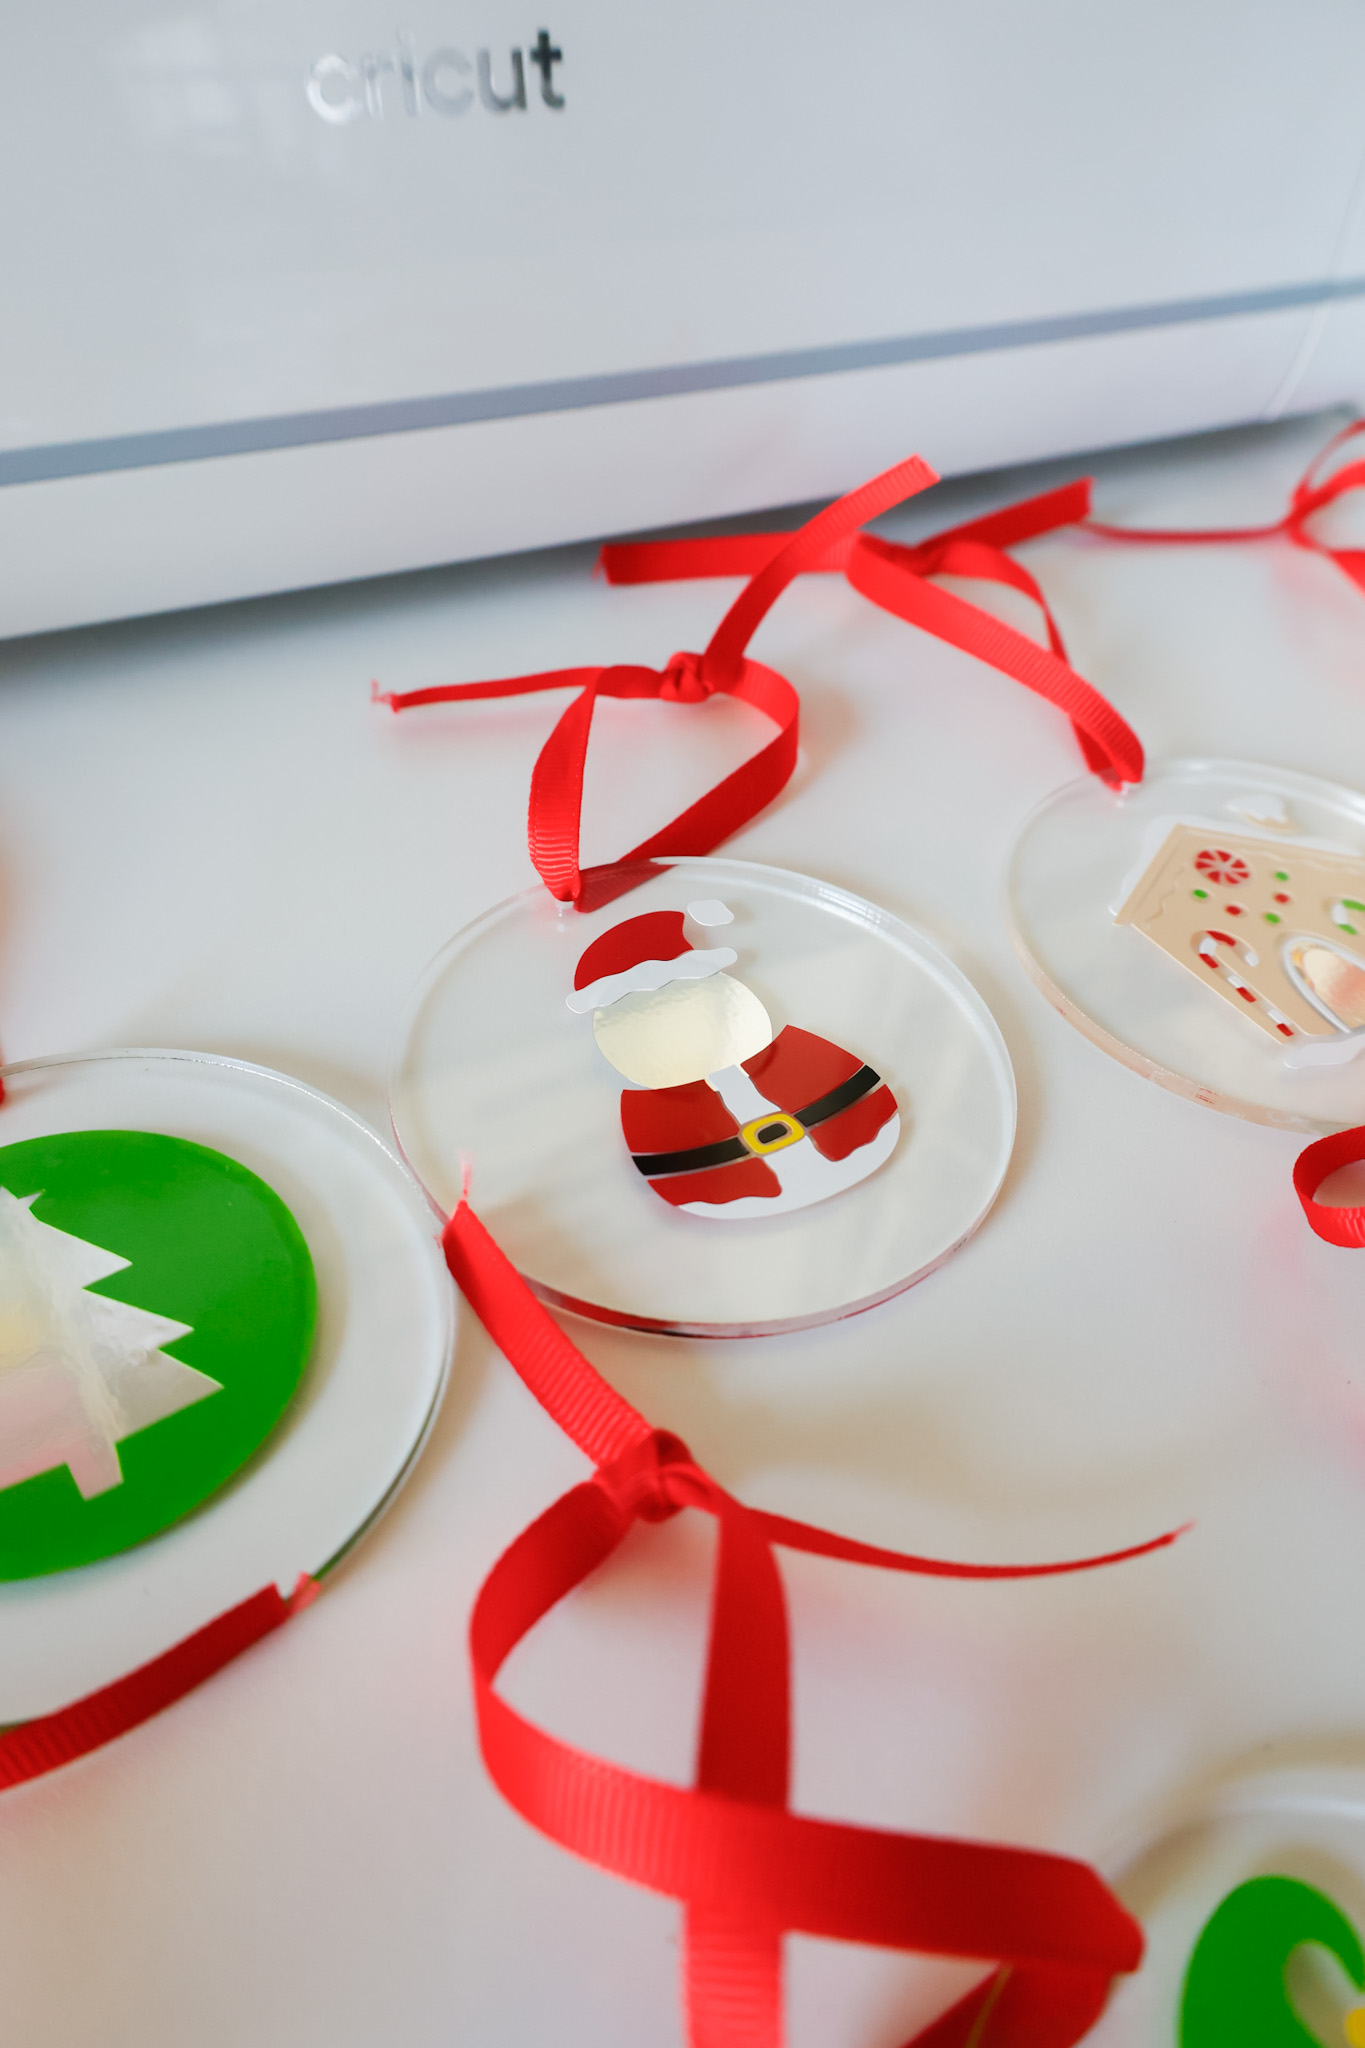
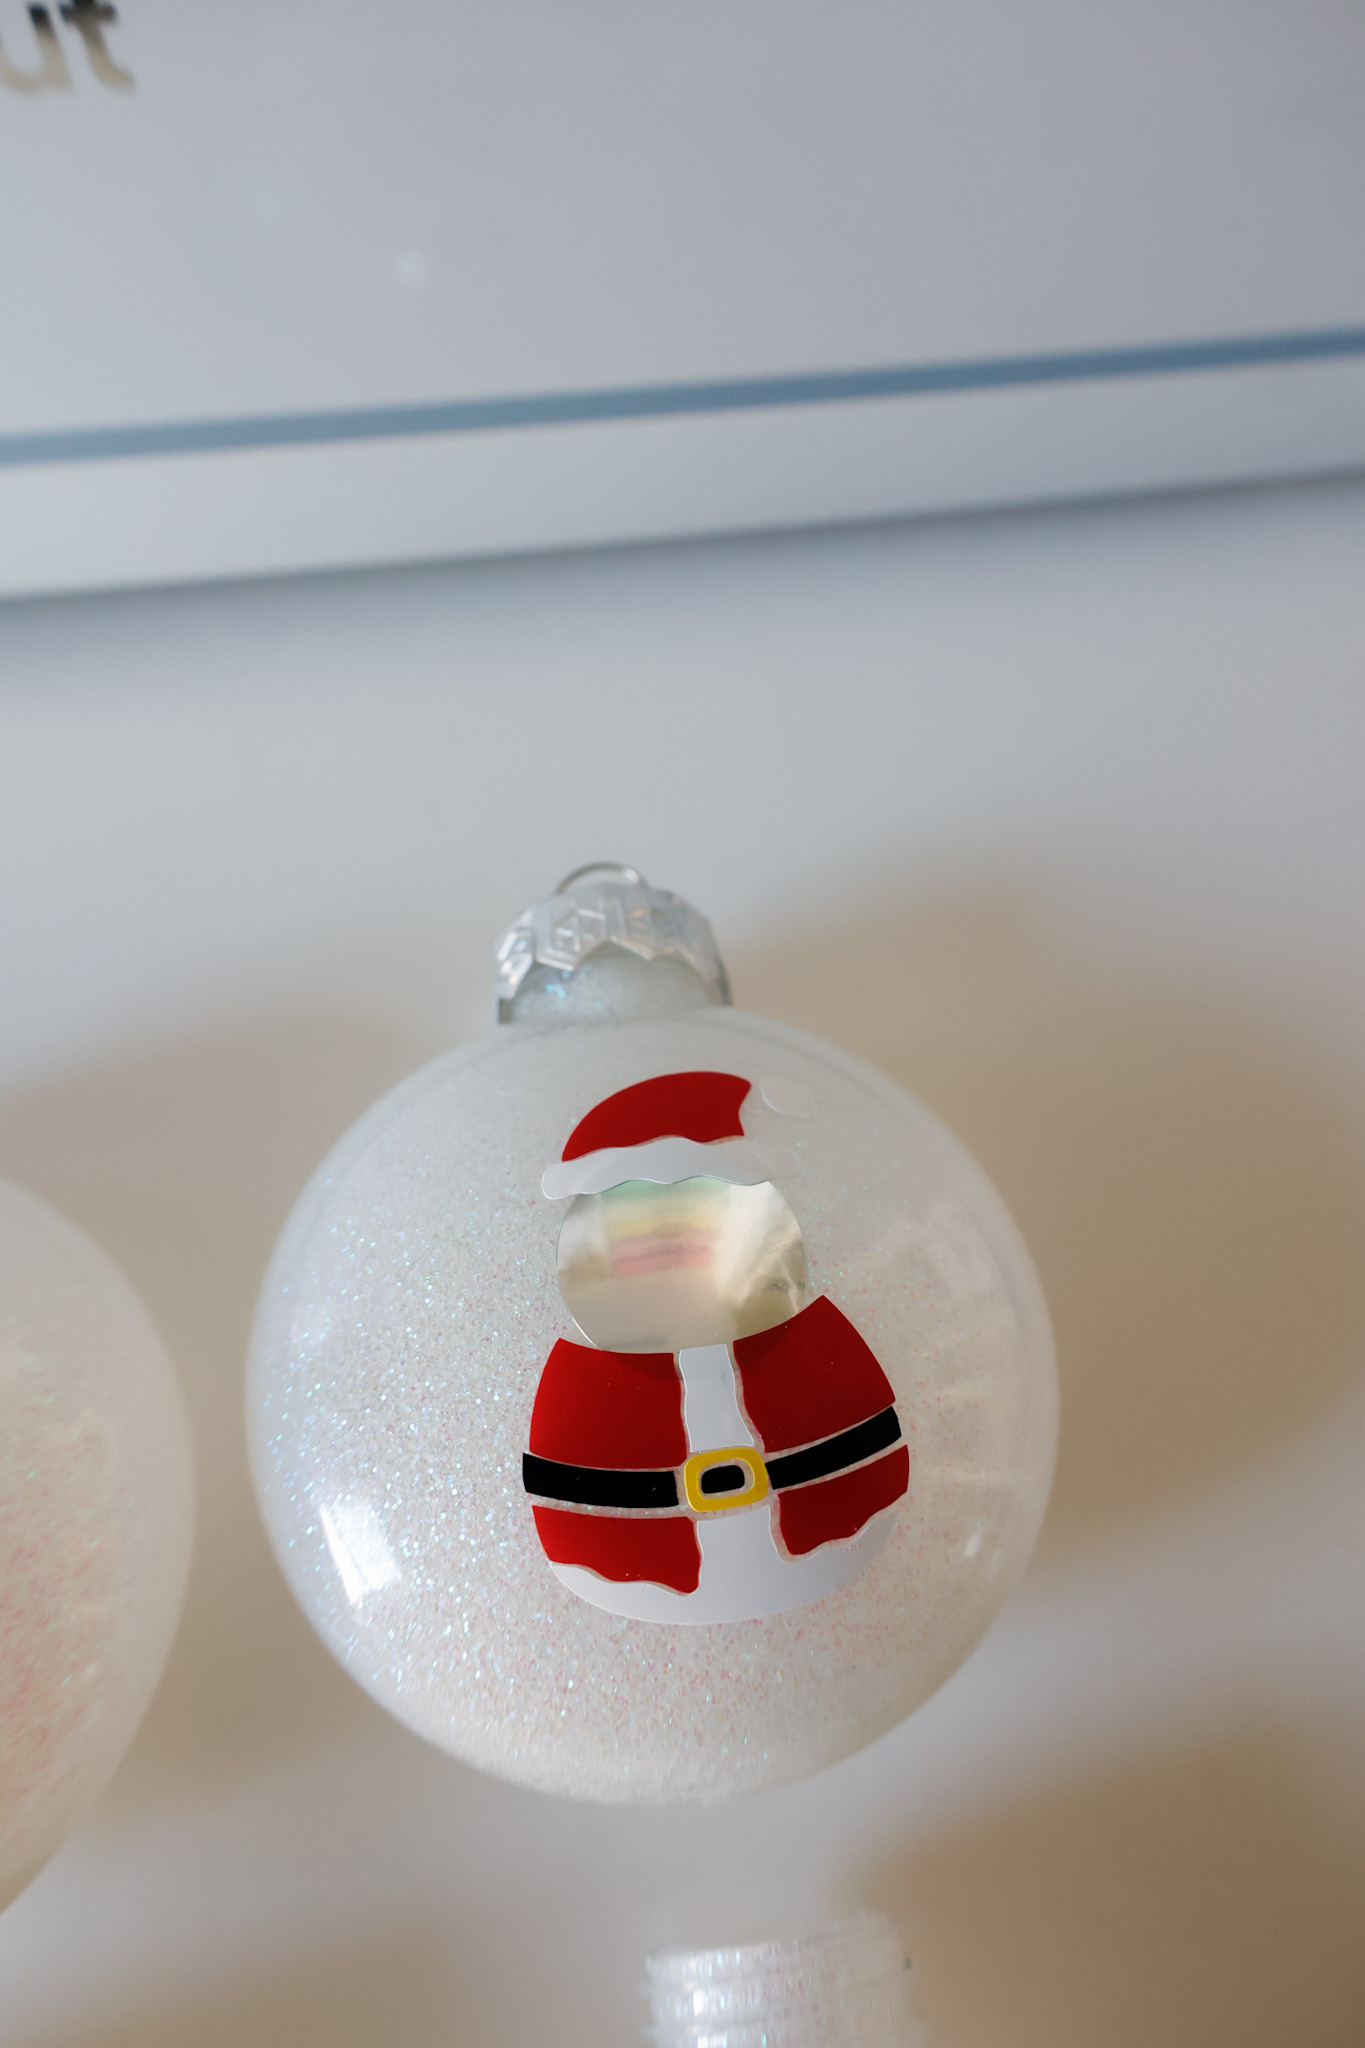
For Santa, I make a circle shape for his head so when they looked at the ornament, it was like they were Santa!
Think of unique and festive ways to personalize this craft, or use my Design Space link to replicate my project.
You’ll need Cricut Access for this project.
For each image, ensure that there is only one shade of red, green, yellow, brown, etc.
This way, you’ll only need one color for these shapes to be cut instead of three different types of red.
I designated my reflection shapes and circles to be gray to represent the adhesive foil.
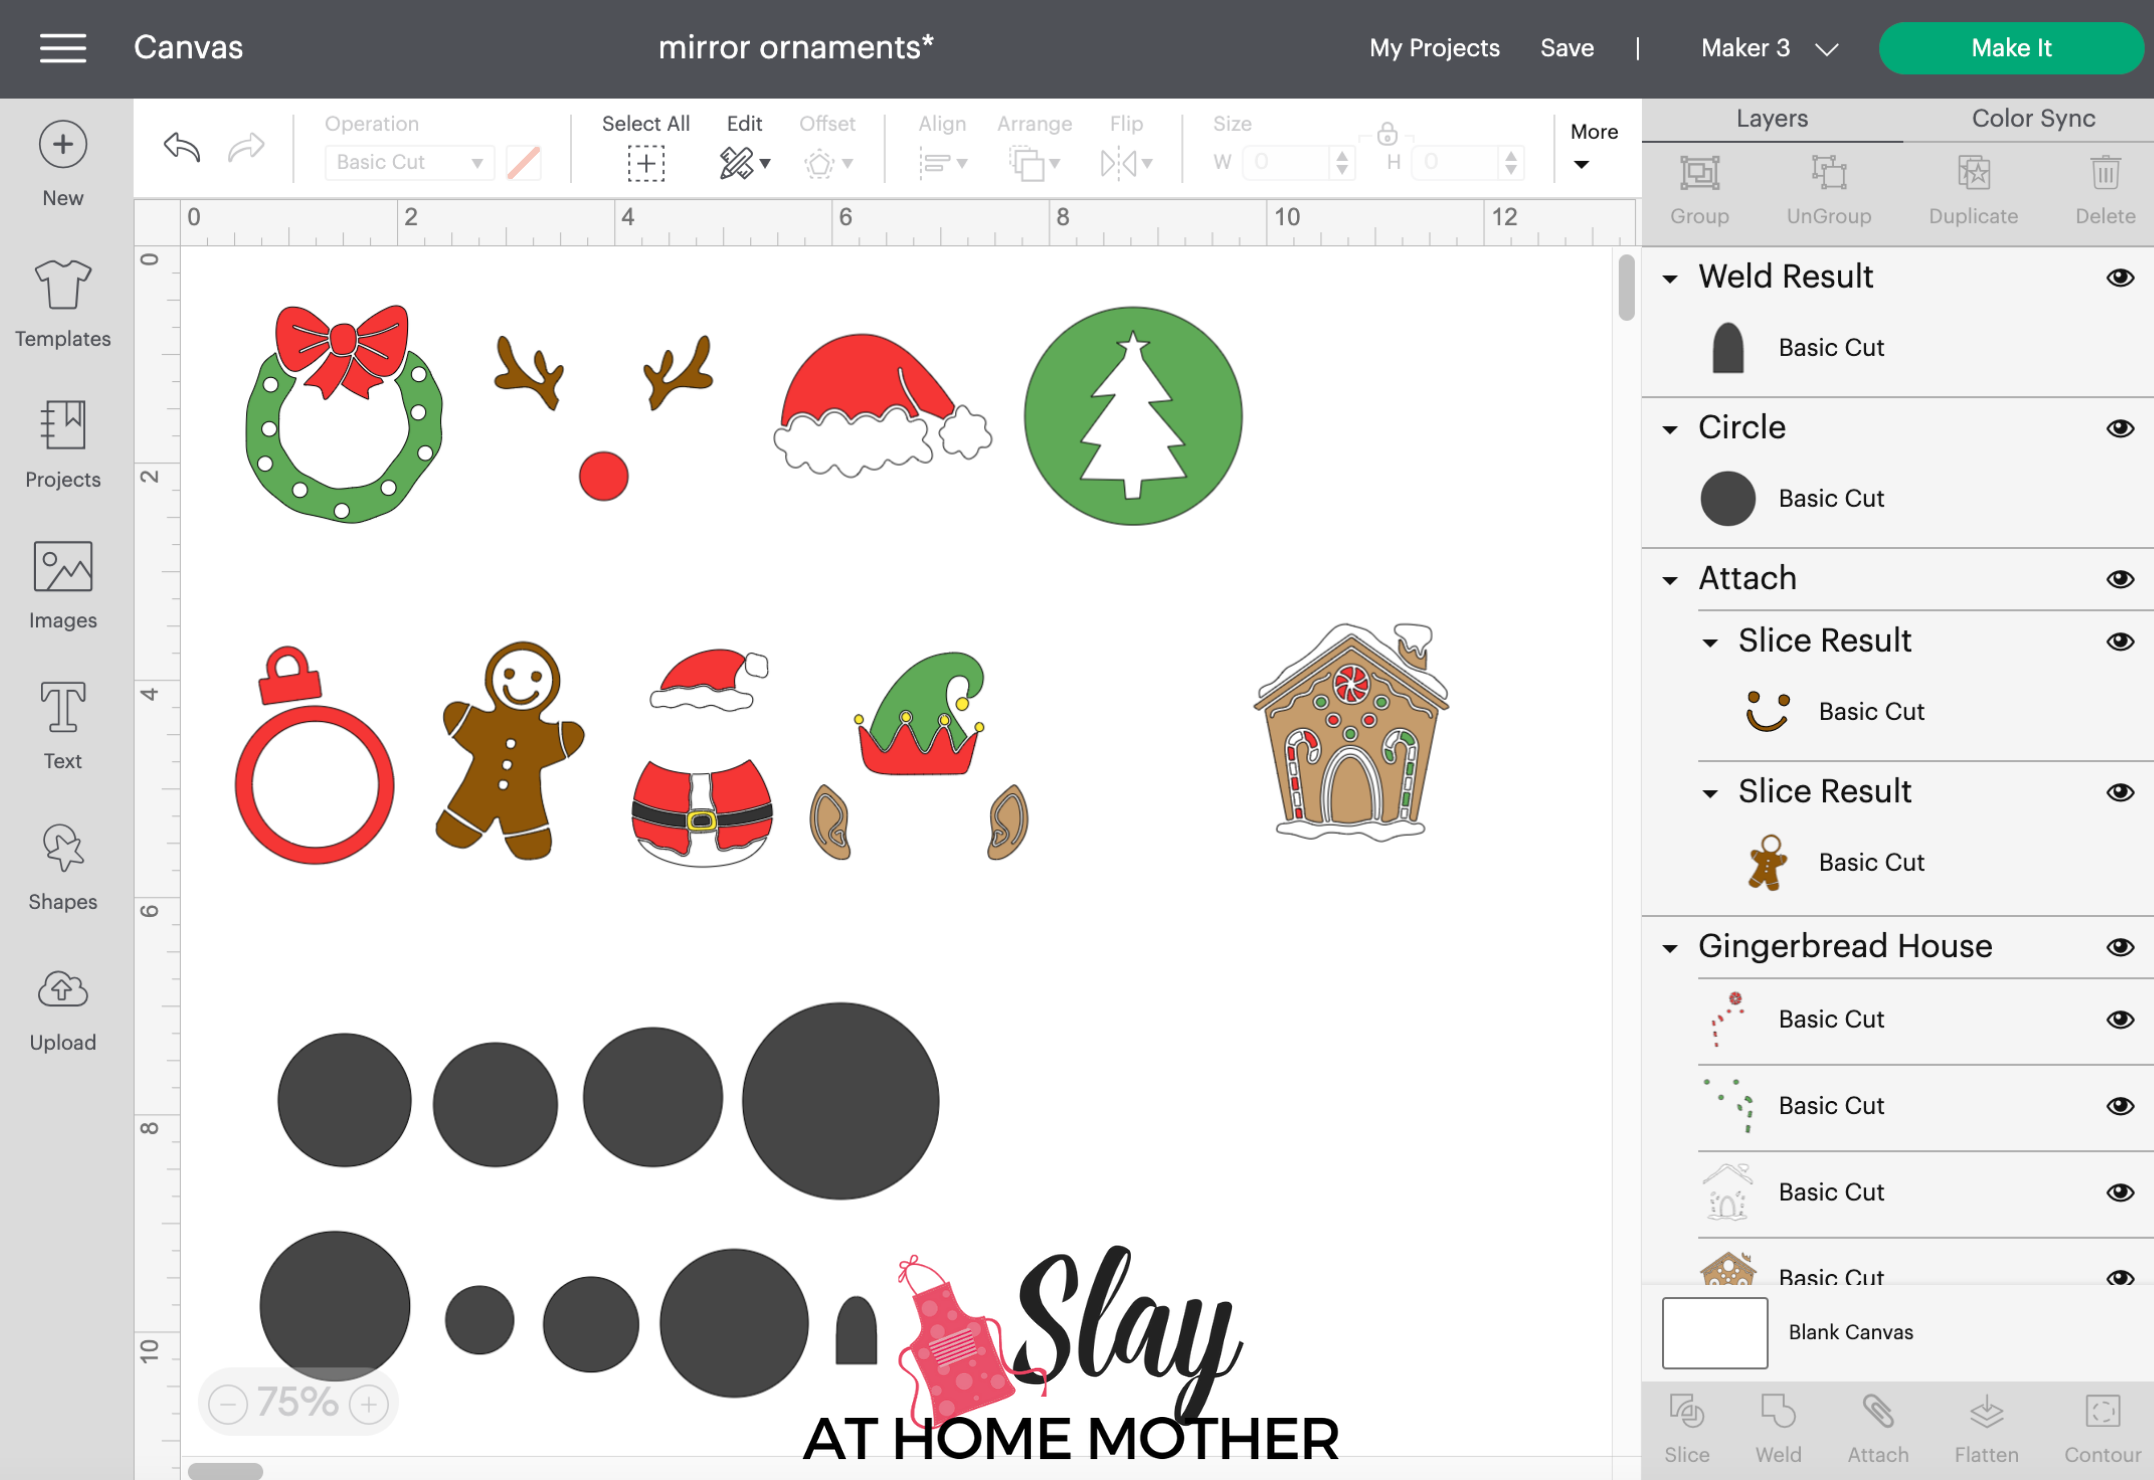
Cut out your shapes with your Cricut machine (I’m using a Maker 3, but this project is capable with an Explore Air 2 or 3).
Layer your design on a piece of transfer tape, starting with the top layer first.
P.S. Did you know you can reuse a piece of transfer tape multiple times?
I only needed two 3″x3″ pieces of transfer tape for this project!
Your bottom layer (most likely the adhesive foil shape) will be transferred to your transfer tape last.
You can use a piece of parchment paper between the layers while you line them up.
I find that sometimes I see better when holding the shapes up together against a window or sliding glass door.
Once your design is layered, it’s time to place it on your ornament.
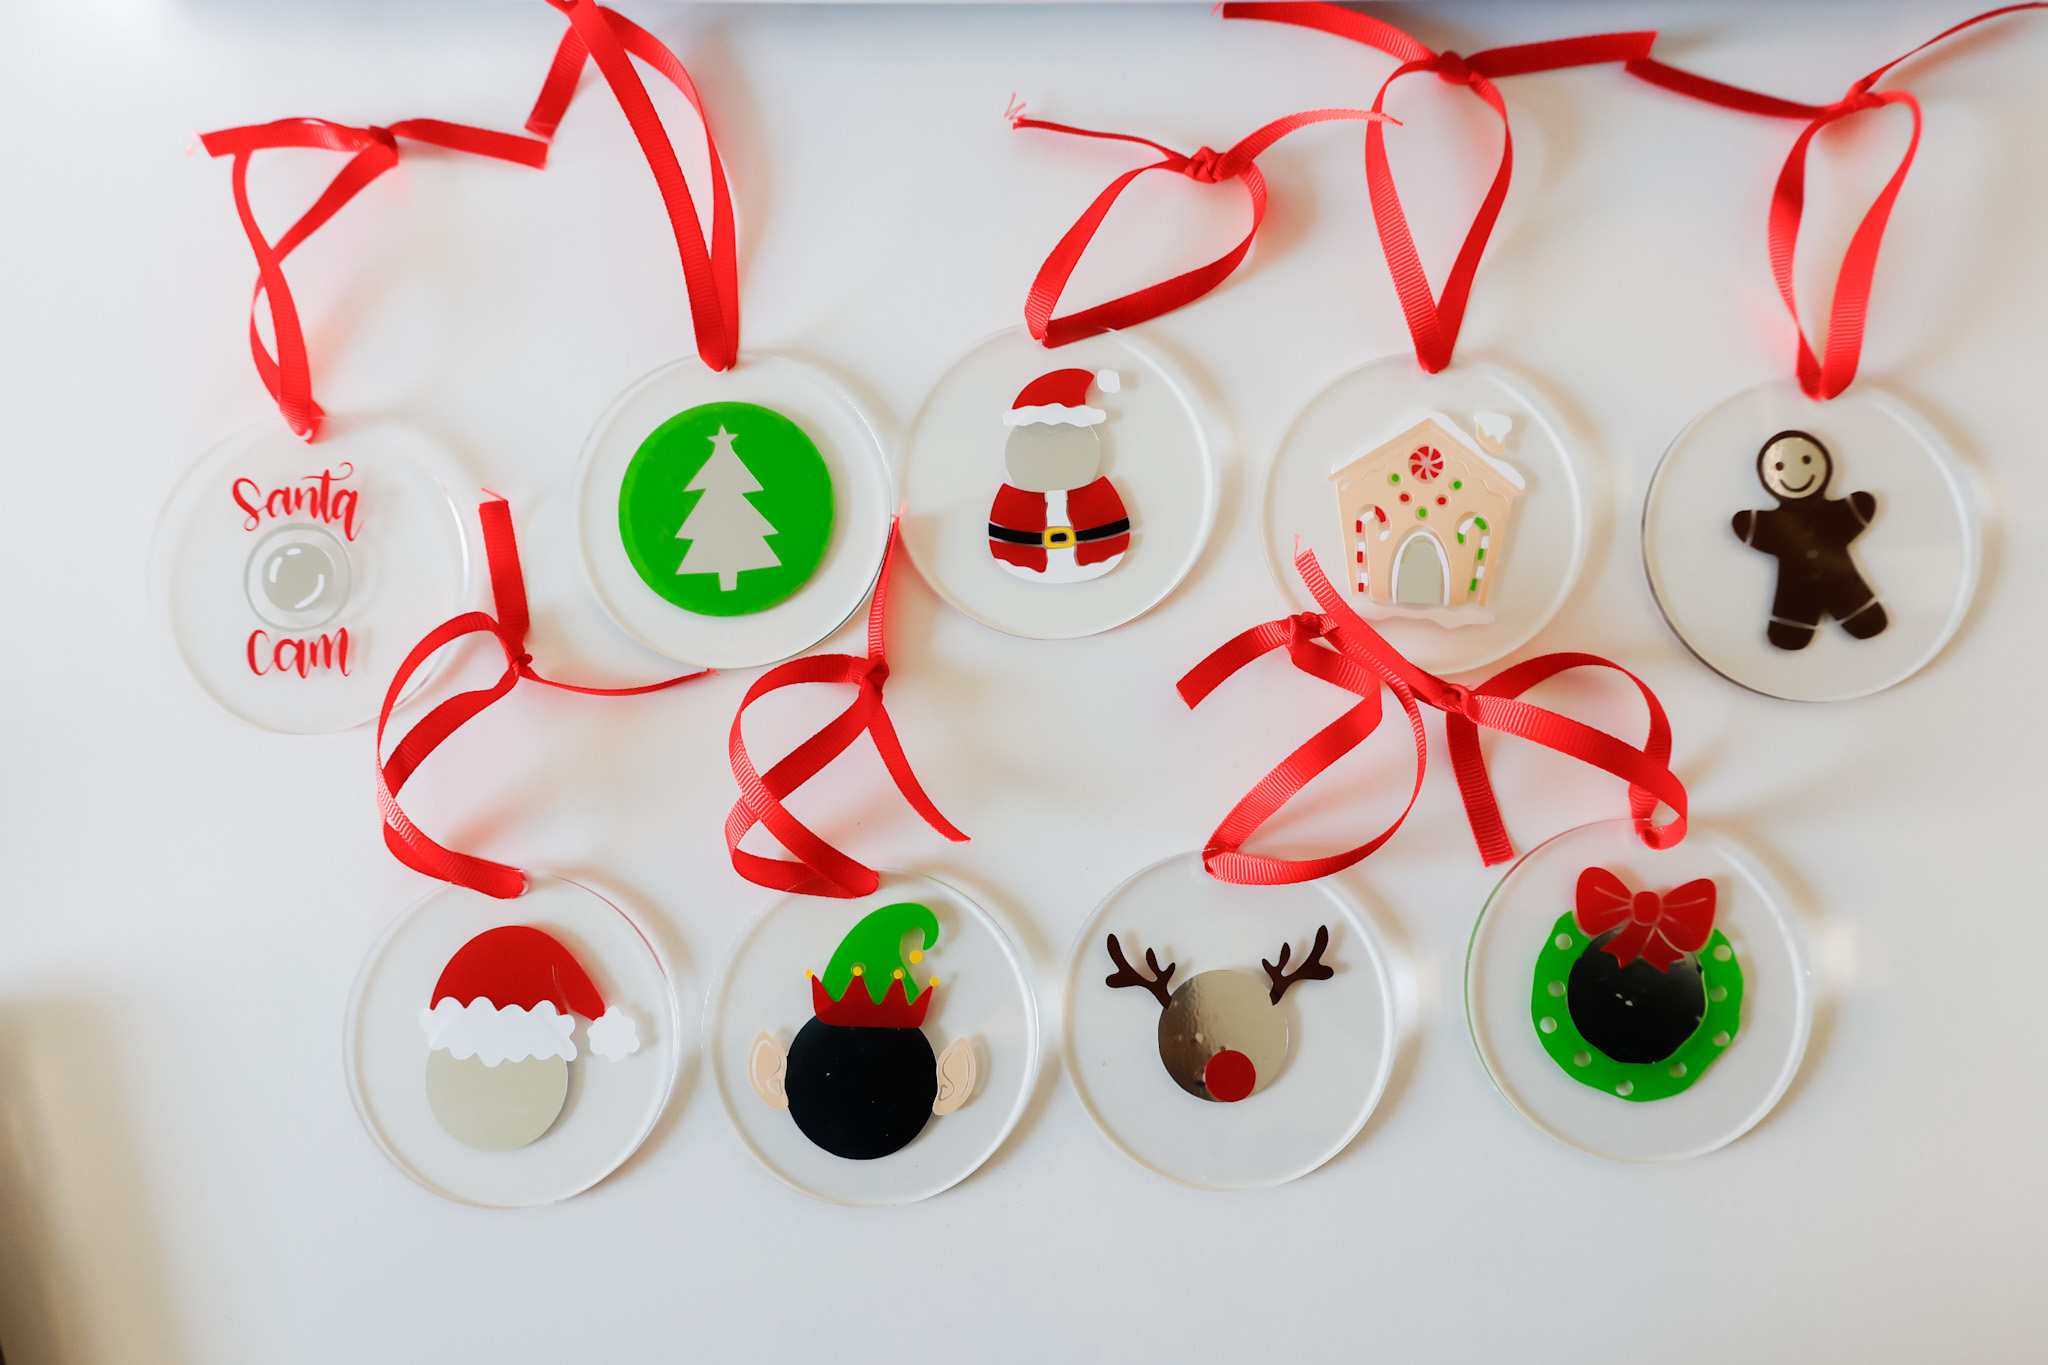
Tie a festive colored or pattern ribbon through the hole at the top, and hang them on your Christmas tree.

What I love about using adhesive foil with this particular design (Santa Cam), is that kids can see their reflection in it, which makes the point that they’re always being watched that much more real!
You May Also Like: DIY Keychains – A Beginner Cricut Craft (this post uses these same acrylic discs)
Can I Apply These Designs To Disc Ornaments?
The answer is yes for some, and no to the rest.

Disc ornaments, while less round than traditional ball ornaments are not totally flat.
This means that larger shapes have a harder time laying flat without rippling along the edges…
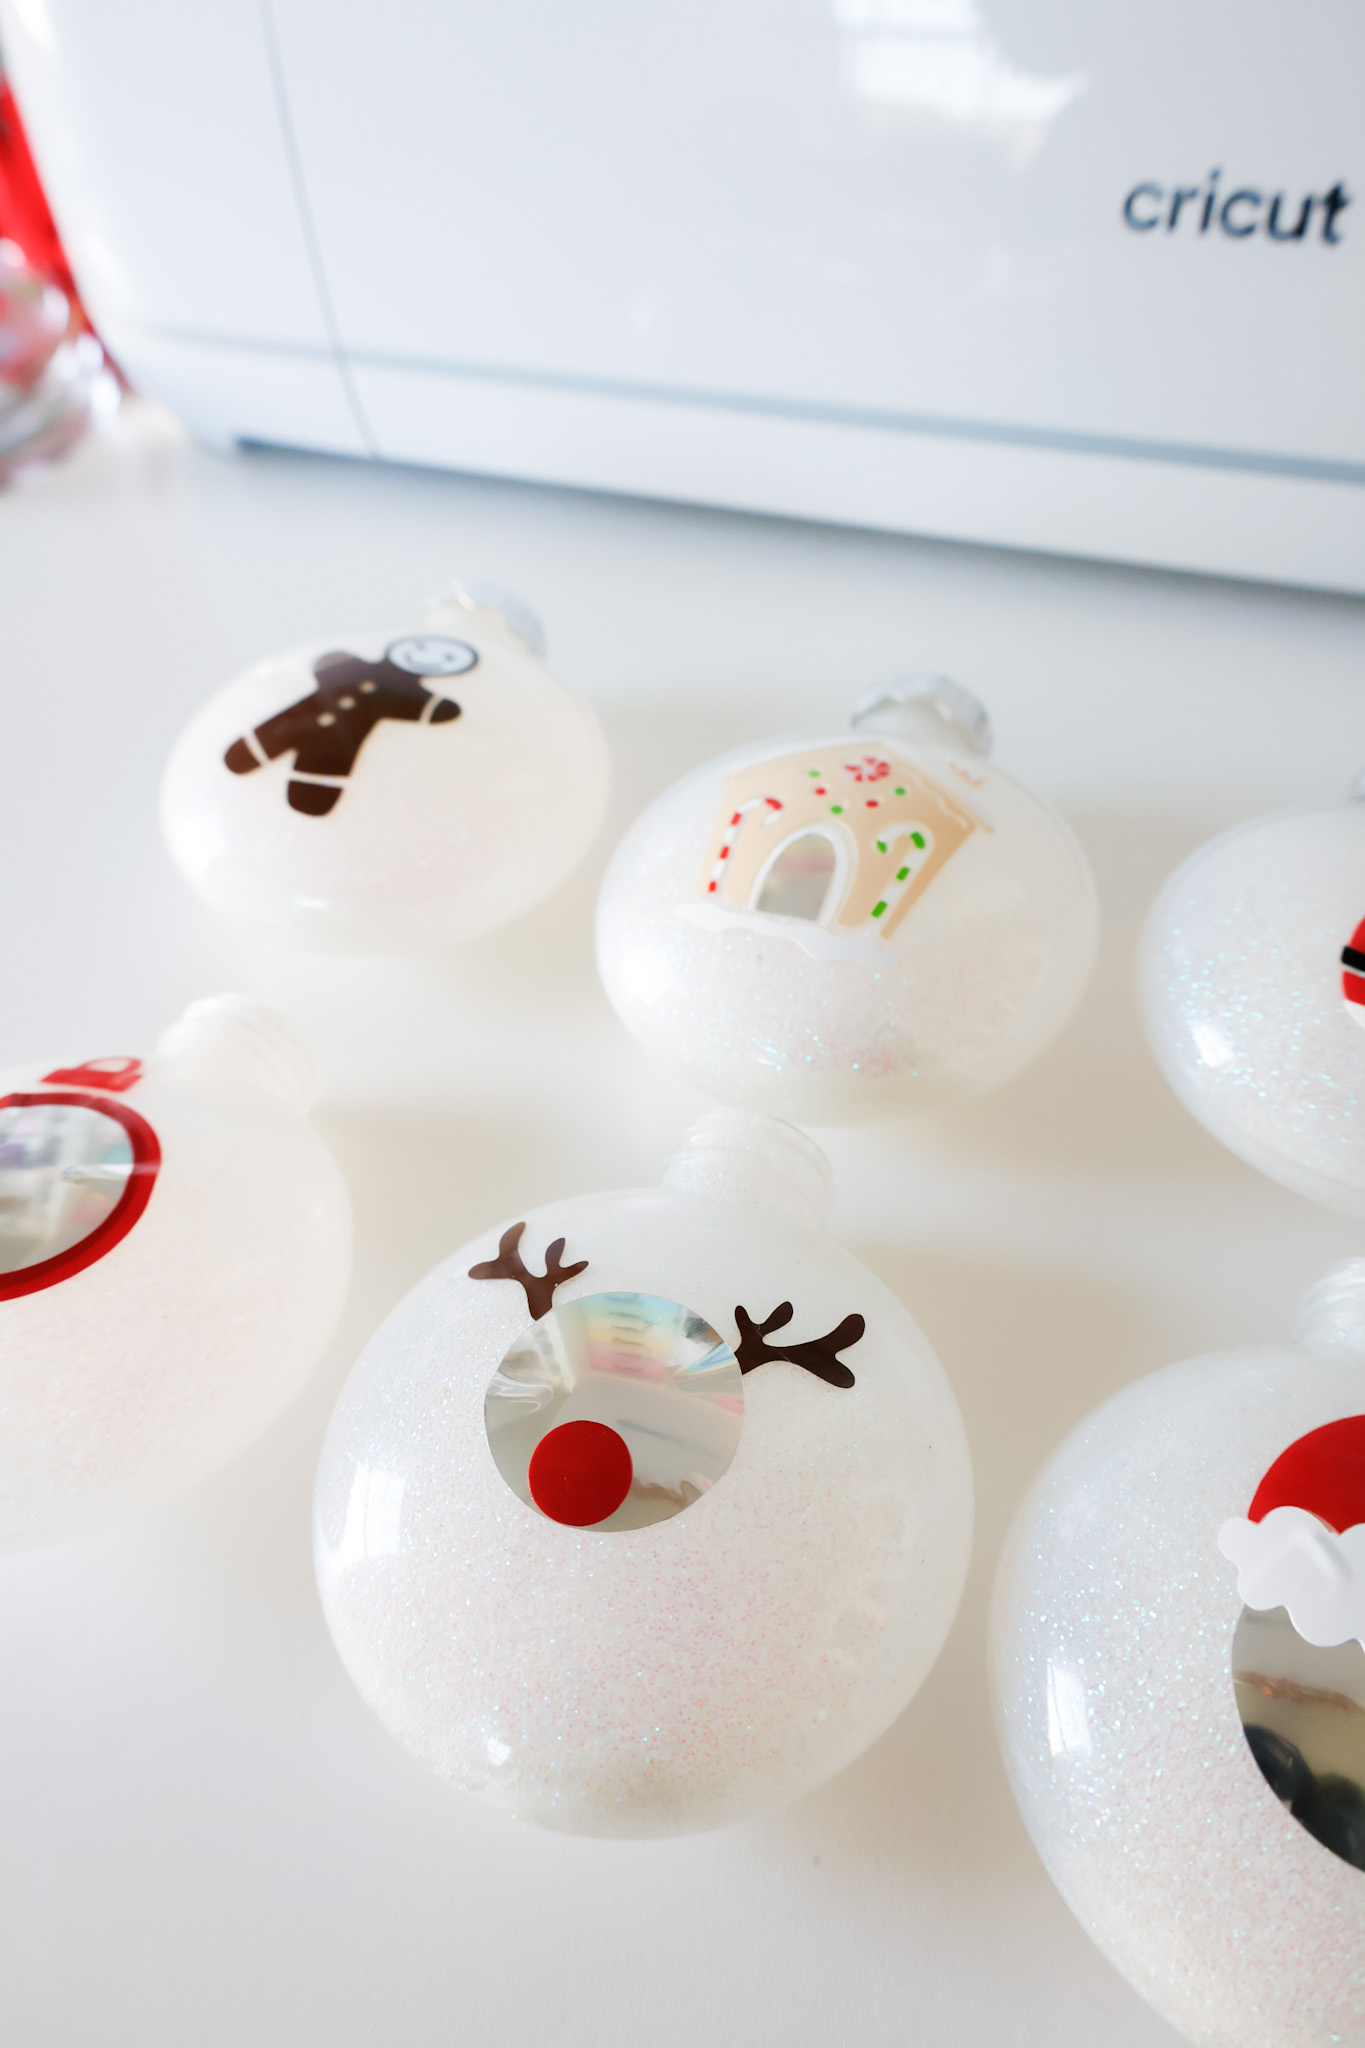
Although some designs with smaller shapes to them lay down just fine on a disc ornament and would work just fine!
Here’s one of the images with smaller pieces of vinyl that transfers just fine to a disc ornament…
When applying a vinyl design to a disc ornament, keep in mind that your design will adhere better if you cut the transfer tape (see photo below).
You’ll need to hover the design over the ornament, press the design down in the center, and smooth your finger out towards one direction at a time.
Work your way around the design, always starting from the center and moving outward.
I’ll be doing a post here soon on how to glitter your ornaments evenly and beautifully!

Leave a Reply