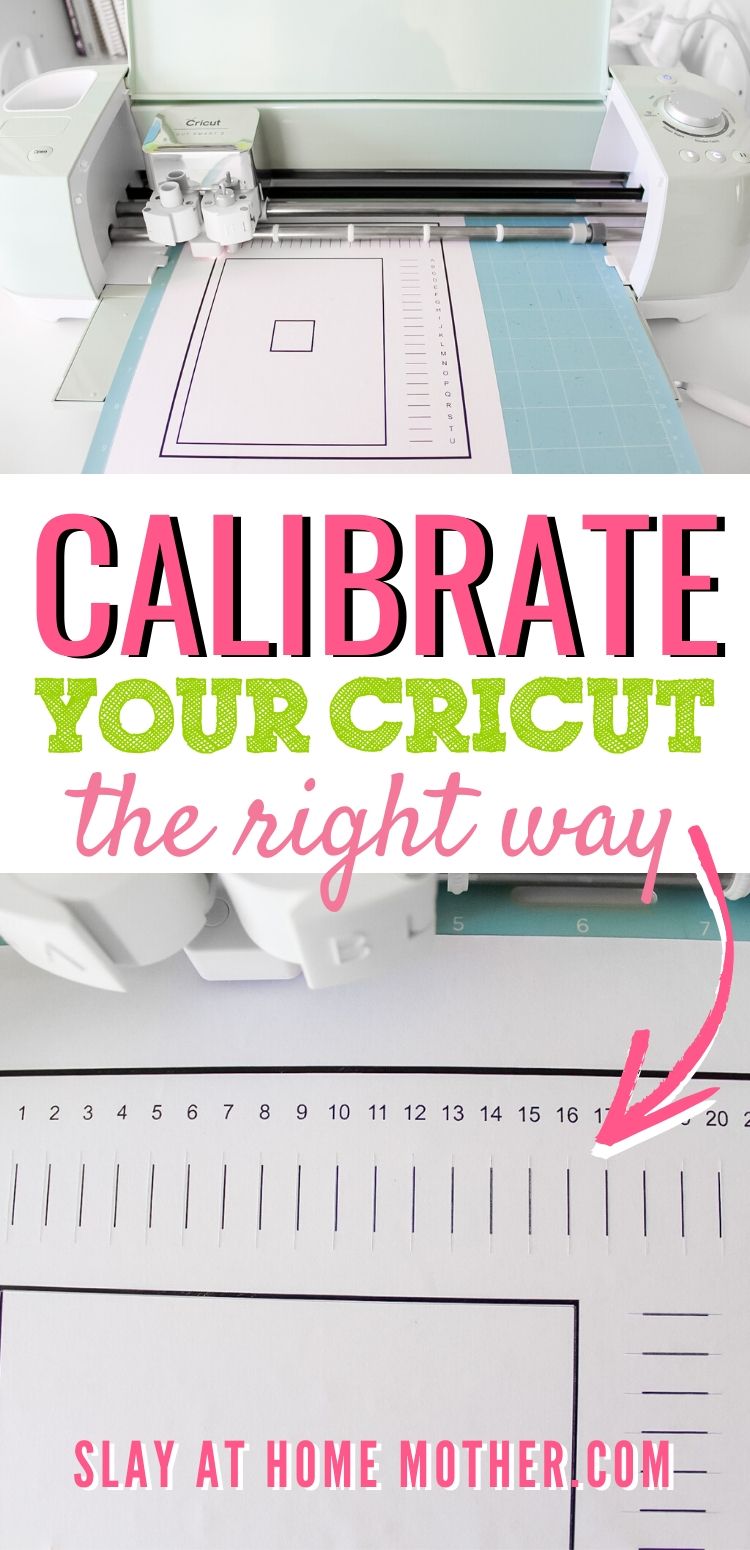
Need to calibrate your Cricut Explore Air 2? Follow this easy tutorial, with easy-to-interpret screenshots and instructions!
Struggling with cuts that are off & not sure what the problem is?
Chances are it’s time to calibrate your Cricut.
Although it may sound complicated, just follow this easy tutorial with easy-to-interpret screenshots and instructions to get your Cricut Explore Air 2 back to cutting smoothly!
Lately, my Cricut Explore Air 2 has been getting quite the workout. I love using it to make labels to help organize our home and to create fun, cheap DIYs that I can share with you all!
Like just last week, I created a DIY Acrylic Calendar because I was *this close* to buying one for $110 online when it dawned on me that I CAN TOTALLY MAKE THAT.
And I did make it, for just $25. I love saving money, it was more fun creating it myself, and I got to really customize it to fit our family’s needs.
*This post contains affiliate links, however, all opinions are my own, as always.
Why Is My Cricut Not Cutting Properly?
If you’re having trouble getting your Cricut machine to cut accurately, it may be time to calibrate it. This process is relatively simple and only takes a few minutes to complete.
With proper calibration, you can ensure that your Cricut machine is cutting precisely along the lines you’ve drawn – making for perfect projects every time!
Is it Time to Calibrate Your Cricut?
Now that I’ve owned my Cricut for a year, I found that it’s time to calibrate it.
You can usually tell you need to calibrate your machine when the cuts are OFF, which was absolutely the case in one of my recent projects.
Instead of getting frustrated when things aren’t quite right, it’s probably an issue with the machine itself.
Calibrating your Cricut is a normal part of owning your machine and should be done as needed or right before using the Print Then Cut function.
Here are some ways you’ll know it’s time to calibrate your machine.
- After trying a new Cricut hack that you know you shouldn’t have attempted with your machine – *side-eyes, cough*
- Using the Print Then Cut function
- Heavily using your Cricut day-in and day-out
- You own your own business that requires tons of cutting with your machine
So in this tutorial, I’ll be showing you how to recalibrate your Cricut Explore Air 2 or Maker, with helpful screenshots and some DON’Ts from a seasoned Cricut crafter.
How To Calibrate Your Cricut Explore Air 2
In your Canvas, select the icon that looks like three horizontal lines at the top left of the screen to expand your Cricut menu, and select ‘Calibration‘.
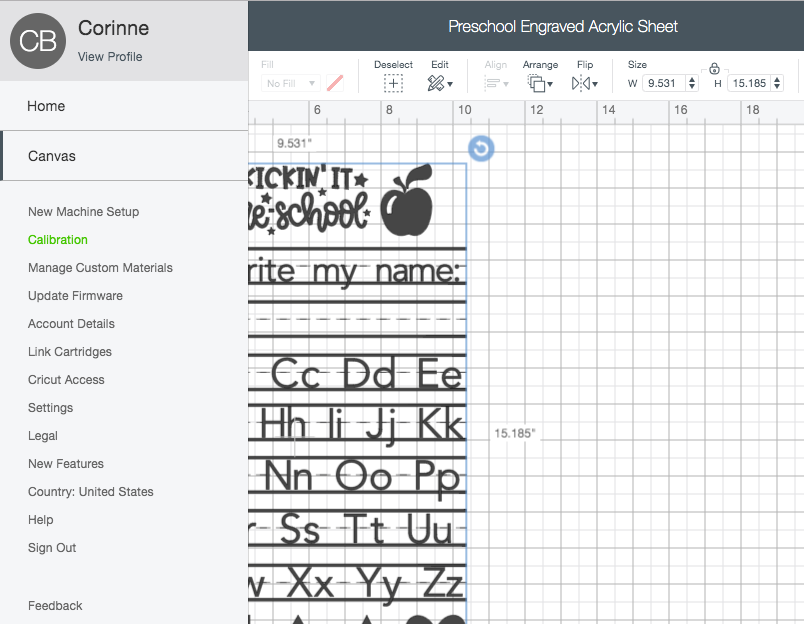
It should be the second line of text under ‘Canvas‘ (see it in green below to the left of the screen).
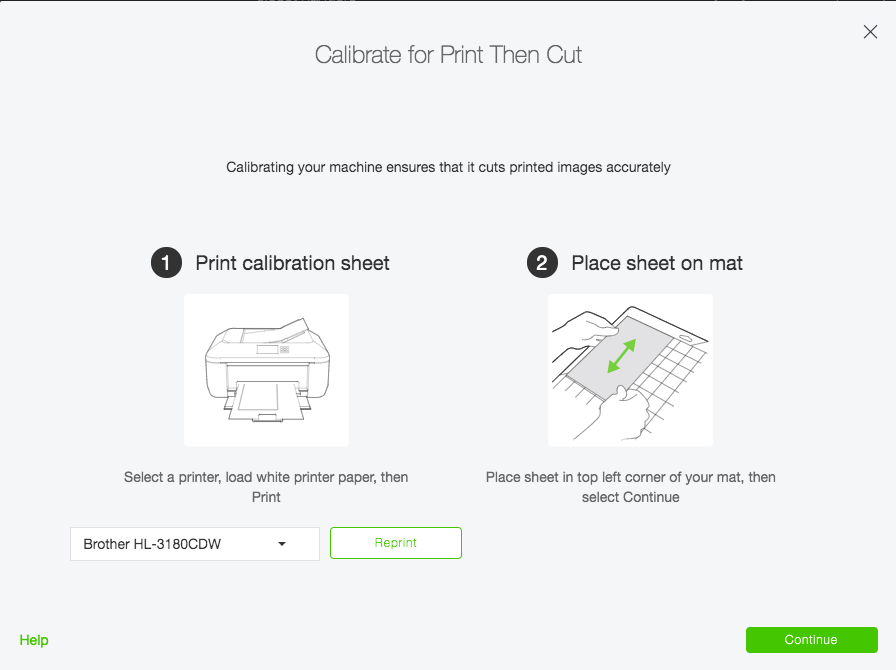
Step One
First, you’ll need to Print the calibration sheet with your printer, and then place the sheet with the squares and lines facing UP on a LightGrip mat in the upper left corner of the mat.
Step Two
Press the green ‘Continue‘ button and load the mat in your Cricut machine.
Your Cricut will begin cutting on the sheet of paper. It will start with the center square and move to the lines at the top and right of the paper.
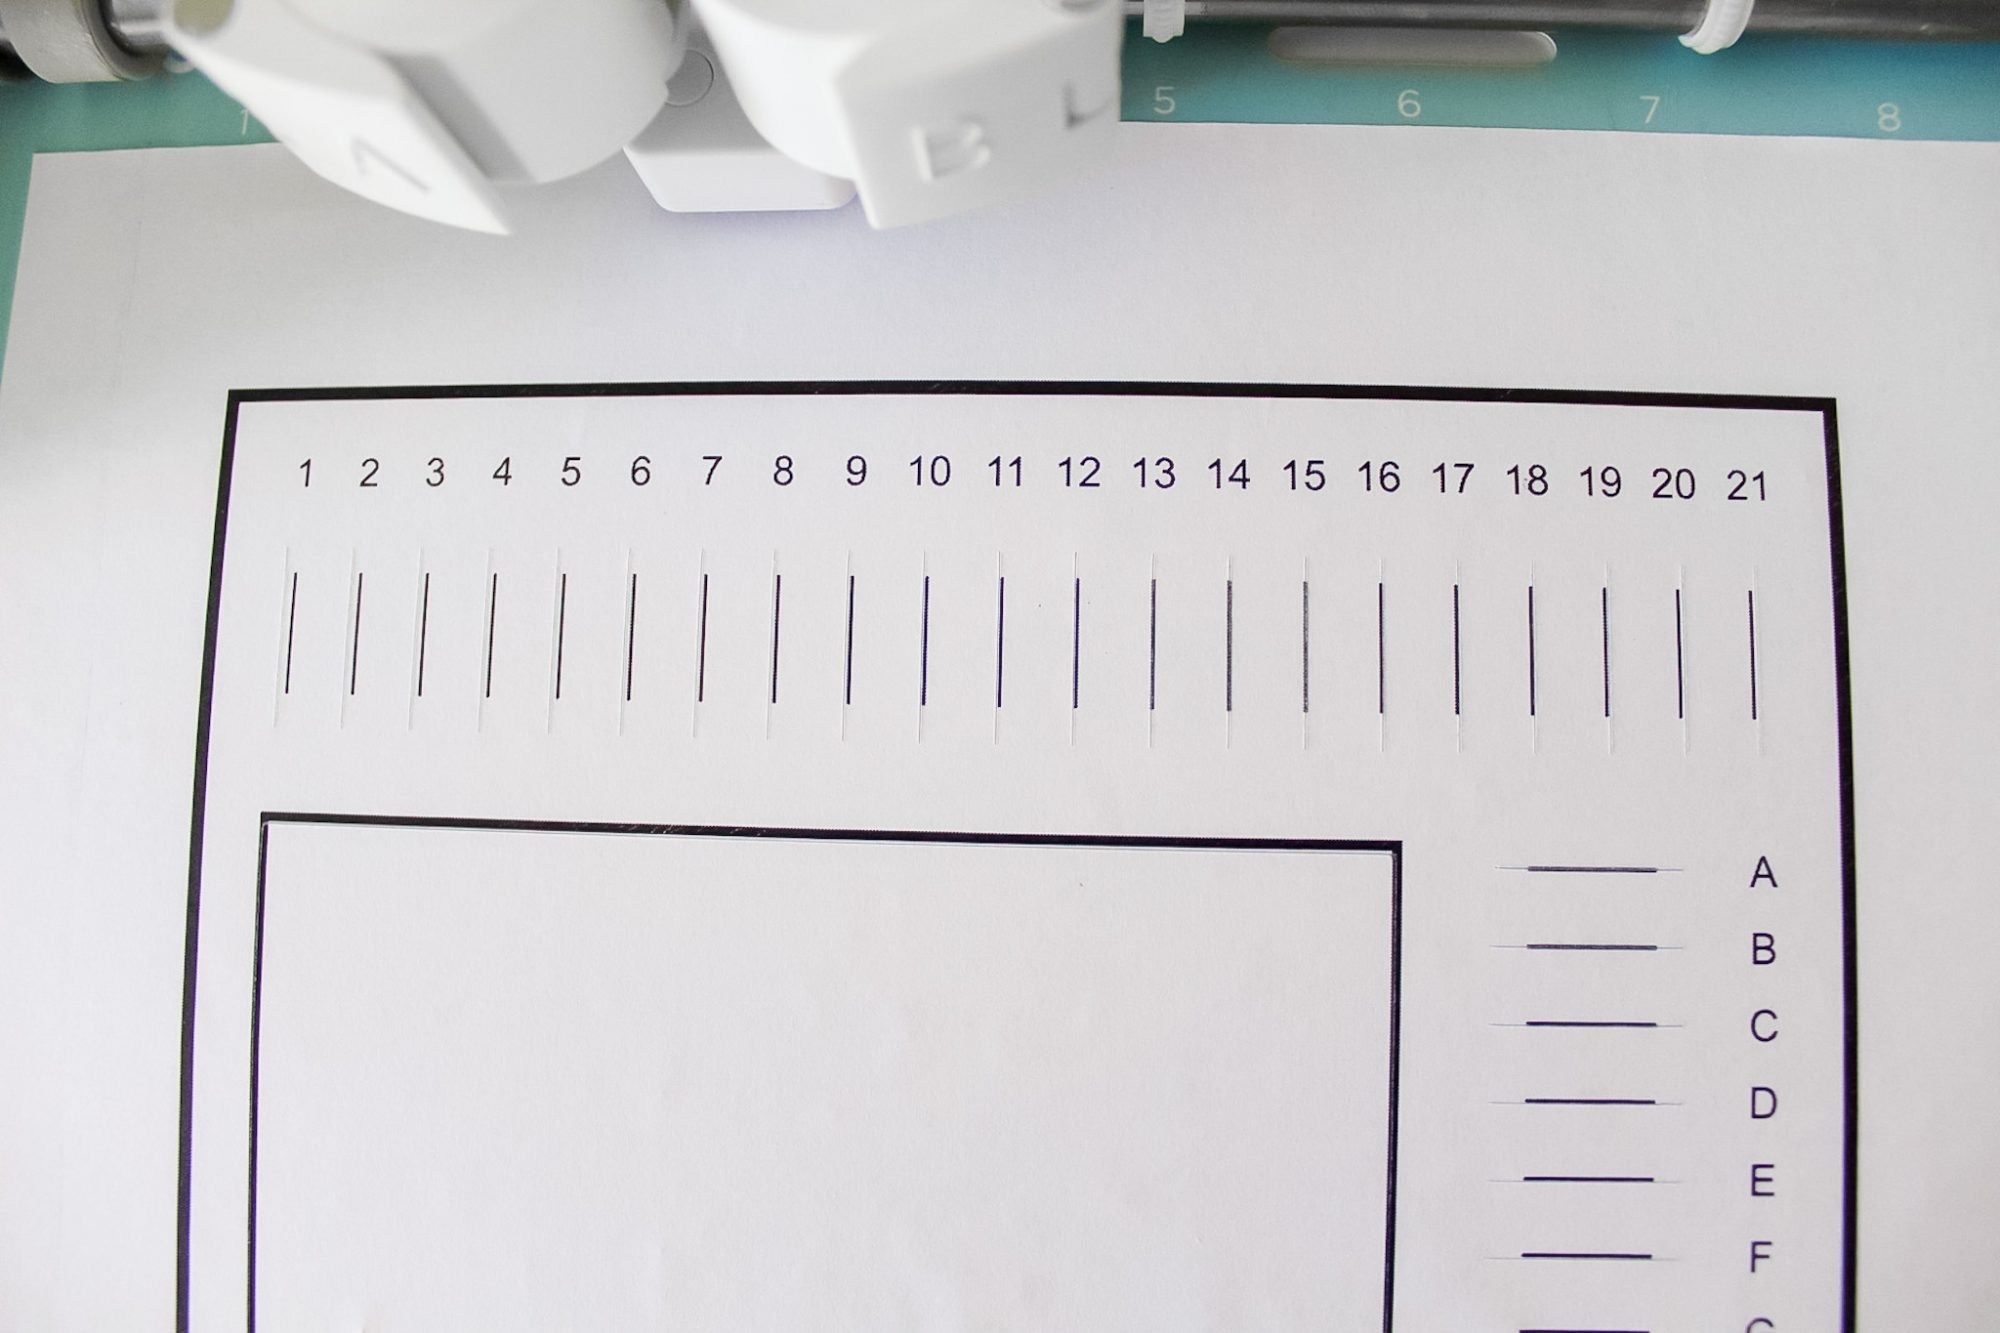
Some of the cuts will be VERY OFF and you may be wondering what the heck your machine is doing!
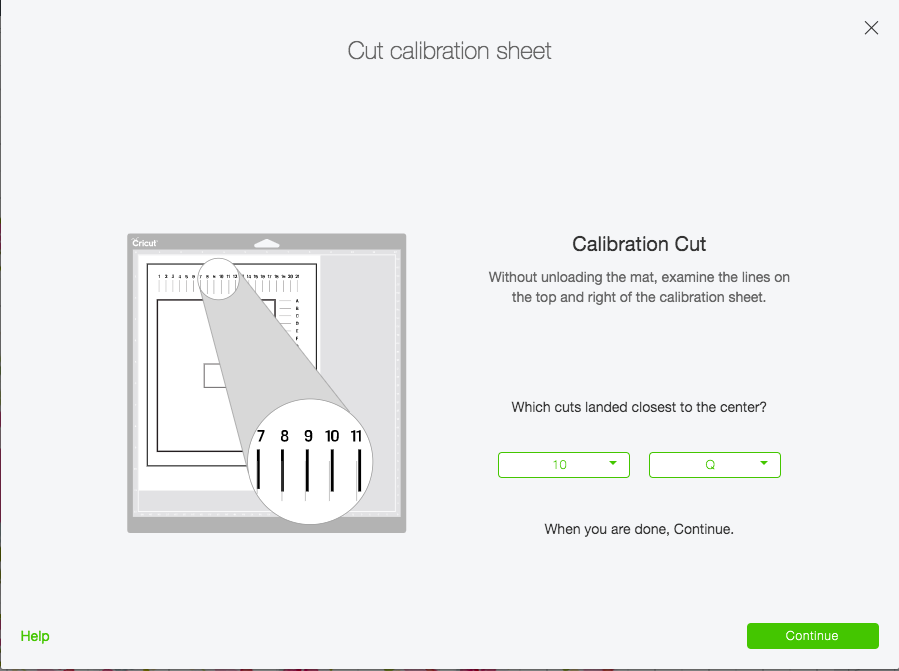
But once it’s done, Design Space will ask you to examine the lines at both the top and along the right side to determine which cut was the most accurate.
Step Three
Choose the number and letter that hits the center of the line BEST, and click the green ‘Continue‘ button.
Your Cricut will then finish calibrating by cutting out the larger square in the center of the piece of paper.
Step Four
When it’s done cutting, Design Space will ask you to unload the mat to examine the cut – DON’T DO THIS!!!
Take it from me, as soon as you unload the mat, the window will close and Design Space will cancel the calibration process and you’ll need to start over.
Step Five
Examine the cut for accuracy with the mat still loaded, and then press ‘Finish‘.
You can then unload your mat and proceed with crafting as your machine is now calibrated!
Do I Have to Calibrate My New Cricut?
Your machine, if it’s new, is already pre-calibrated when you buy it. However, I’m always a little wary of it being ready to use straight out of the box.
If you just got your Cricut, I recommend calibrating it before using it for the first time. It will help ensure that you have the best cutting results from the start!
Ready to create? Here are some of my favorite crafting posts that you’ll want to check out.
- DIY Front Door Round Welcome Sign With The Cricut Explore Air 2
- How To Create A Monogram In Design Space ($5 DIY Keychains With Monograms)
- Print Then Cut Cricut Tutorial: Easy DIY Stickers for About $0.12!
*Post originally published July 2020, last updated January 2023.

Thank you so much! So helpful 😁
This was very helpful but after calibrating, it was better but still cutting to many other lines across the letters.. so when I tried putting it on the transfer paper, the letters would fall apart with no chance of saving it.