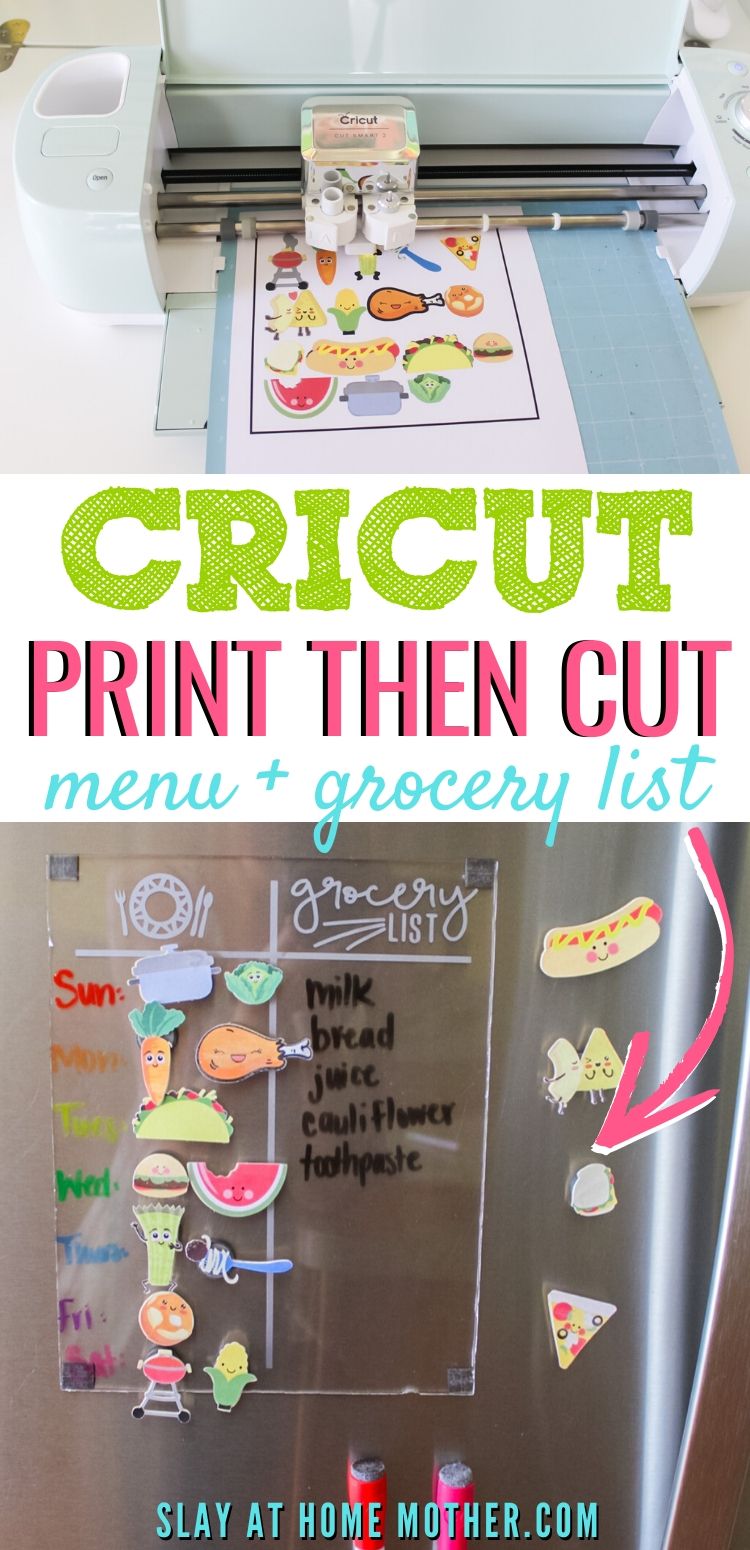
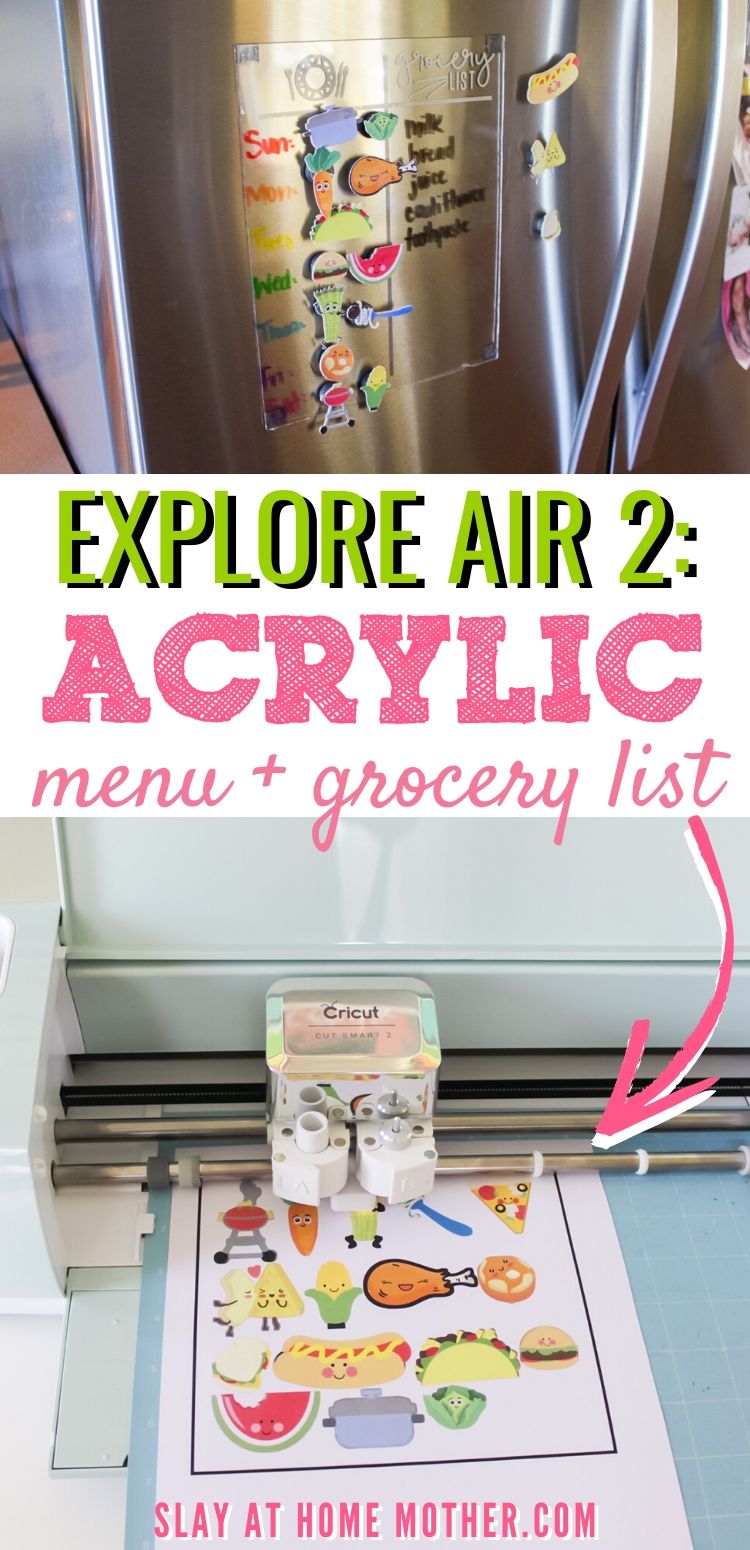
Make this easy DIY Acrylic Menu Planner And Grocery List using Cricut Print Then Cut….
Hey, lovelies!
I’m back at it with another acrylic DIY!
I’ve been experimenting with different materials lately, and have loved stepping outside my usual comfort zone to experiment and craft with some acrylic.
A few weeks ago, I bought a large acrylic sheet and decided to turn it into a few different projects…
I ended up coming up with a DIY Acrylic Wall Calendar tutorial, and Engraving on Acrylic – Preschool Writing Board (Cricut hack) tutorial!
With a little bit of acrylic leftover, I decided to make something for our kitchen.
If you’ve been following me on Instagram, you already know that we’re in the middle of a HUGE kitchen renovation – I’m talking from the floors to the ceiling!
We’re doing…
Cabinets.
Backsplash.
Appliances.
Sink.
Flooring.
Lighting.
Pantry.
Mudroom closet (off the kitchen).
French doors.
Countertops.
You name it, we’re renovating it ;).
So you can understand why the kitchen is on my mind, and why I wanted to come up with a fun project to do for it.
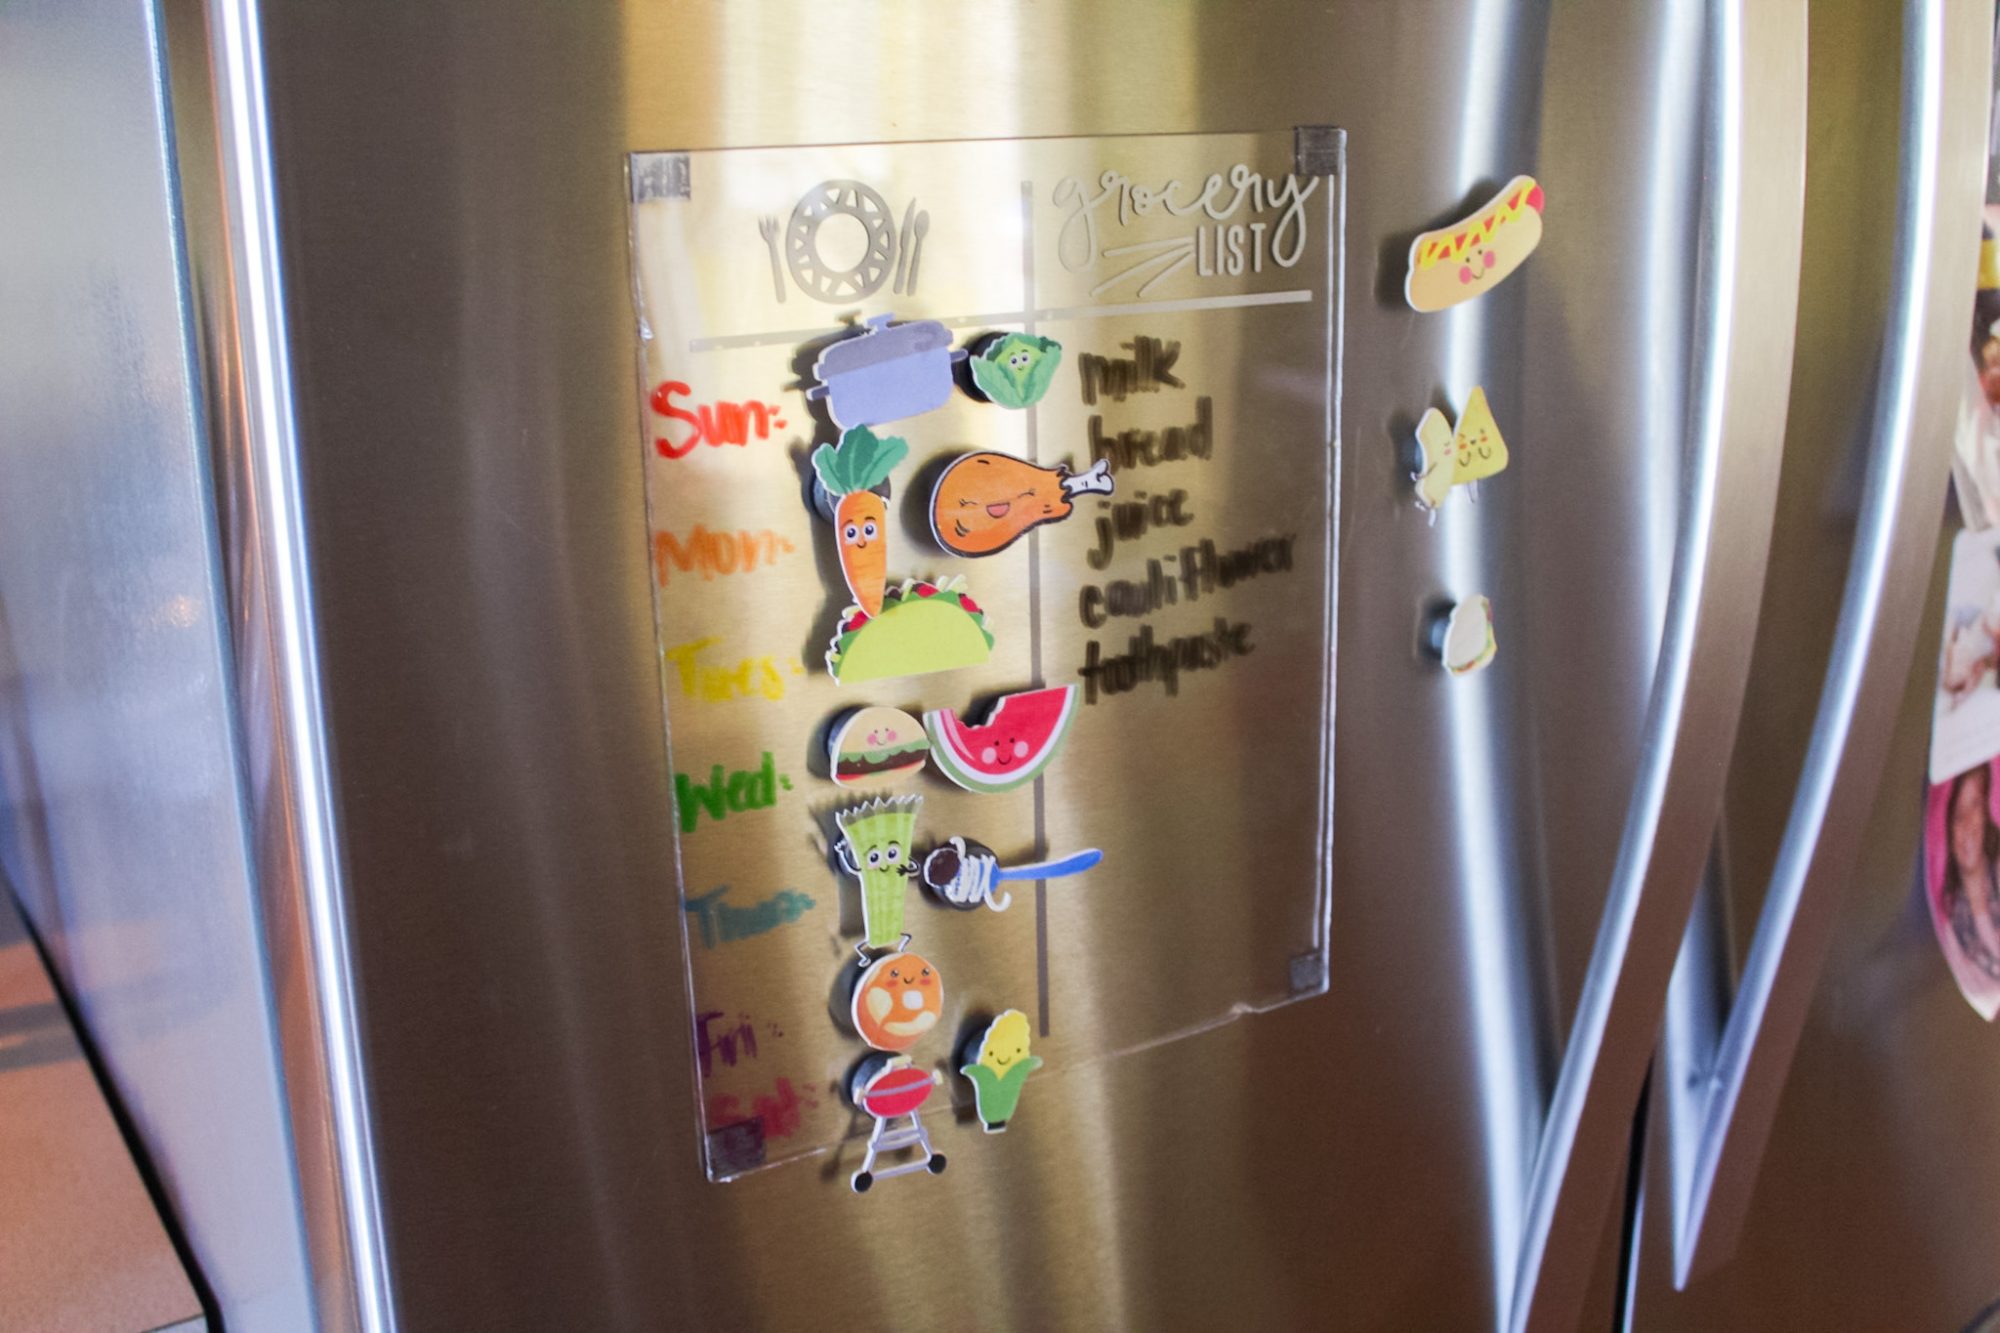
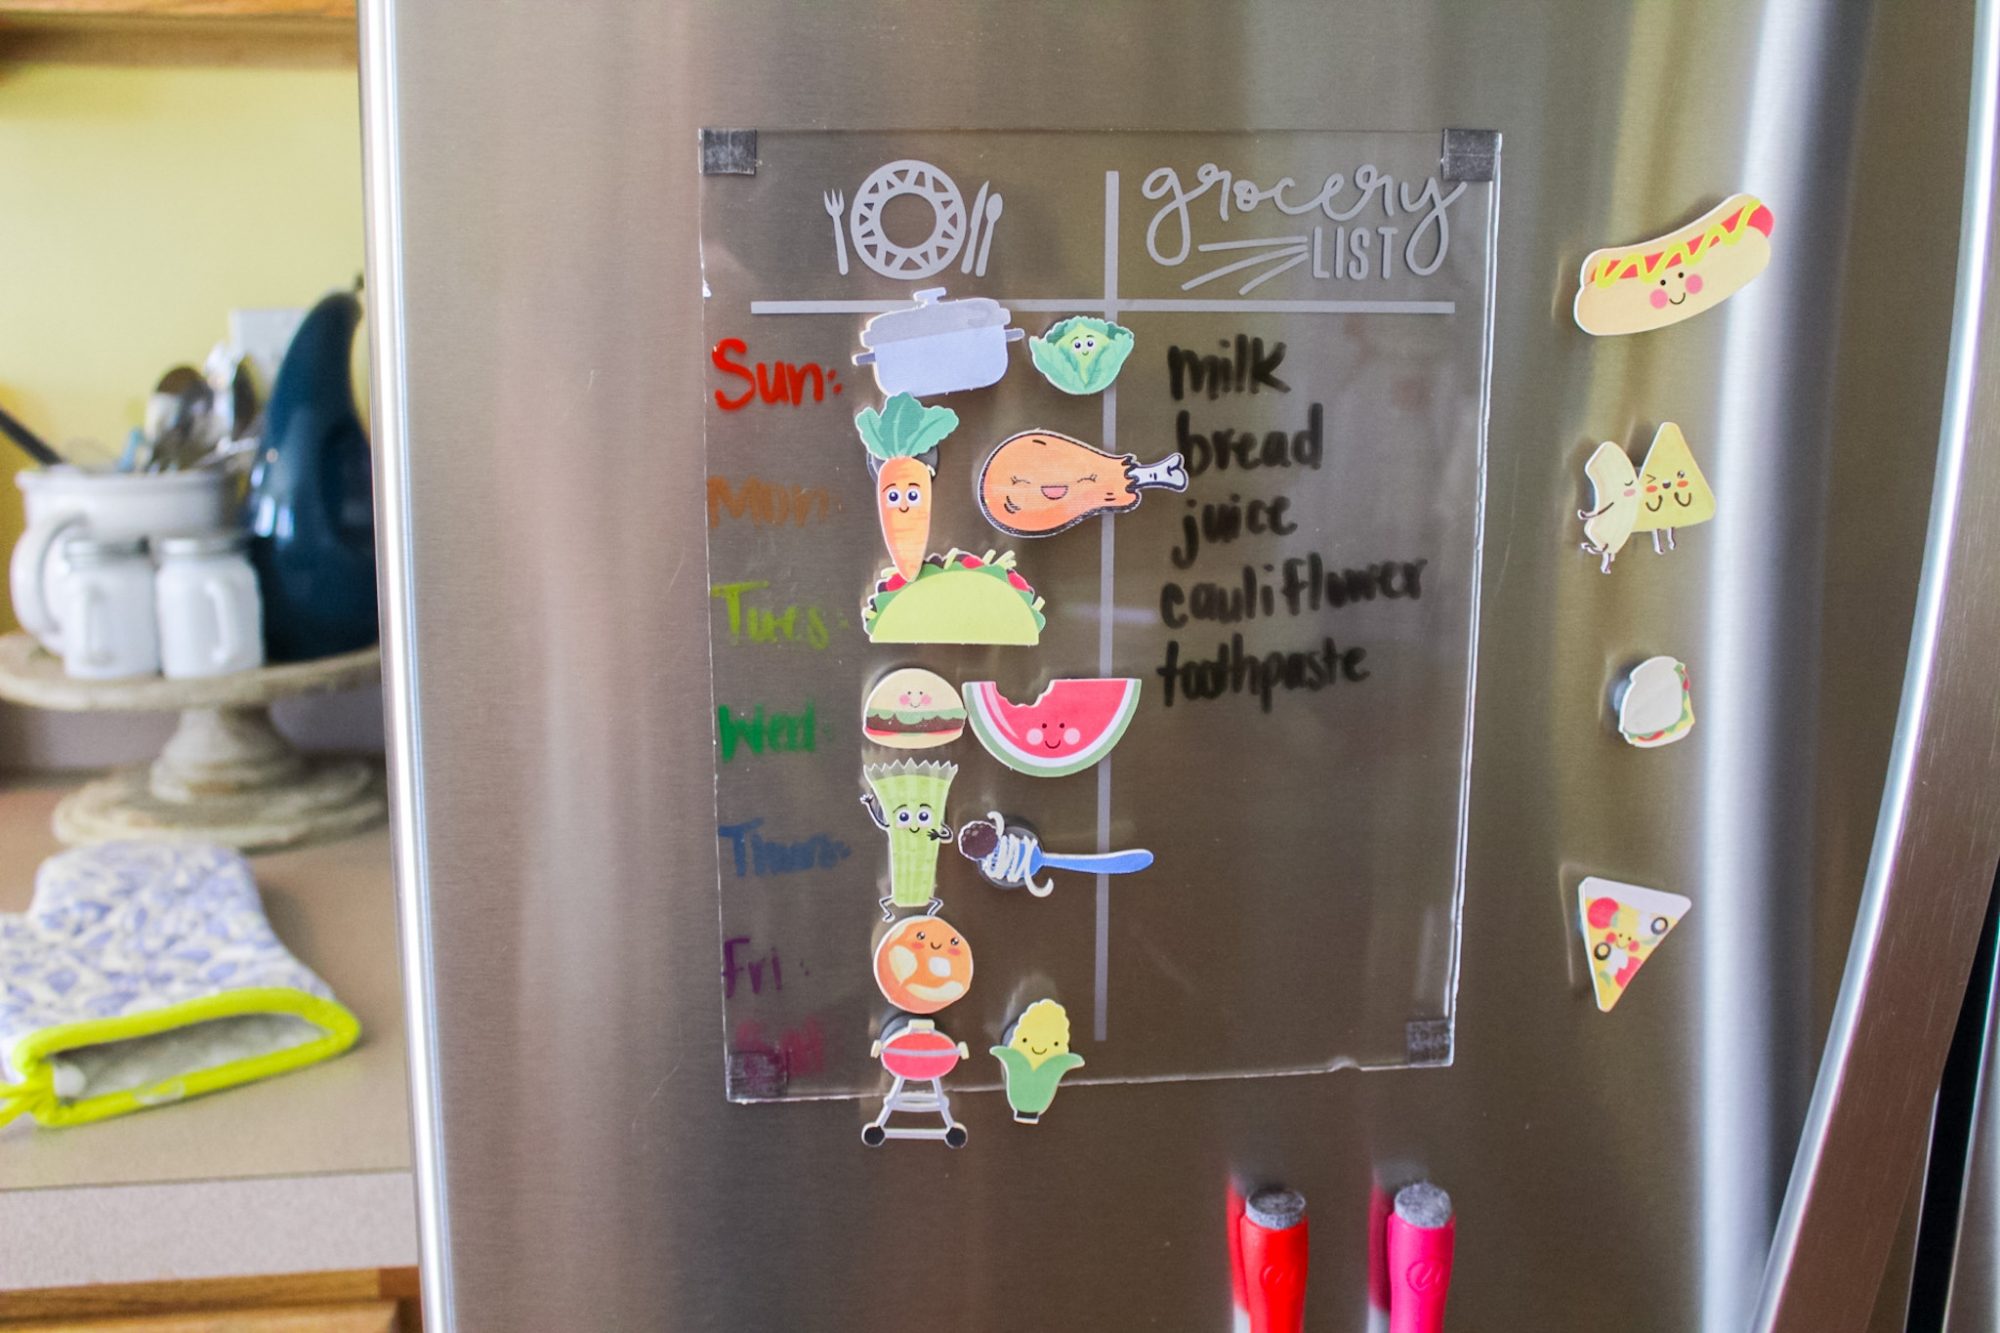
Since creating our acrylic family wall calendar, I thought making a menu planner would be great.
And I came up with this beauty…
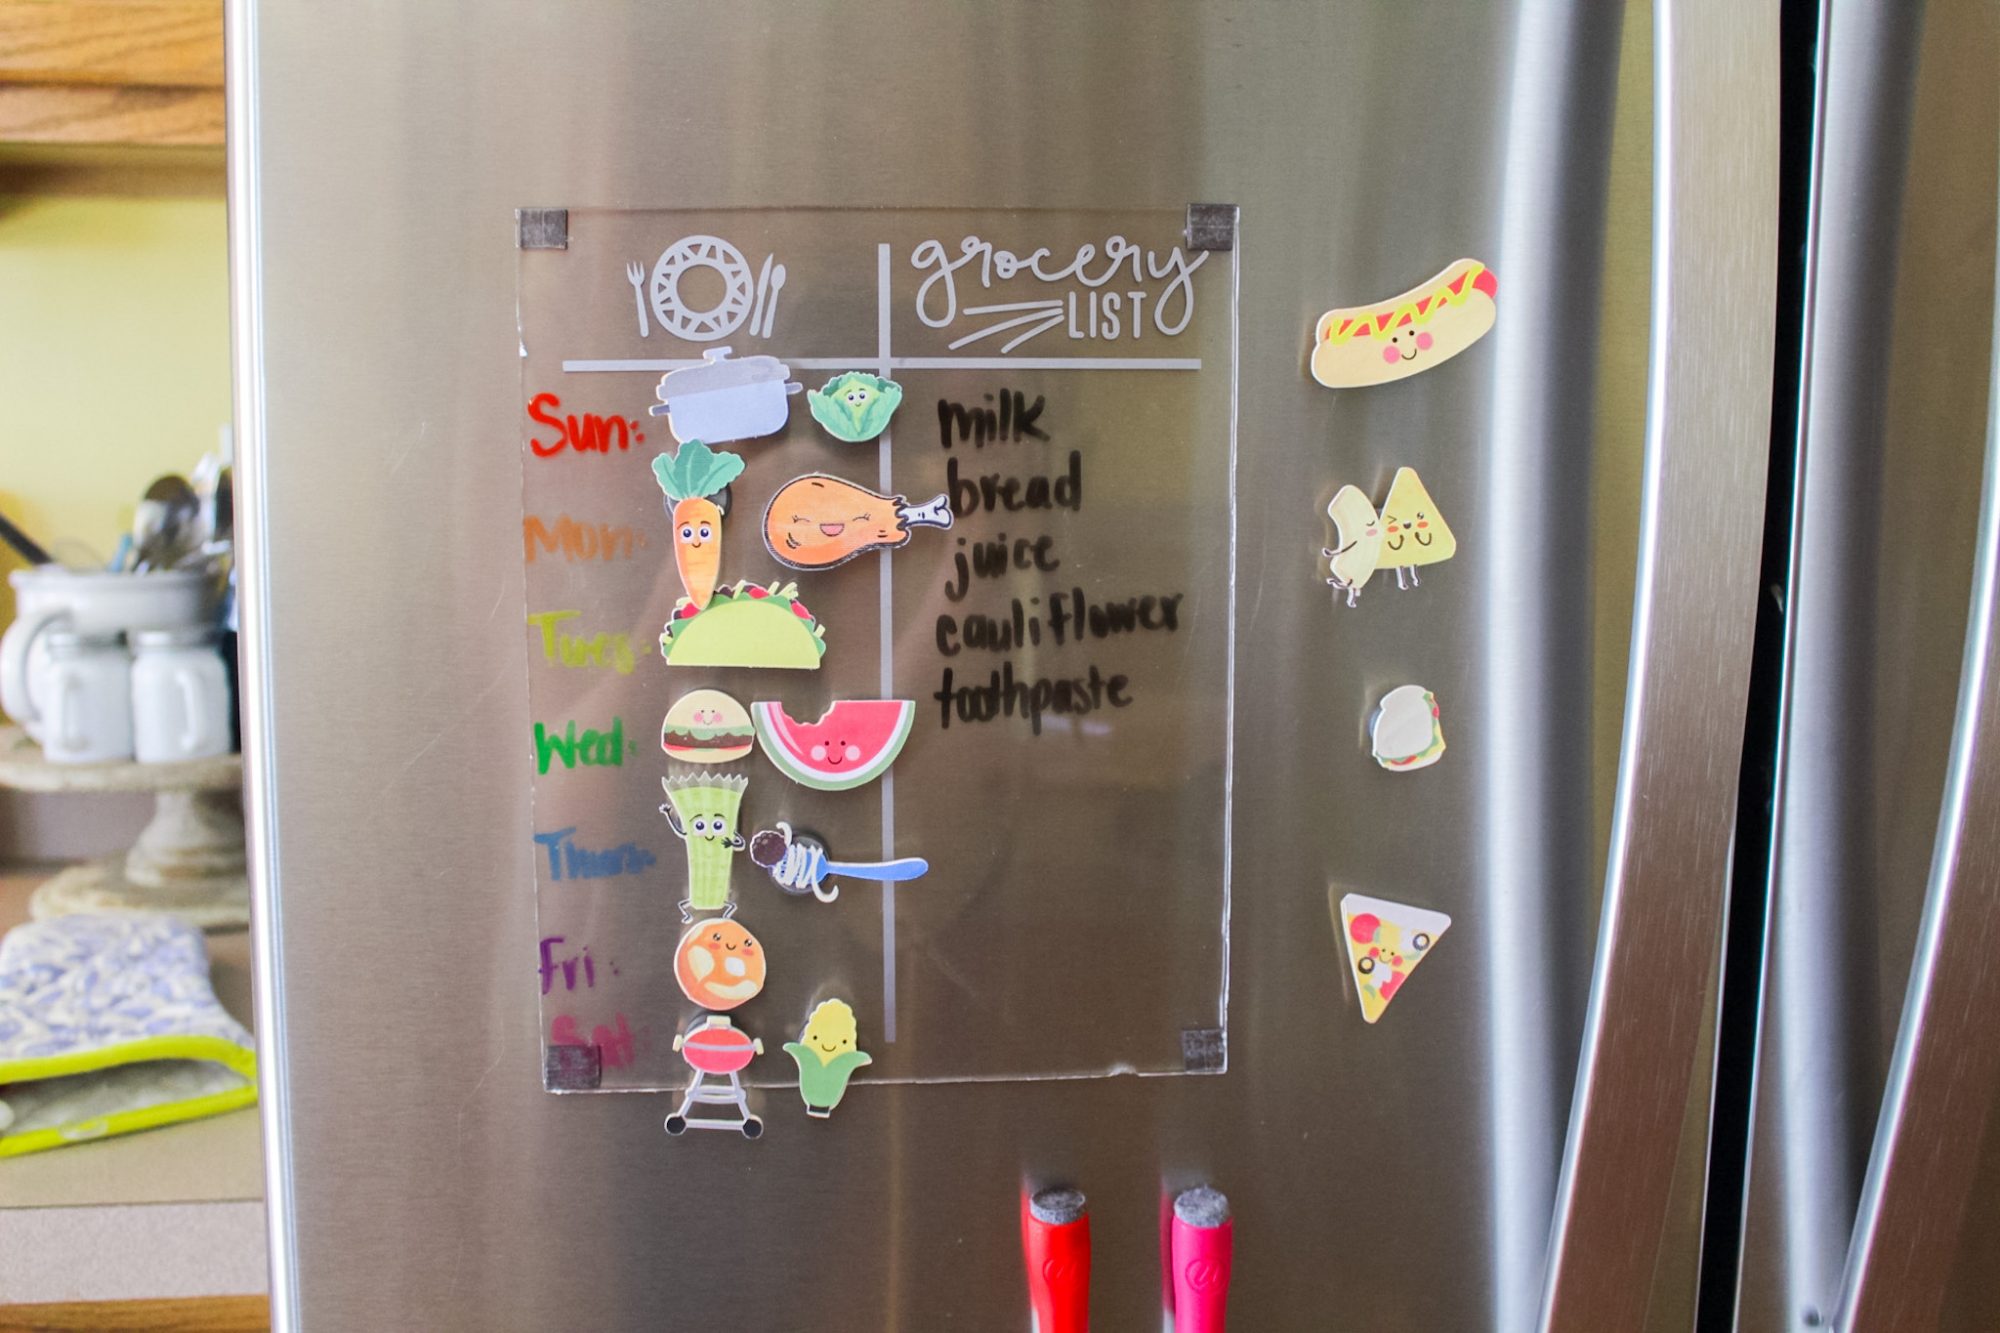
The kids loooove switching out the different foods based on what we’re making that week, and I swear it’s helping them eat healthier and more!
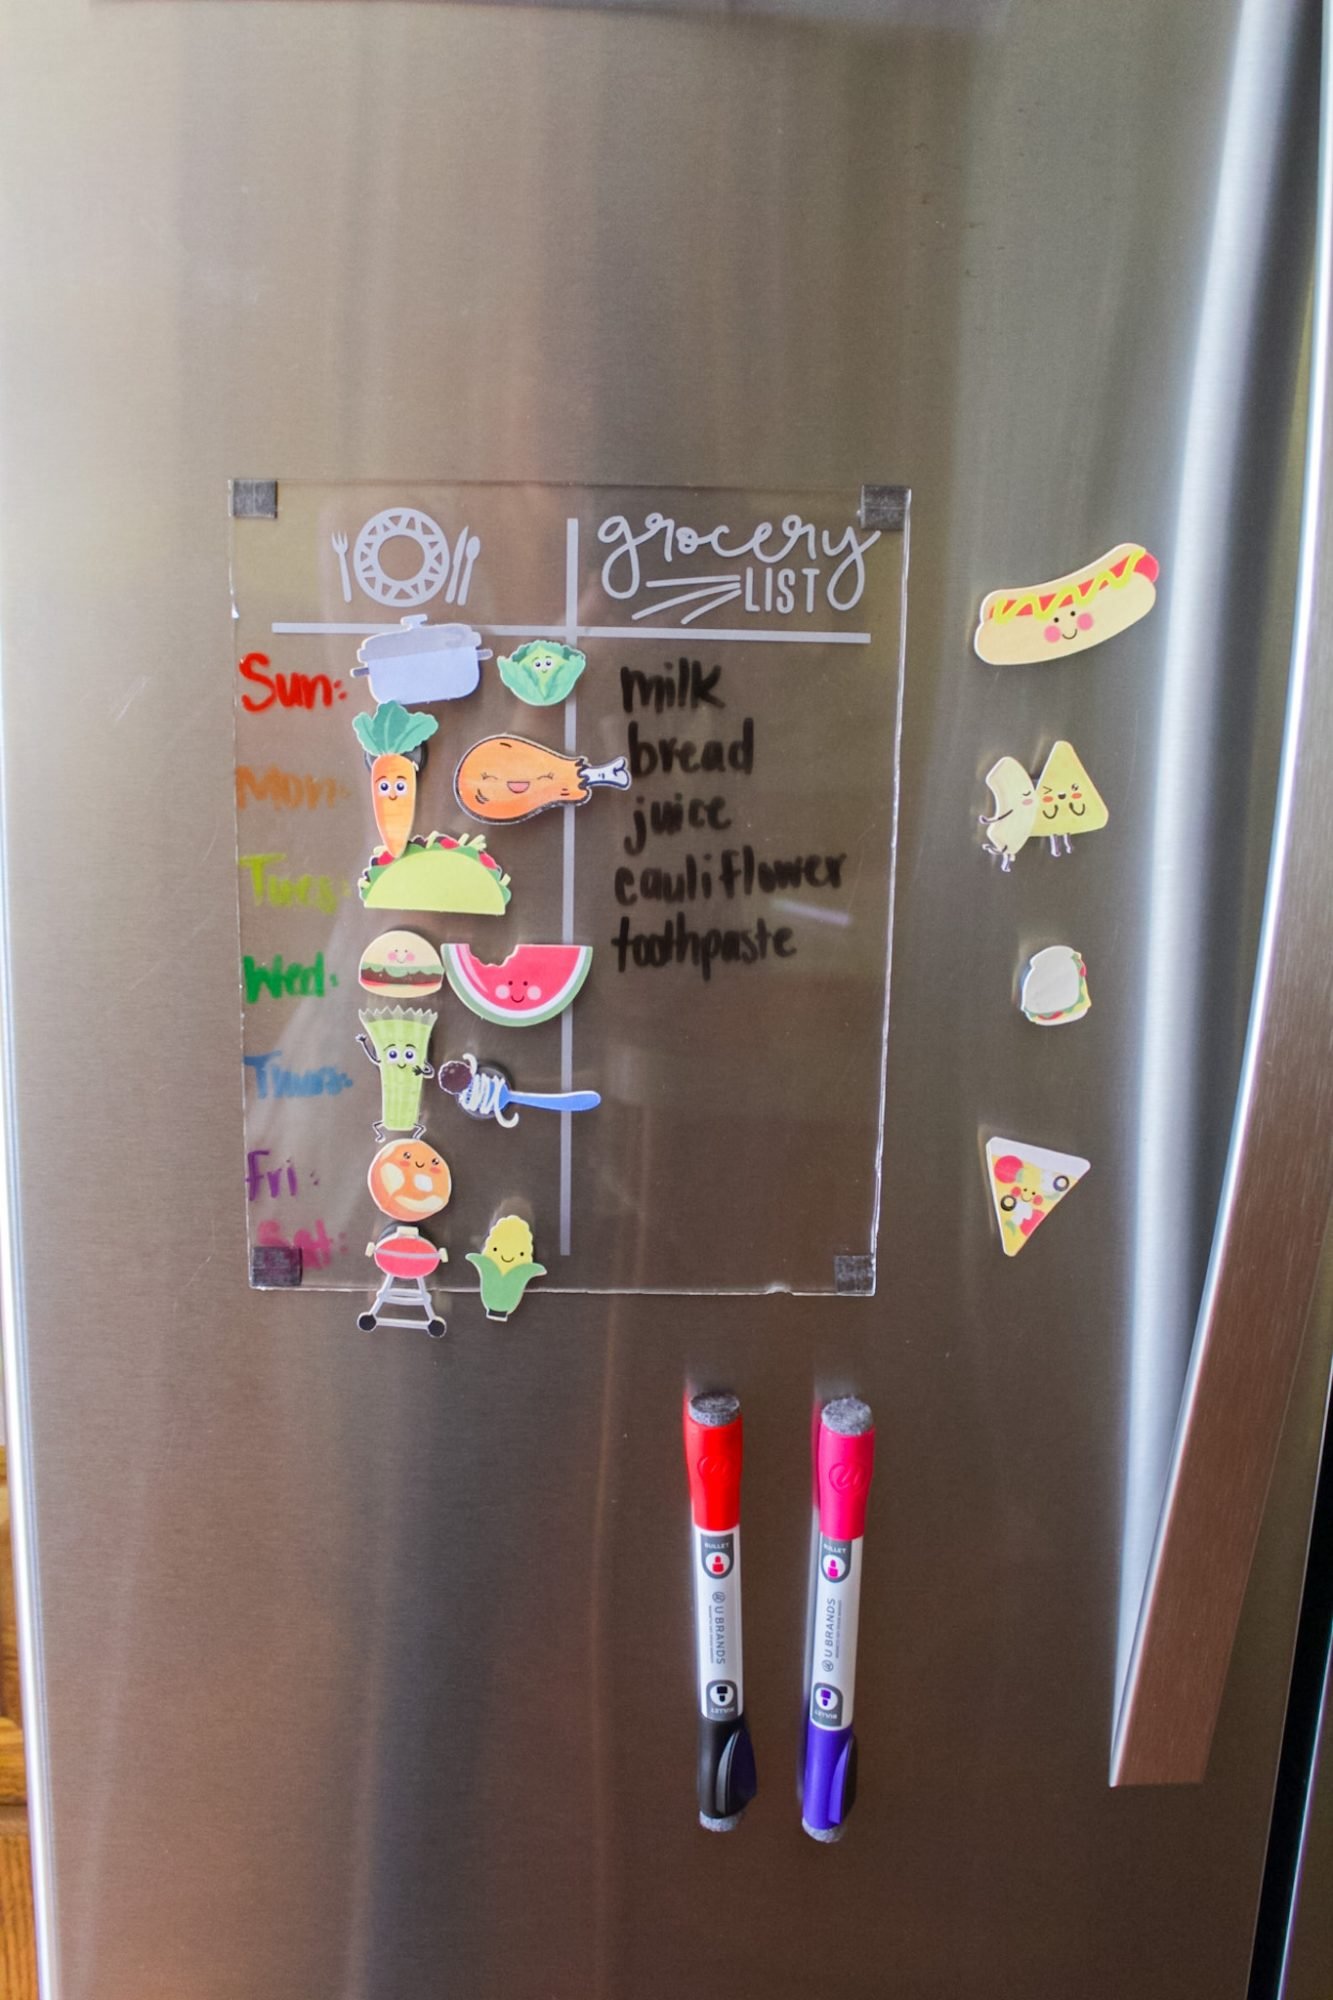
With this sign, you can create your own design as well and focus just on groceries, or just on menu planning, or whatever suits your lifestyle.
Maybe you’re trying to lose or gain weight and you want to track calories.
Maybe you want to write a Bible verse for the day.
The possibilities are endless!
In this tutorial, I’ll be showing you how to make this acrylic fridge sign with screenshots and helpful tips…
This post contains affiliate links, however, all opinions are my own.
What You Need To Make This Acrylic Fridge Sign
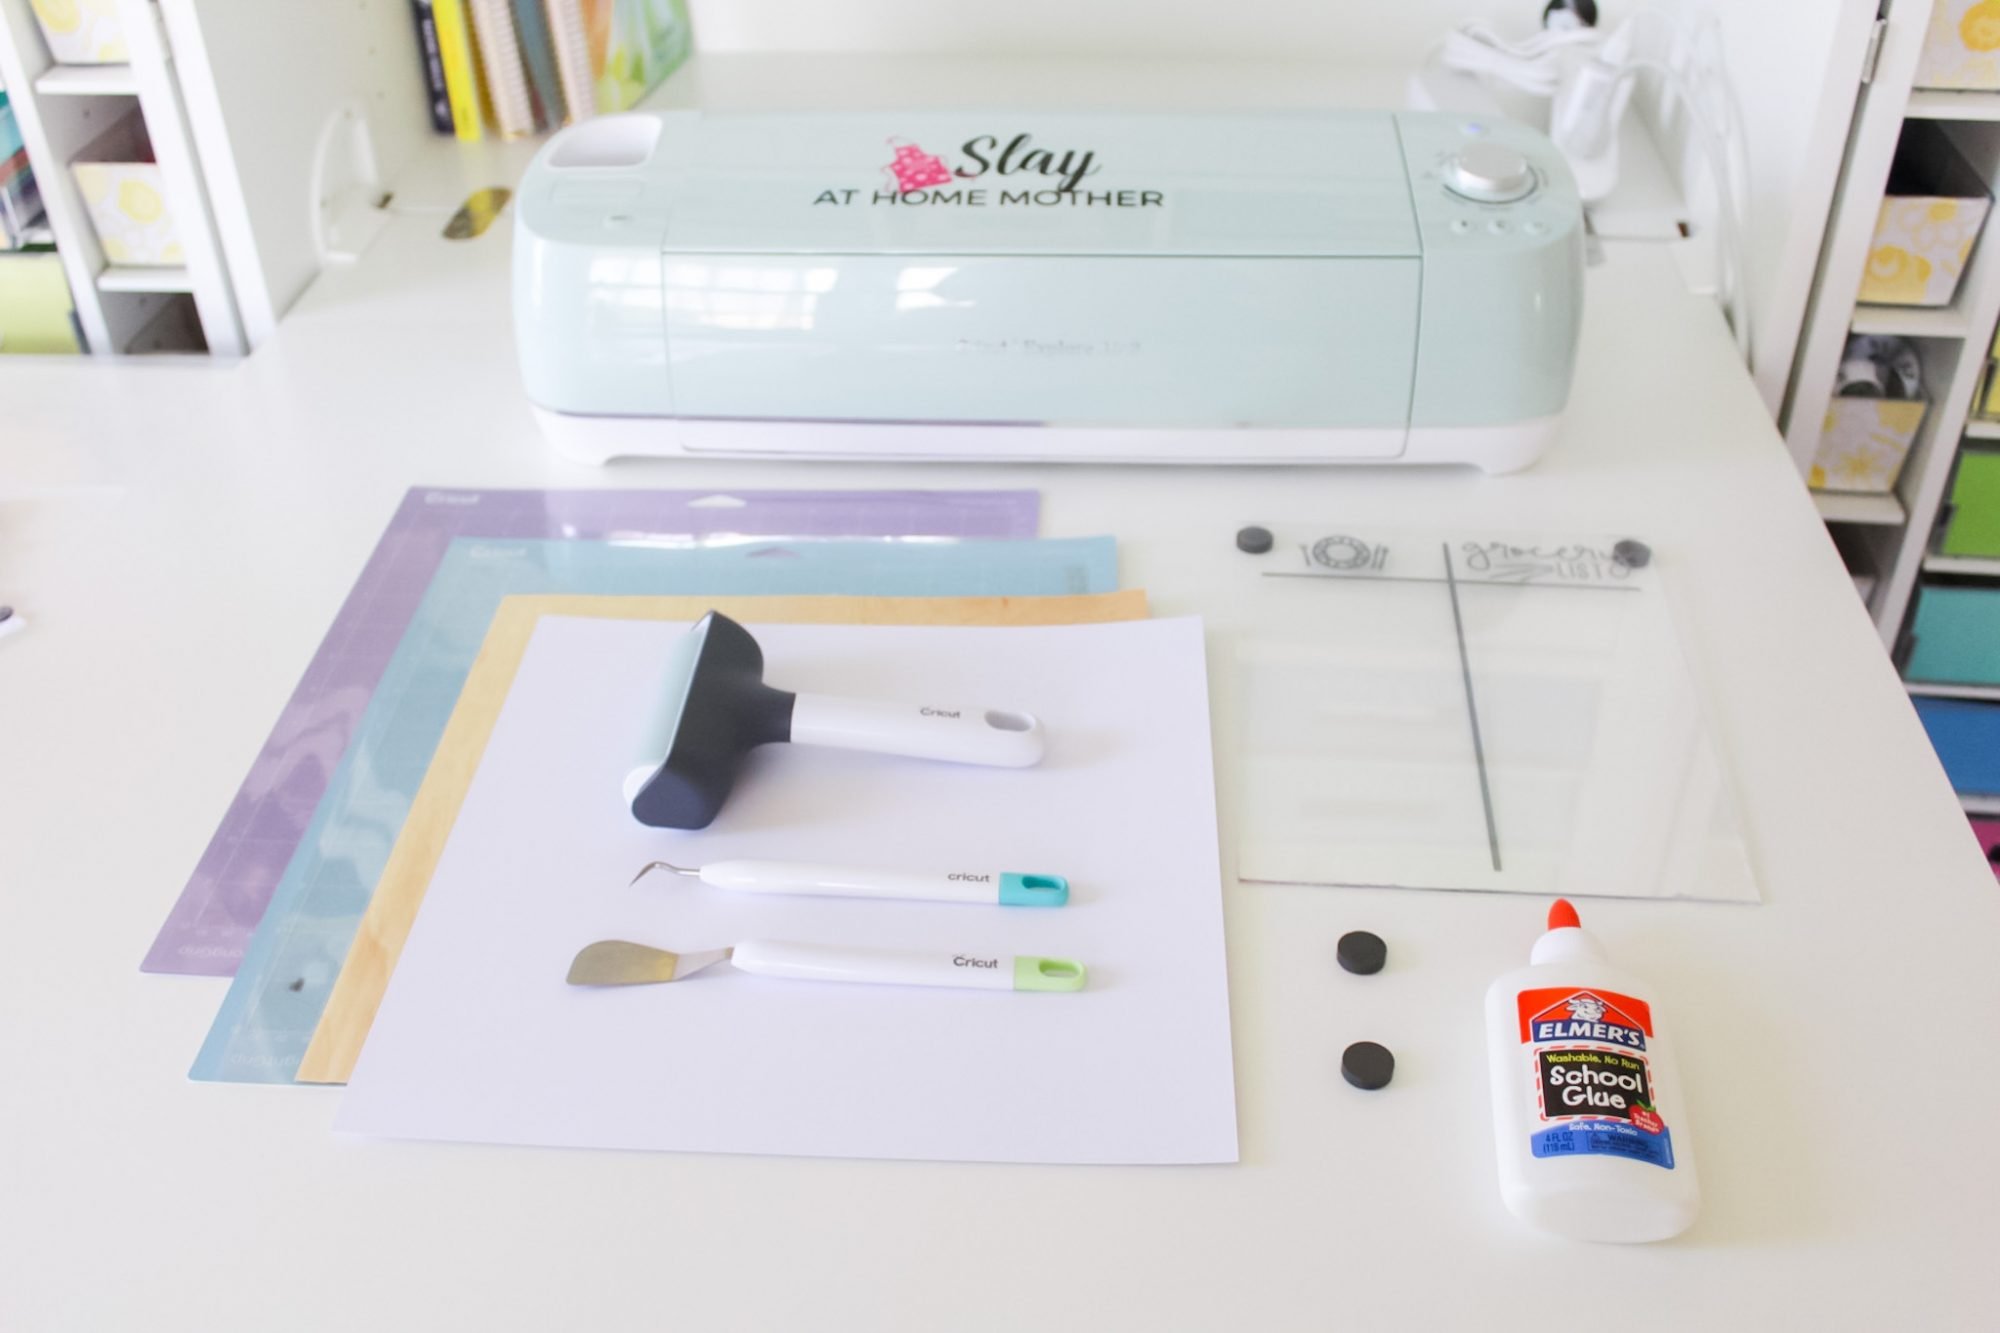
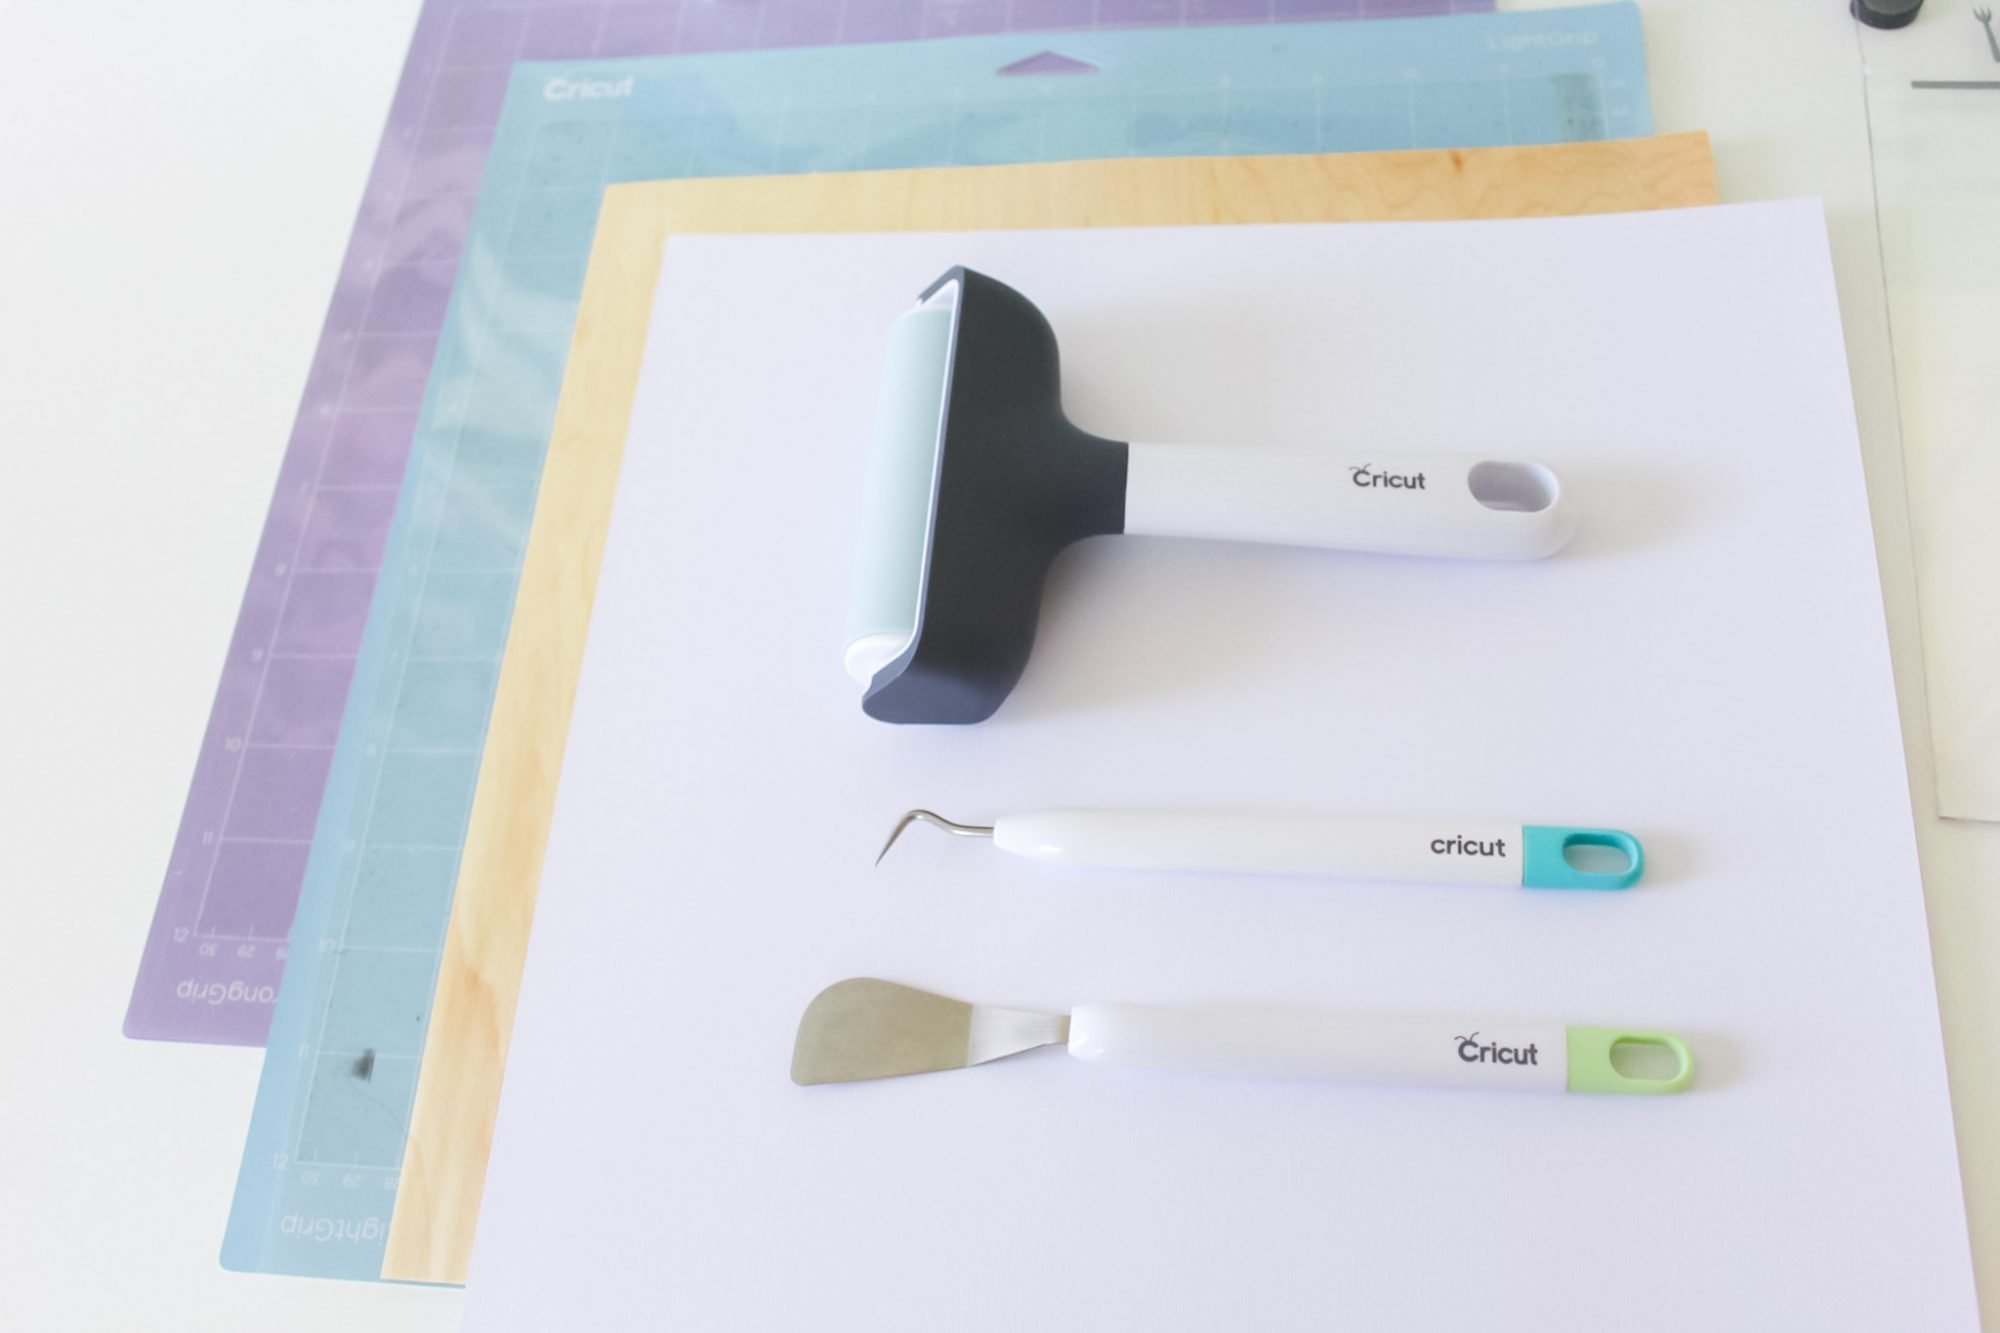
Here’s what you need to make an acrylic fridge sign…
- Cricut machine (I have the Explore Air 2)
- acrylic sheet
- LightGrip mat (blue)
- StrongGrip mat (purple)
- tweezers, spatula, and weeder (these come in the basic tools set)
- brayer
- maple wood veneer (one sheet)
- white cardstock – 80 lb.+ (one sheet)
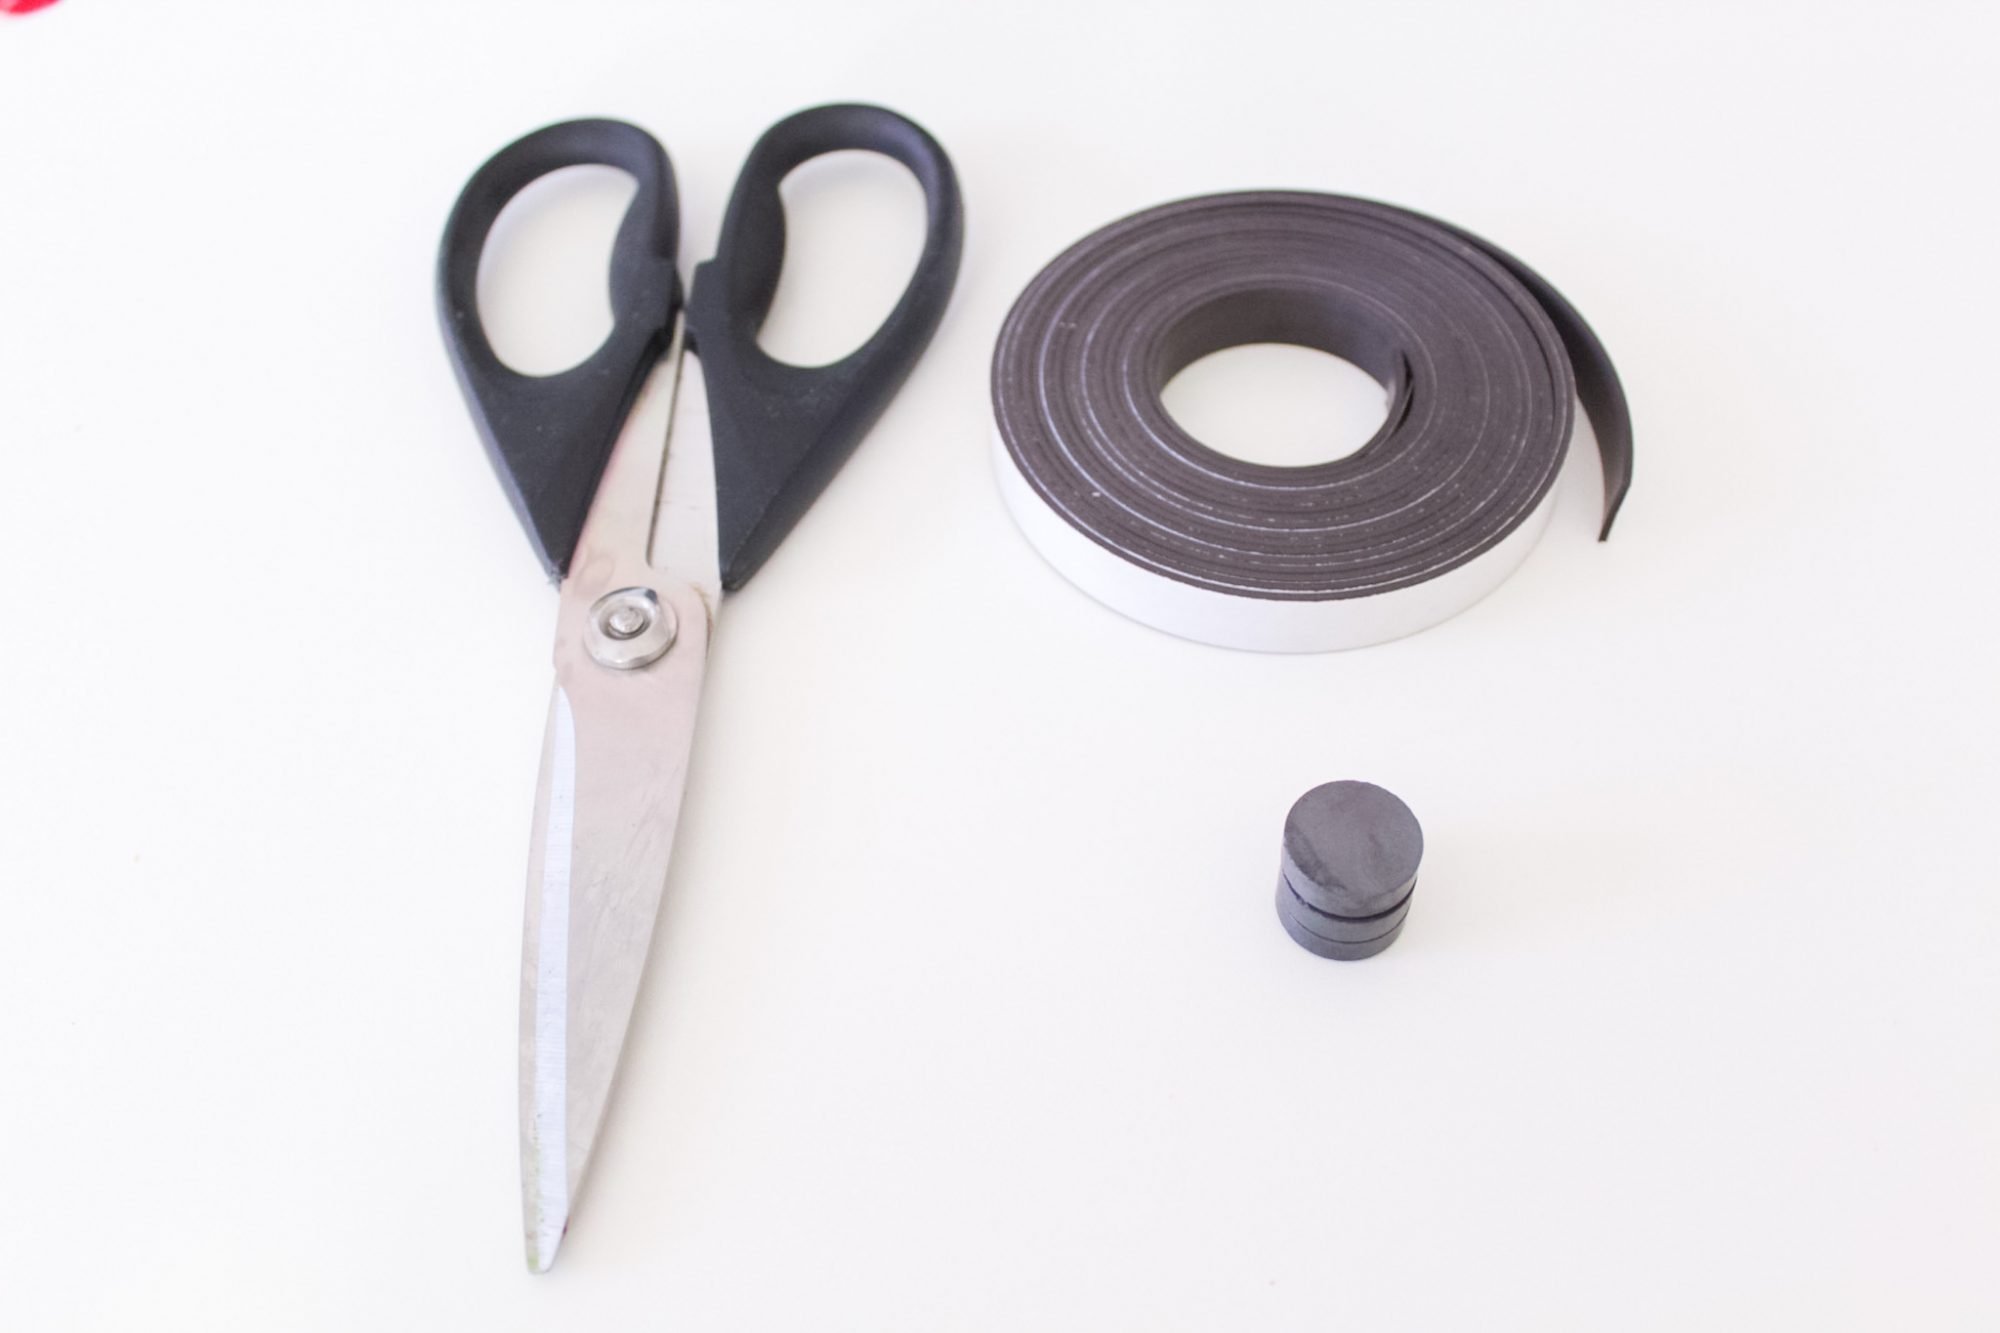
- magnetic strip
- 18mm round disc magnets
- color printer
- permanent vinyl in the color of your choice
- transfer tape
- fine-point blade and deep-point blade
- school glue
I know that looks like a lot of materials, but I swear this tutorial is so EASY!
I even have the free Design Space link for you so you can go straight to Design Space and make this.
Why Do I Need Two Different Types Of Magnets?
This is a fair question!
I, through trial-and-error, learned that I could not use disc magnets on the corners of the sign because when I went to place the disc magnets with food images on them onto the acrylic sign, the magnets would all repel each other.
By implementing the strip magnets, which are thinner and weaker, I am able to still create a strong enough hold to keep the sign on the fridge without repelling the other disc magnets.
Also, the disc magnets are necessary because the strip magnets are not strong enough to hold the food to the sign (or even the fridge), even when doubled or tripled up along the backside of the food shapes.
Designing Your Menu Planner And Grocery List In Cricut Design Space
To access my design in Design Space, click HERE.
Before you design your menu planner and grocery list for your acrylic sign, you’ll need to first cut and measure your acrylic sheet.
As I mentioned in my DIY Acrylic Wall Calendar post, I like to create an outline first that matches the measurements of my project (in this case, an 8″x10″ rectangle), to make sure my design fits within the shape I need it to…

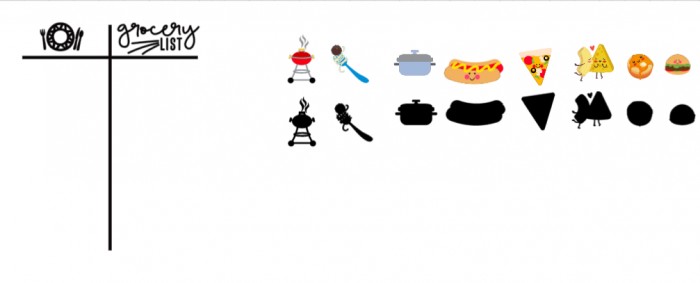
To section off your sign in Design Space, use the Shapes tab and insert a Square shape.
Unlock the shape by clicking on the Lock icon towards the lower right of the shape itself, and adjust the size so you can create two intersecting lines in the shape of a cross.
Weld the two perpendicular lines together.
This divides your rectangle into two sections, one for your menu planner, and one for your grocery list.
You can either type ‘Menu’ and ‘Grocery List’, or search for fun images within the Images tab on the left-hand toolbar like I did.
Attach them all together.
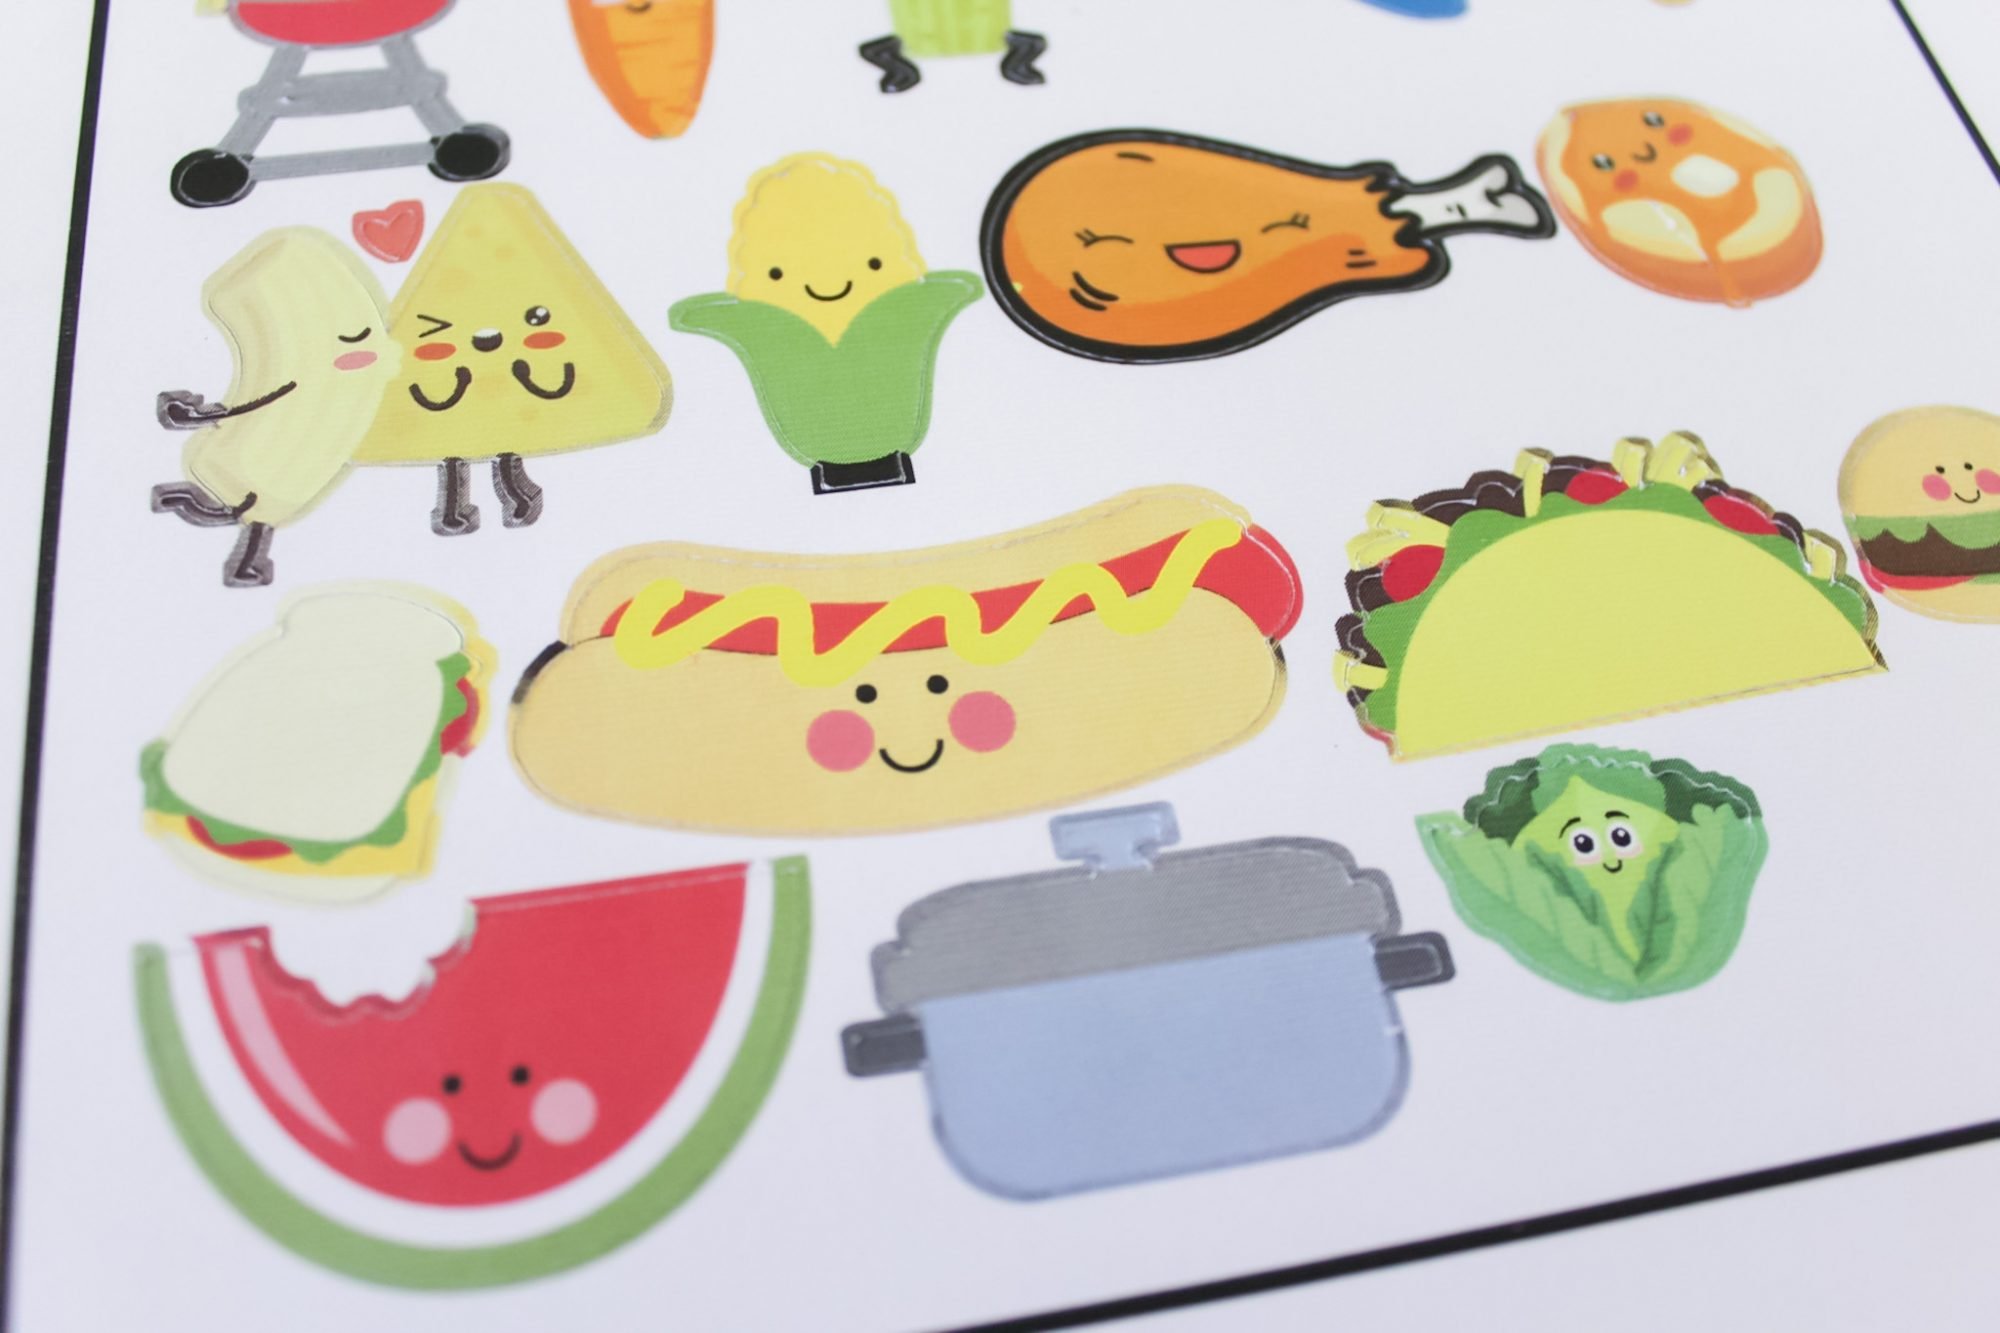
Next, insert some fun food images for your menu planner using the Images tab on the left-hand toolbar. Because I have kids, I chose personified images that had smiles on them.
For each image, select ‘Print‘ under ‘Fill‘.
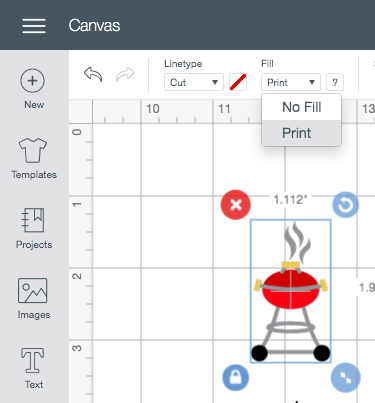
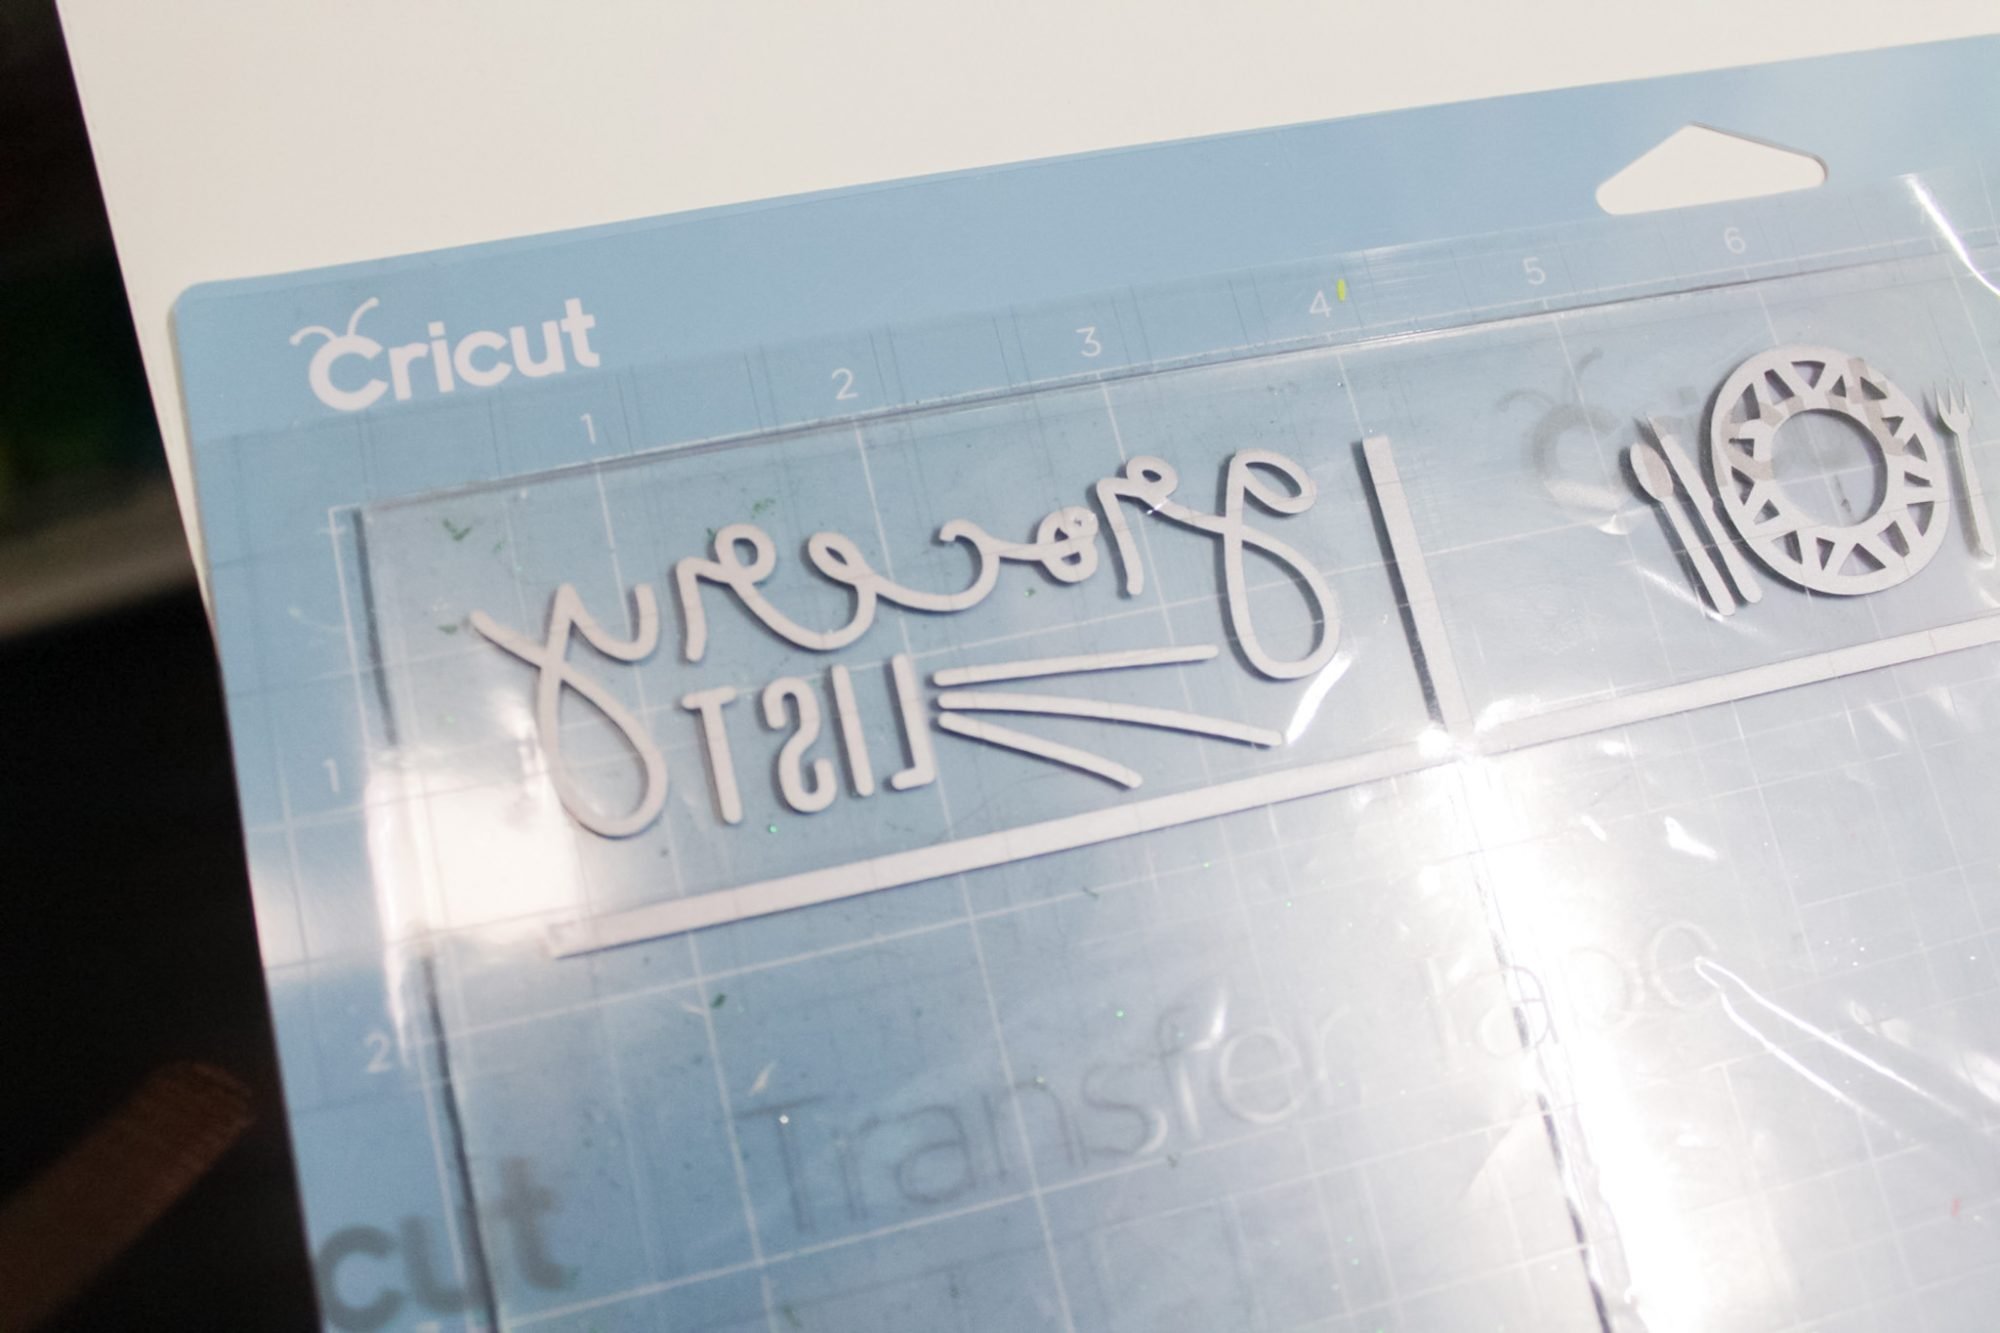
Next, Duplicate each image, and Weld the duplicated image so it becomes a solid shape.
You can see each welded shape in black in the screenshot below…
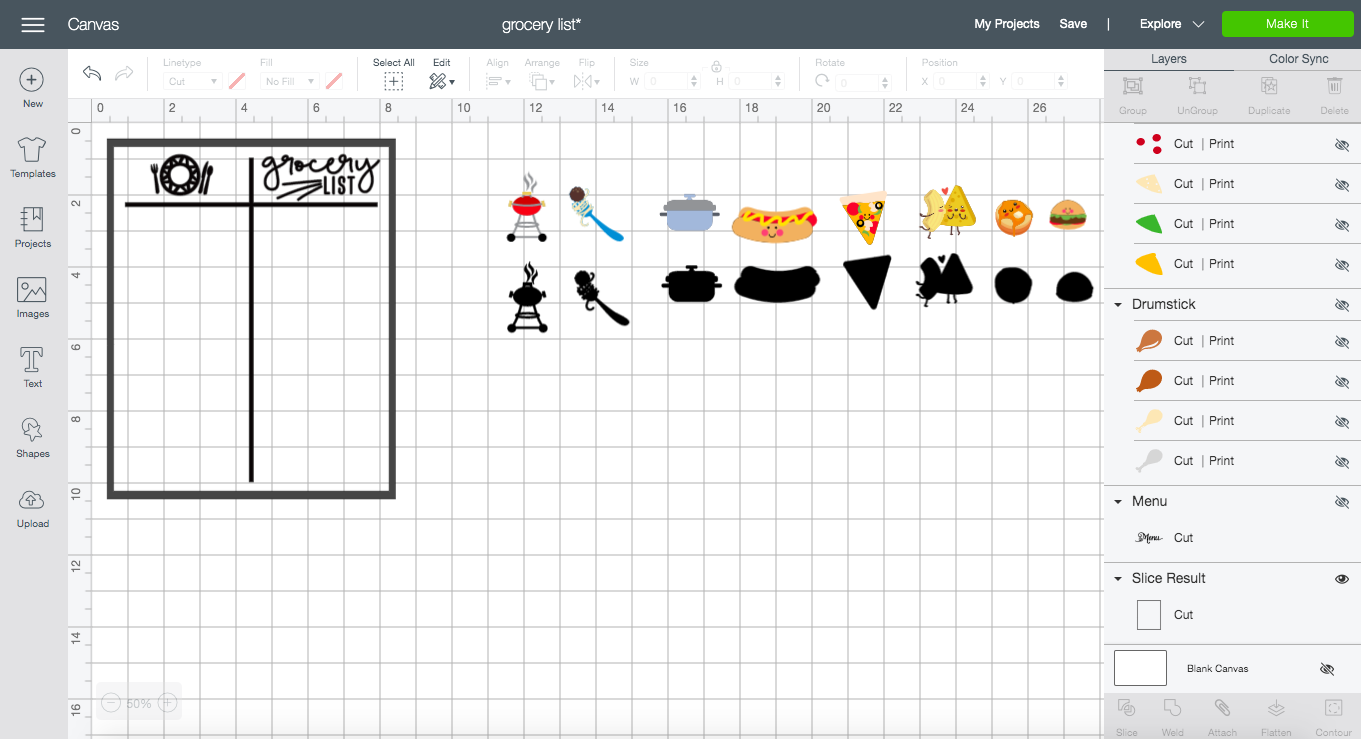
Now you can Flatten the original images.
The Flatten button is located towards the bottom right of the Design Space screen.
This ensures that your Cricut will cut out just the outline of the printed shapes and not proceed with any interior cuts within the printed images.
Cutting Your Design With Vinyl, Wood, And Cardstock
Hide your rectangle outline by clicking on the eye icon in Design Space next to its shape along the righthand toolbar.
We don’t want to cut the outline, we only needed it to make sure our design fit within the confines of our acrylic sheet.
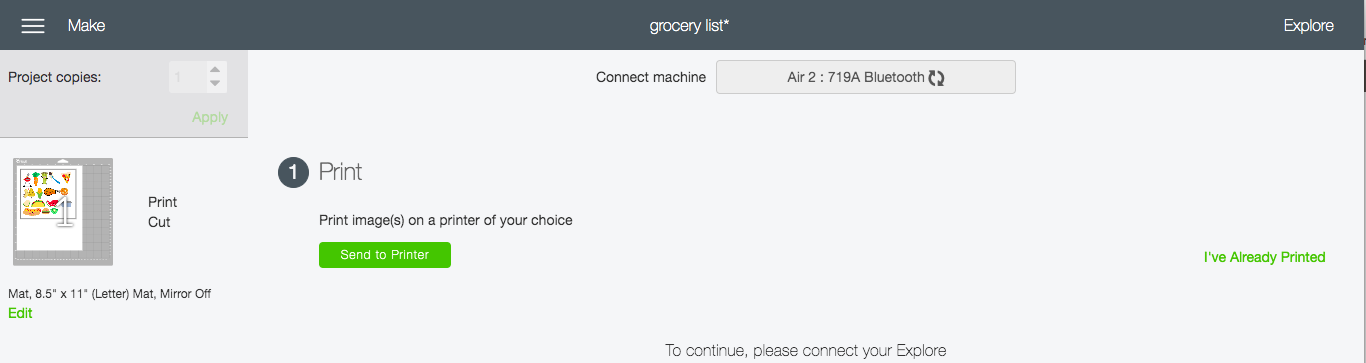
Click On Make It.
In the Prepare screen, you should see three different cuts.
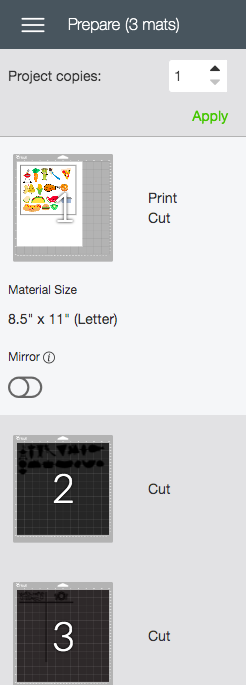
Your food pictures will be printed on white cardstock, your solid shapes will be cut out of wood veneer, and your vinyl decal will be cut out of permanent vinyl.
Because we want to minimize changing out mats and save some time, we’re going to cut the two materials needing the Lightgrip mat first, which are the cardstock and permanent vinyl.
The last cut will be the wood veneer shapes.
Cut Vinyl Using LightGrip Mat
First, you’ll want to cut your grocery list and menu planner decal with permanent vinyl.
Before cutting your vinyl, consider if you’d like to Mirror your design prior to cutting.
I mirrored my design so that the vinyl would be on the backside of my acrylic and I could freely write and erase with dry-erase markers on the front without disturbing or wearing down the vinyl.
And because – kids. 😉
If you’re mirroring your design, click on the Mirror button within the Prepare screen.
It looks like this…
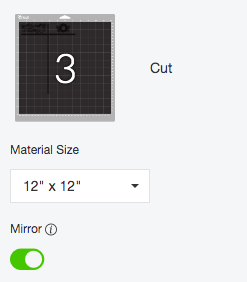
The button should be green.
Load your permanent vinyl onto your blue LightGrip mat, and cut with your Cricut machine.
If you mirrored your design, it will cut backwards (see below)…
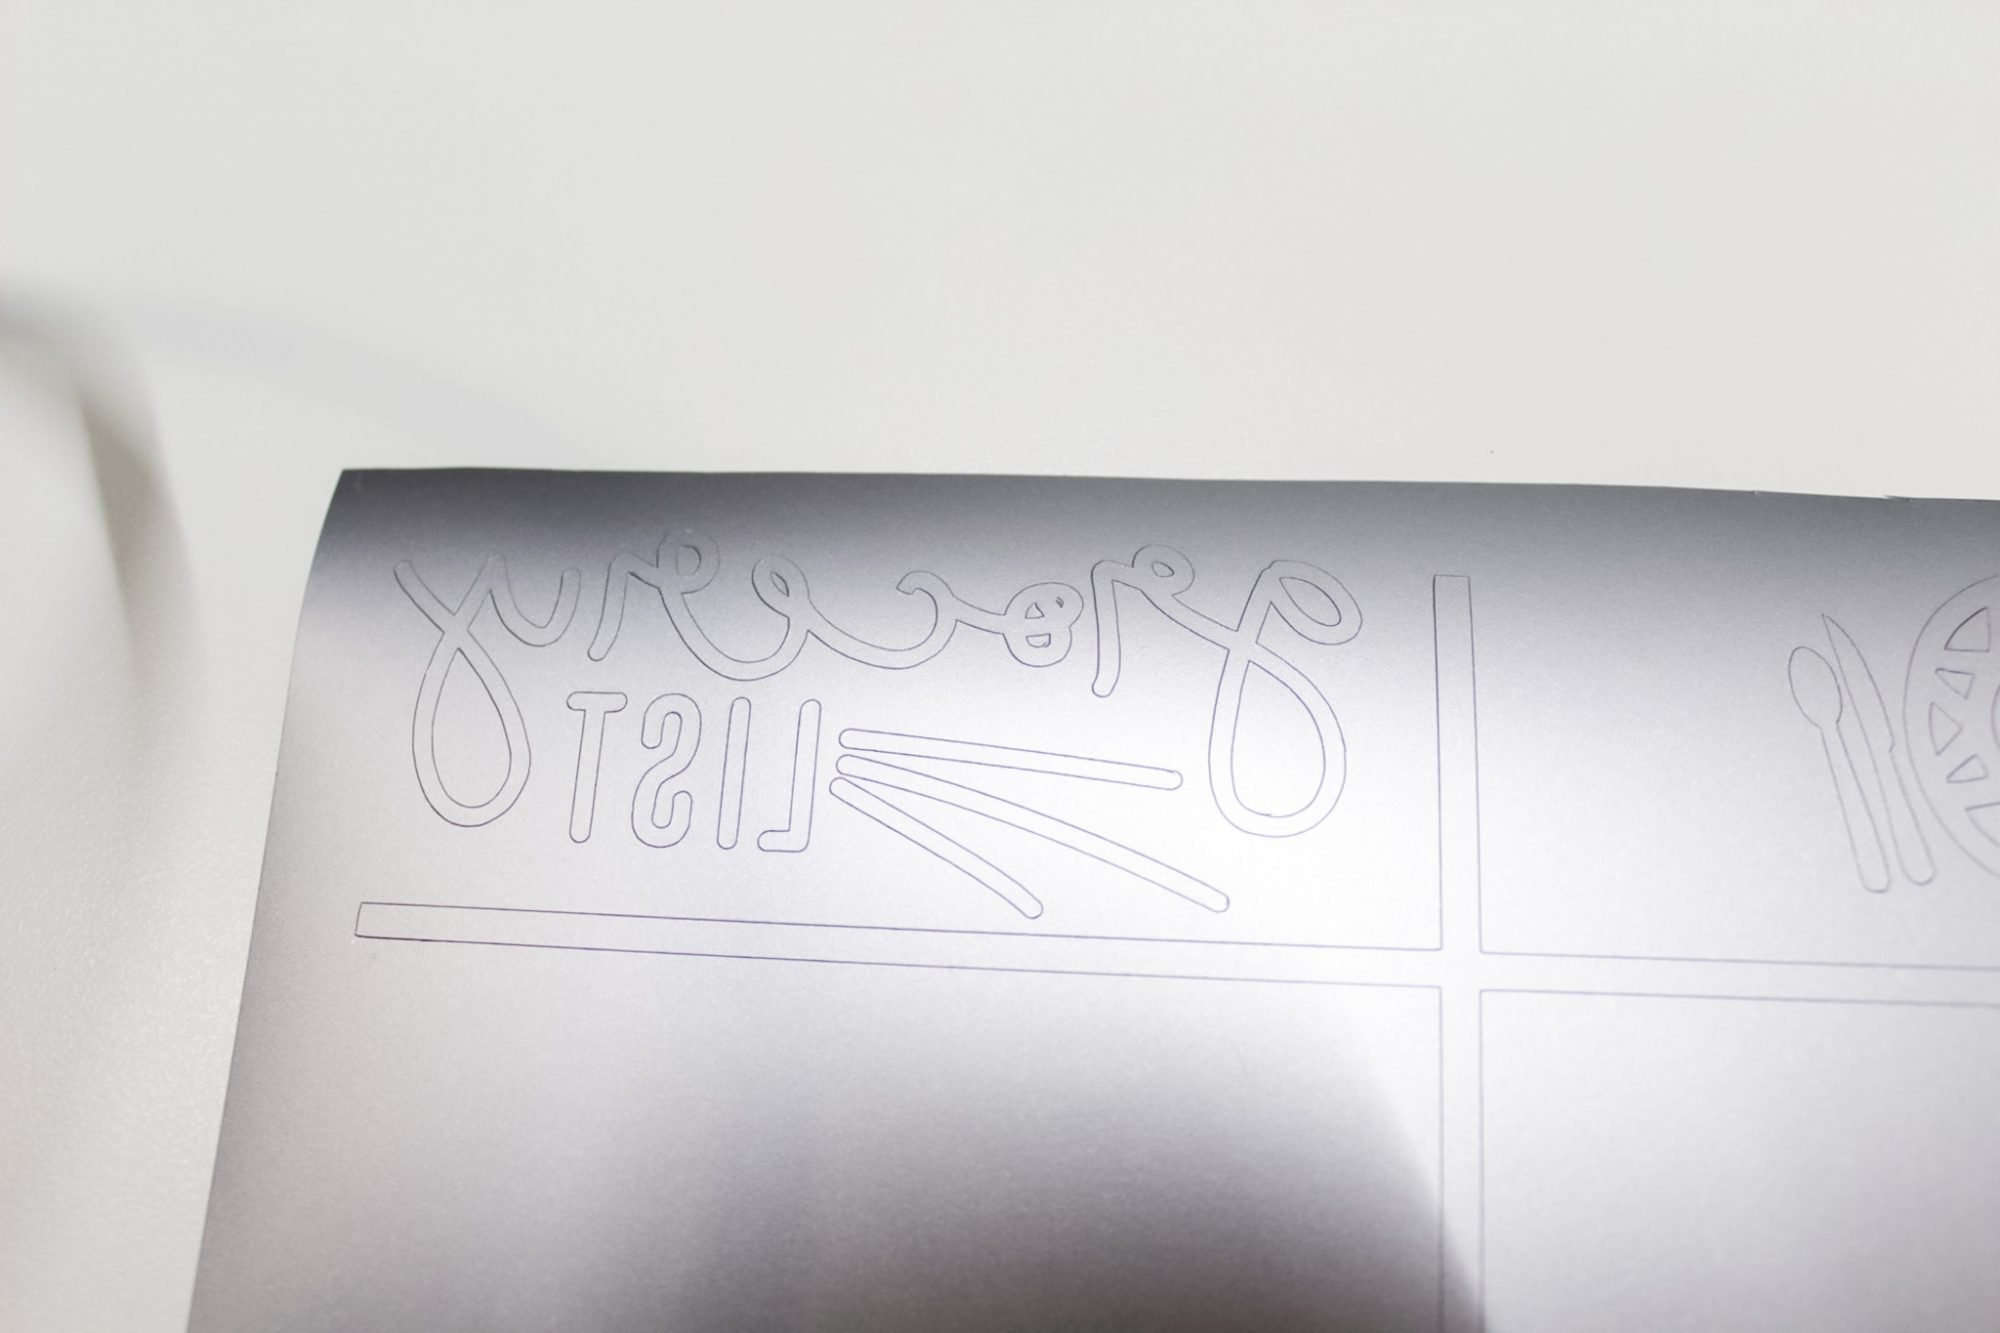
Weed away excess vinyl from your design, and transfer to Cricut transfer tape.
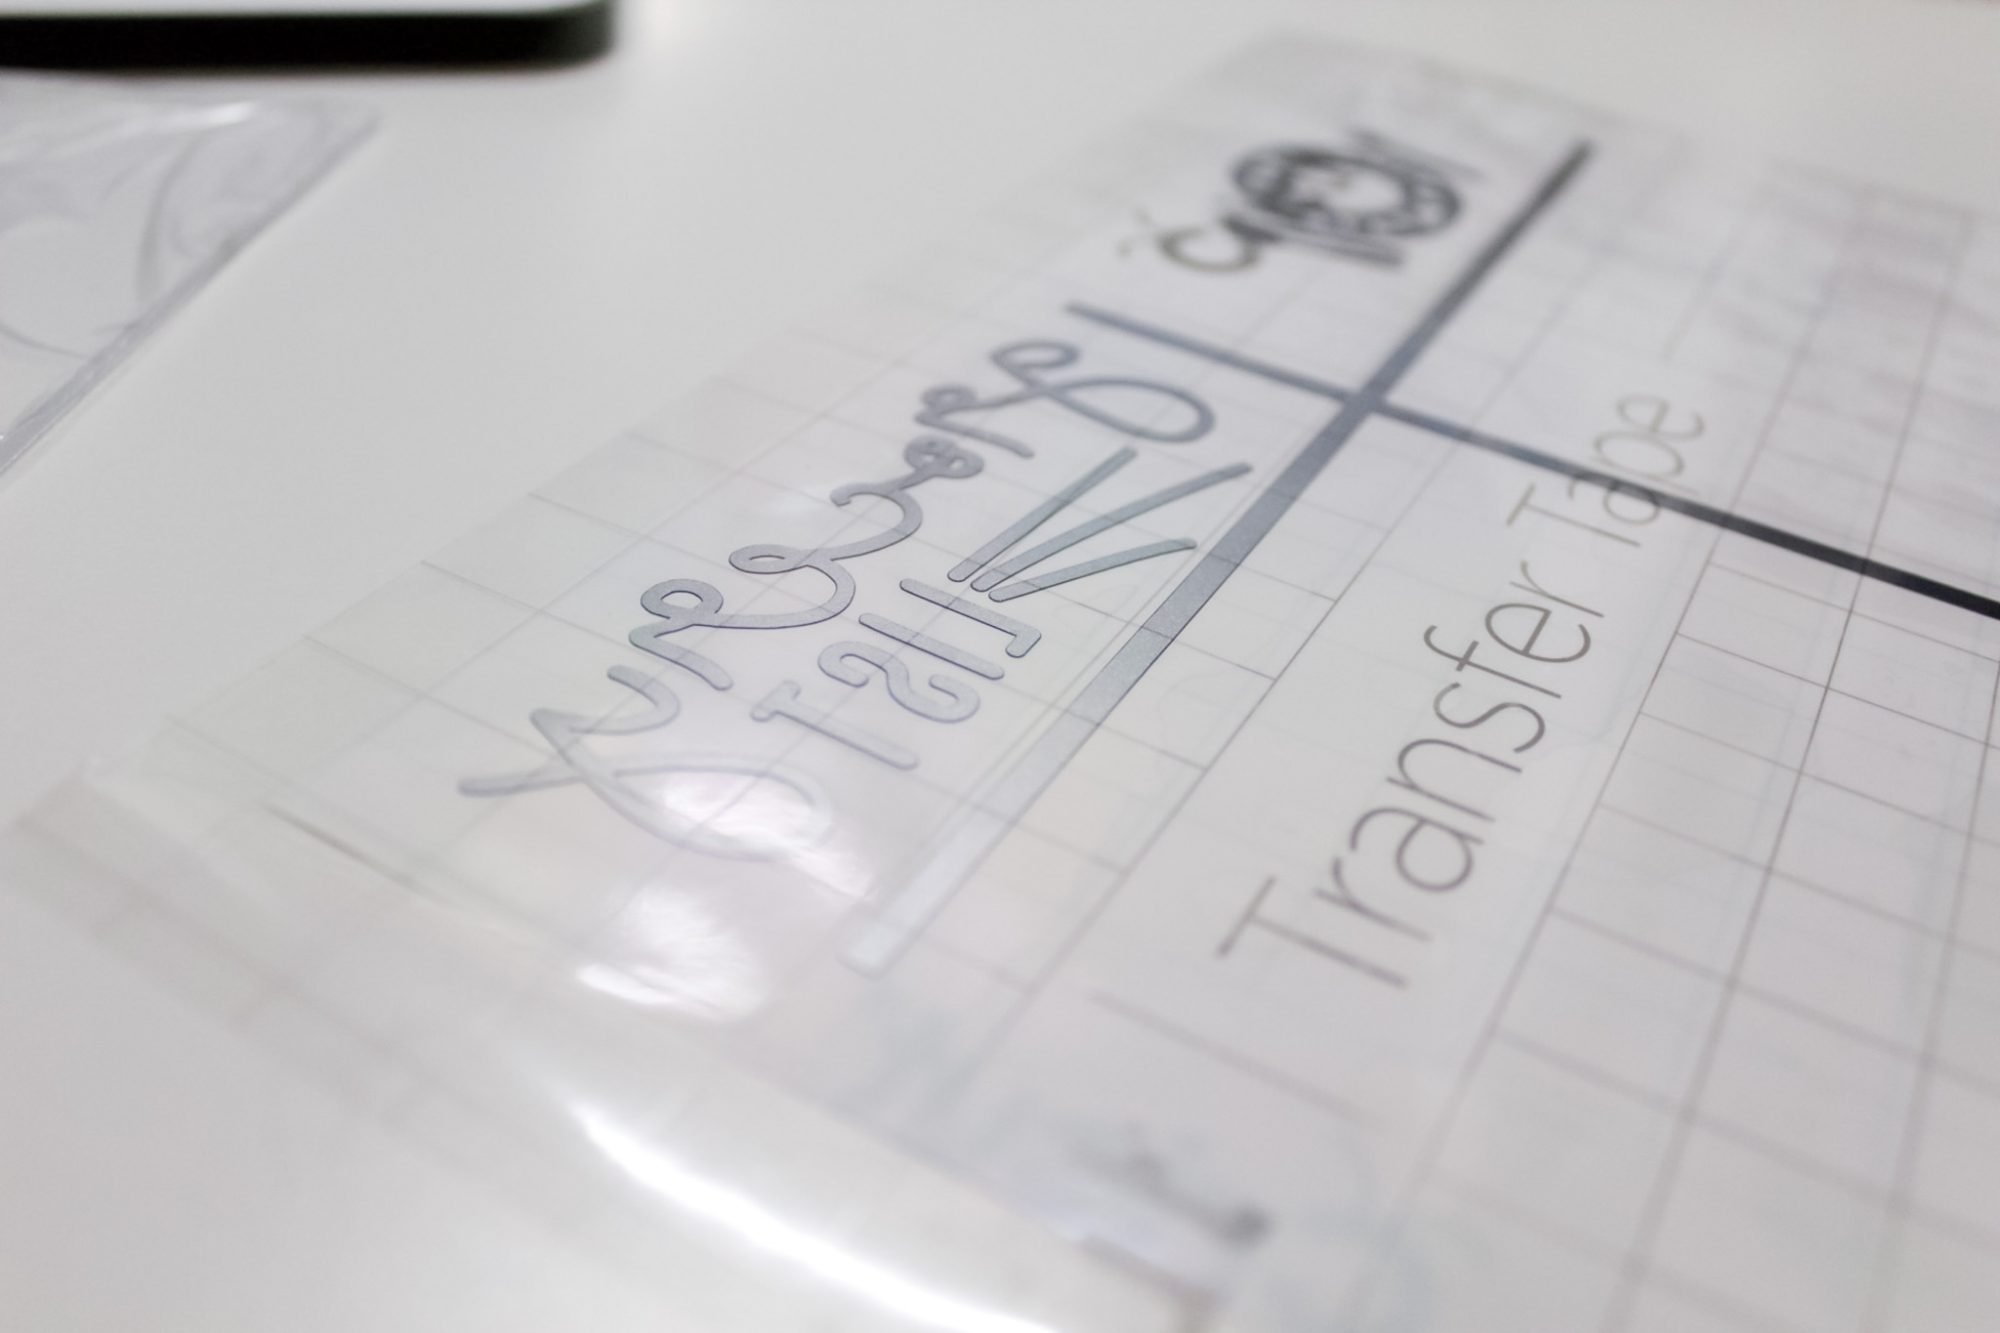
To center your design (and this is the really awesome part about working with acrylic because it’s completely see-through!), you can place it on your covered LightGrip mat.
Use the gridlines to determine where the center line should go and use that as a guide to place your vinyl decal.
Because my sign is 8″ wide, I am placing the center line directly over the 4″ line.
Transfer your decal to your acrylic sheet, burnishing the transfer tape.
Now you can remove the front plastic protective sheet from the front of your acrylic.
Next, cut four small squares or rectangles (depending on the size of your acrylic sheet) from your magnetic strip, and apply to all four corners on the back of your sign.
Trust me, you need it on all four corners!
how to print then cut on cricut
If this is your first time using Cricut Print Then Cut, you will need to calibrate your machine.
If your machine is already calibrated, your Cricut will require you to send the design to your Printer.
A new window will pop up. Select ‘Add Bleed‘ – this adds a little extra ink around the border of your pictures so there isn’t a white border in your finished cut pictures.
Print.
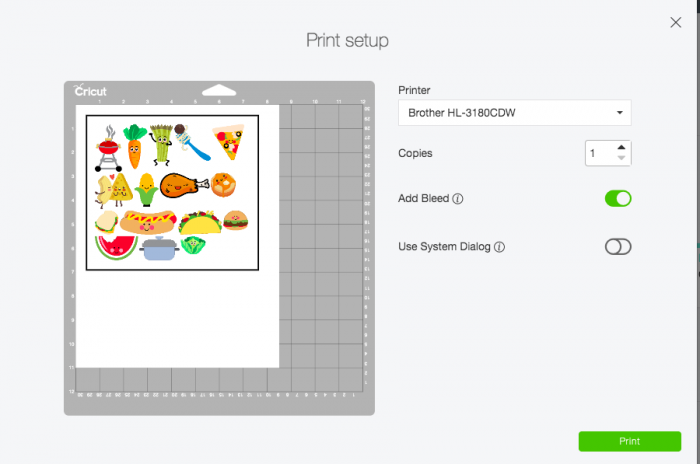
Before loading my cardstock into the paper tray of my printer, I needed to take a piece of copy paper and use it as a template to cut my 12″x12″ piece of cardstock down to size.
Your printer will then print out your food pictures surrounded by a black square outline.
This outline is the scoreline your machine will need to scan prior to cutting to determine where cuts need to be made.
Leave your paper as is and attach it to the upper left corner of your LightGrip mat.
Load the mat and proceed with cutting your cardstock.
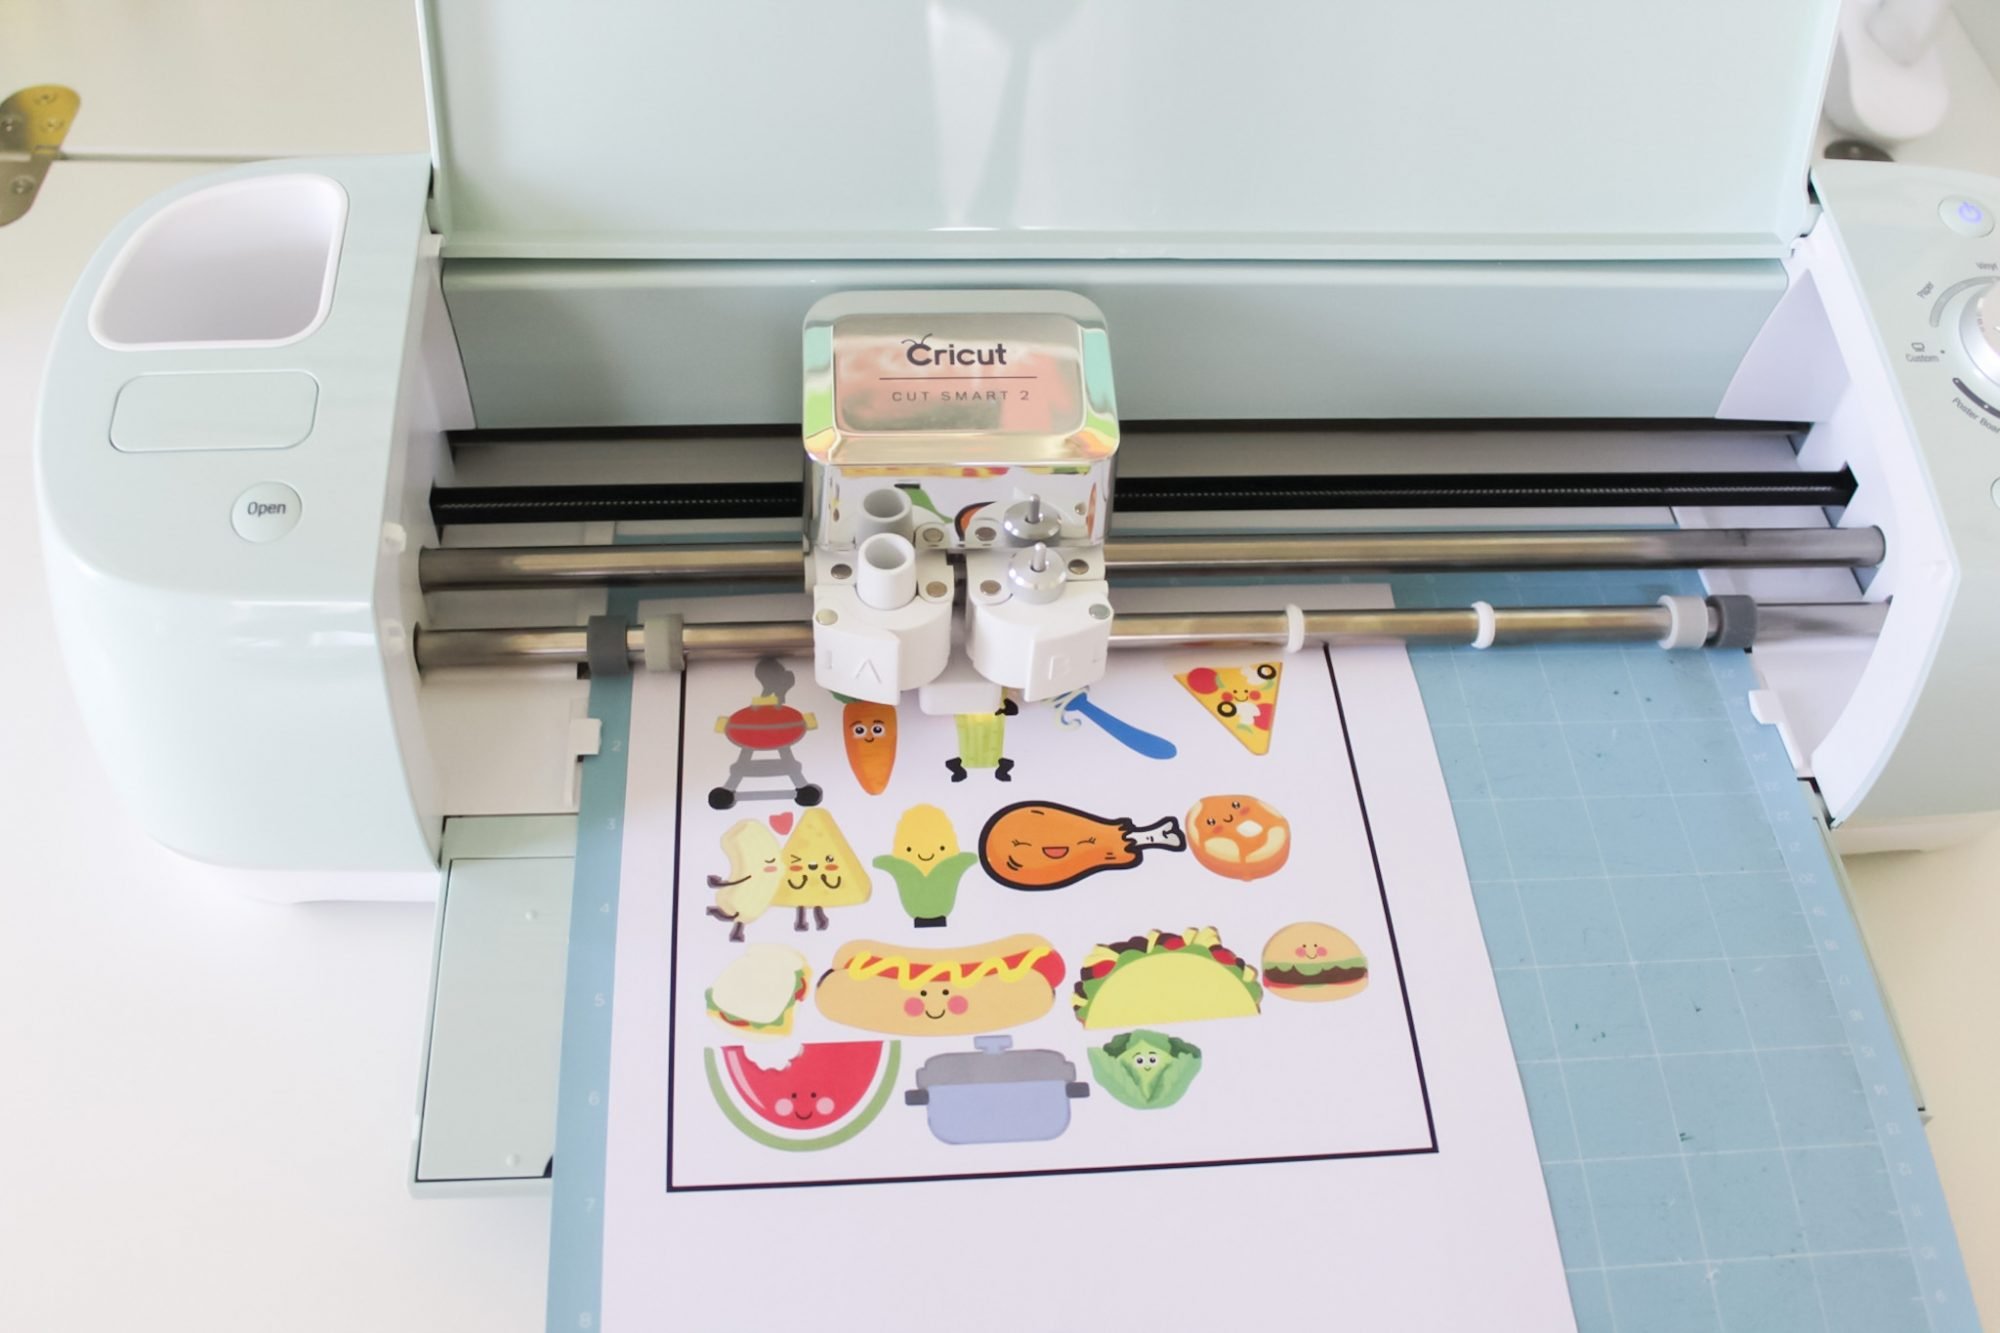
Your Cricut machine will first scan the black lines around your image first (this is called scoring), and then cut.
Once it’s done cutting, unload your mat from the machine.
To remove cardstock without curling it, place your mat face down on your working surface, and bend the mat up and away.
This curls the mat, not the cardstock! 🙂
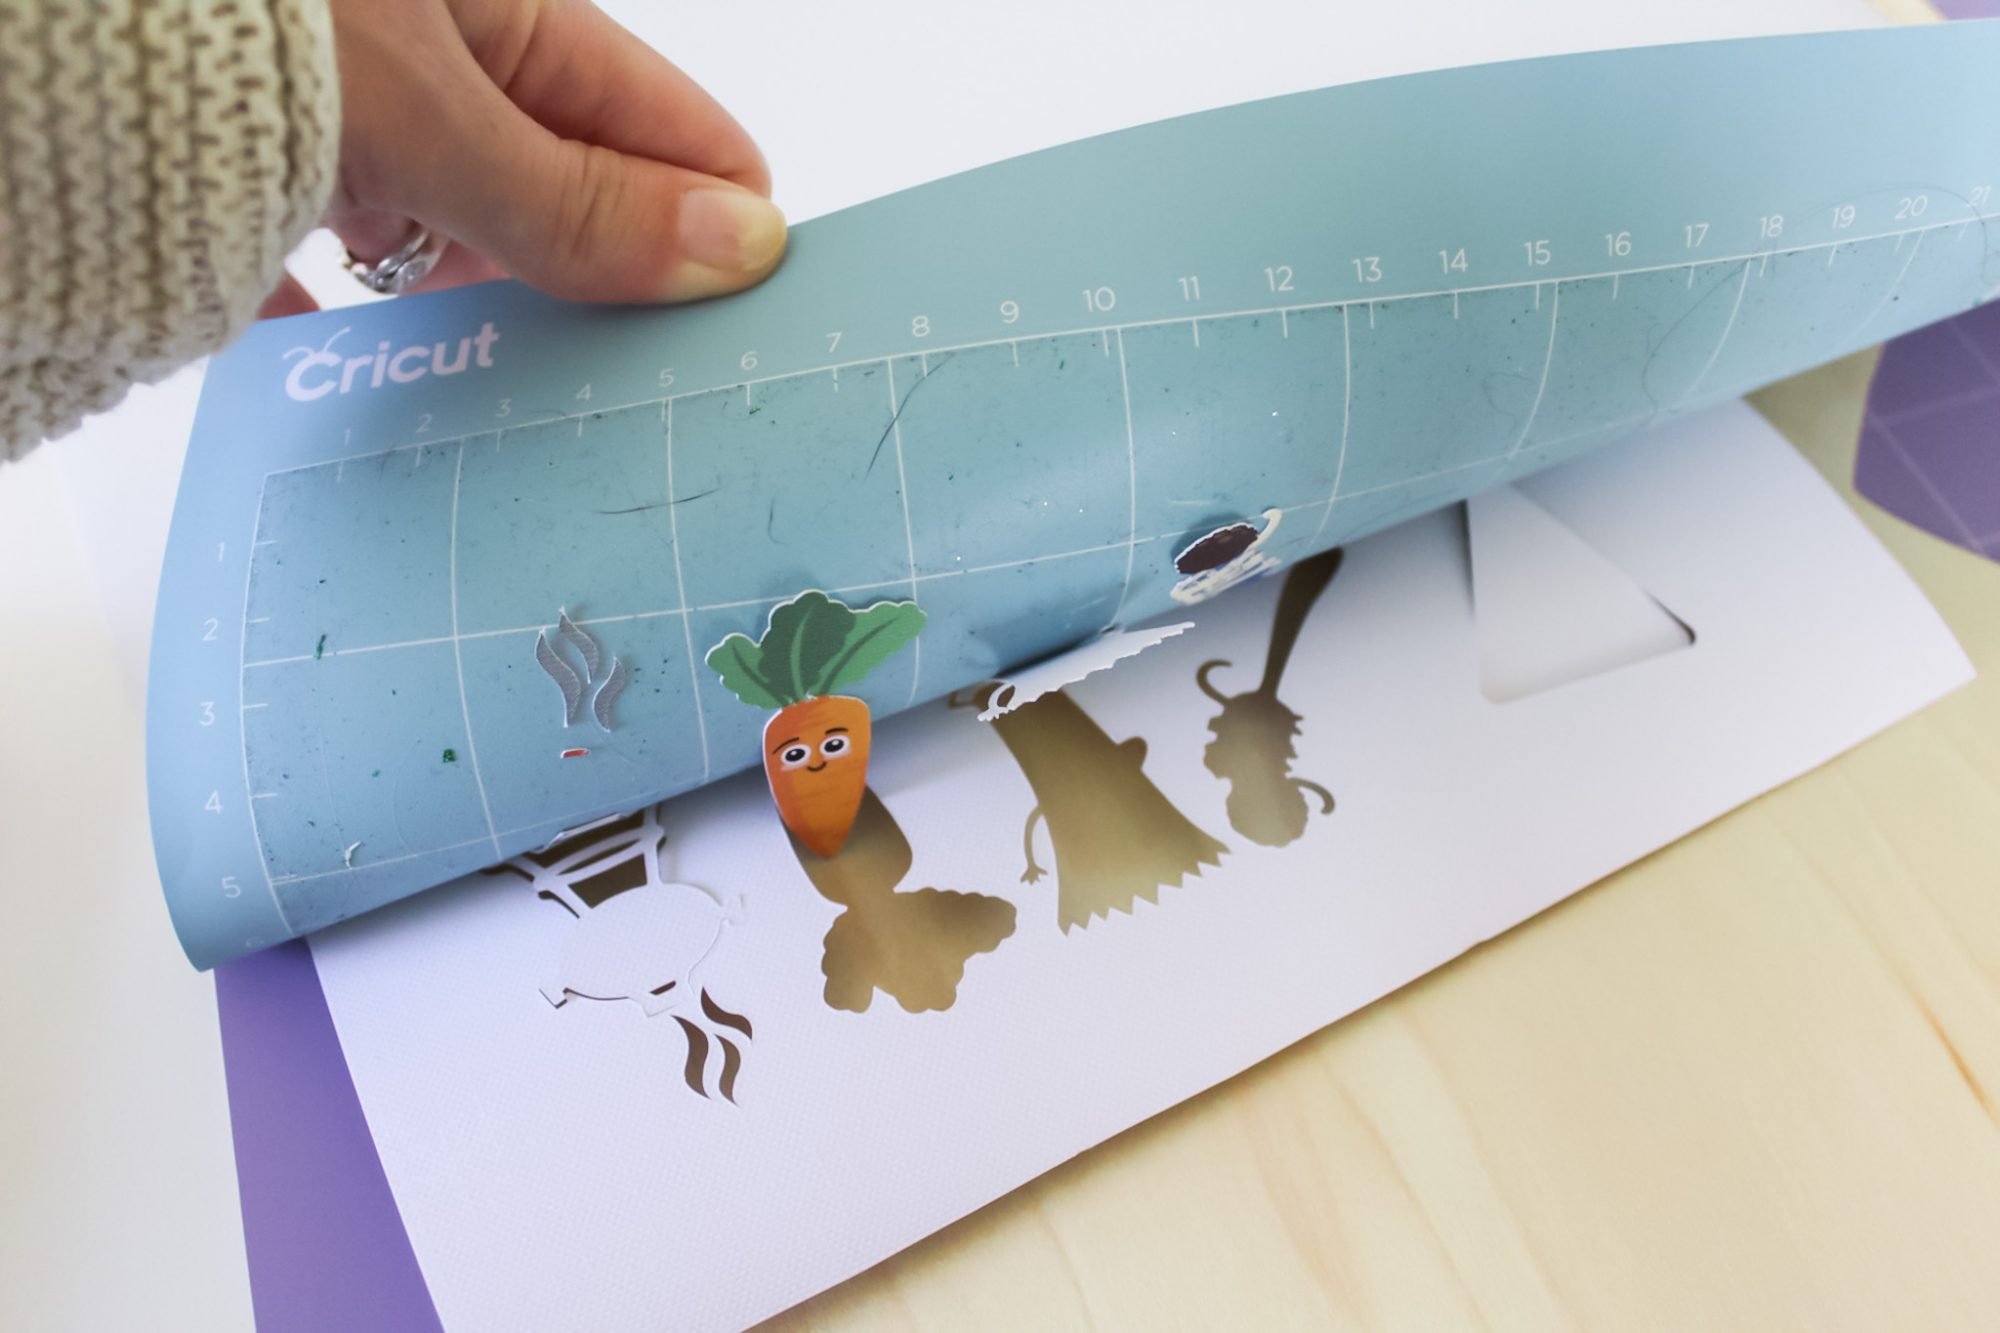
You can also use a spatula or tweezers to gently lift the food shapes from the mat if they’re being stubborn.
Set your printed cardstock food pictures to the side for now.
Cut Food Shapes From Wood Veneer
Now we are going to cut the shapes we welded!
Attach a sheet of maple wood veneer to a purple StrongGrip mat, smoothing it to the mat’s surface with a brayer (a mini roller).
You can also secure the corners with painter’s tape if you wish.
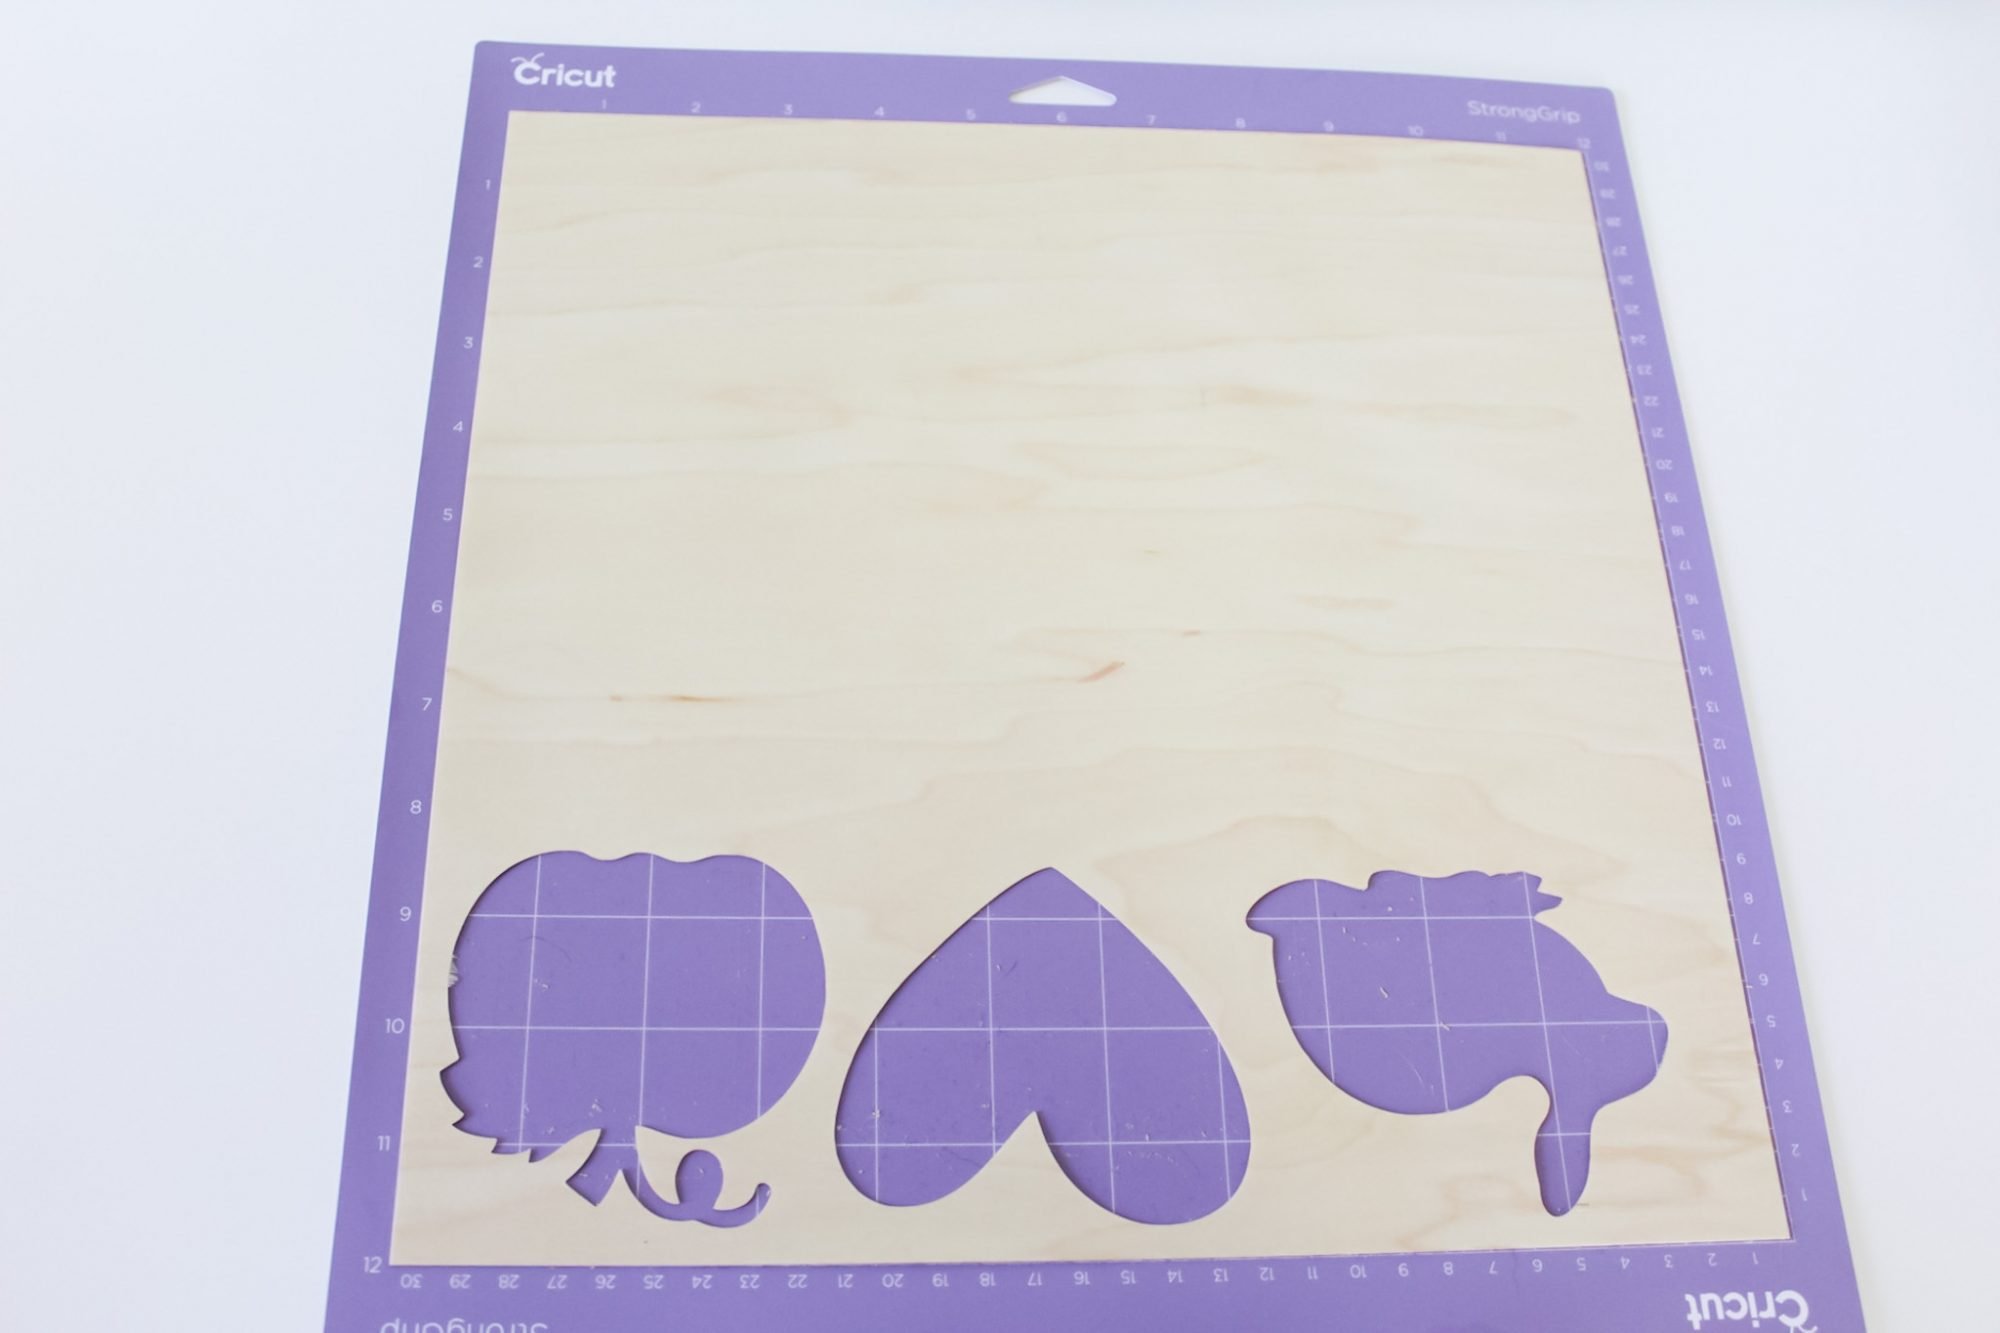
I had this scrap piece of wood veneer leftover from my DIY Interchangeable Home Sign project that was perfect for this step…
Switch out your fine-point blade and housing for a deep-point blade in the B-clamp, and load your mat.
Proceed with cutting your design.
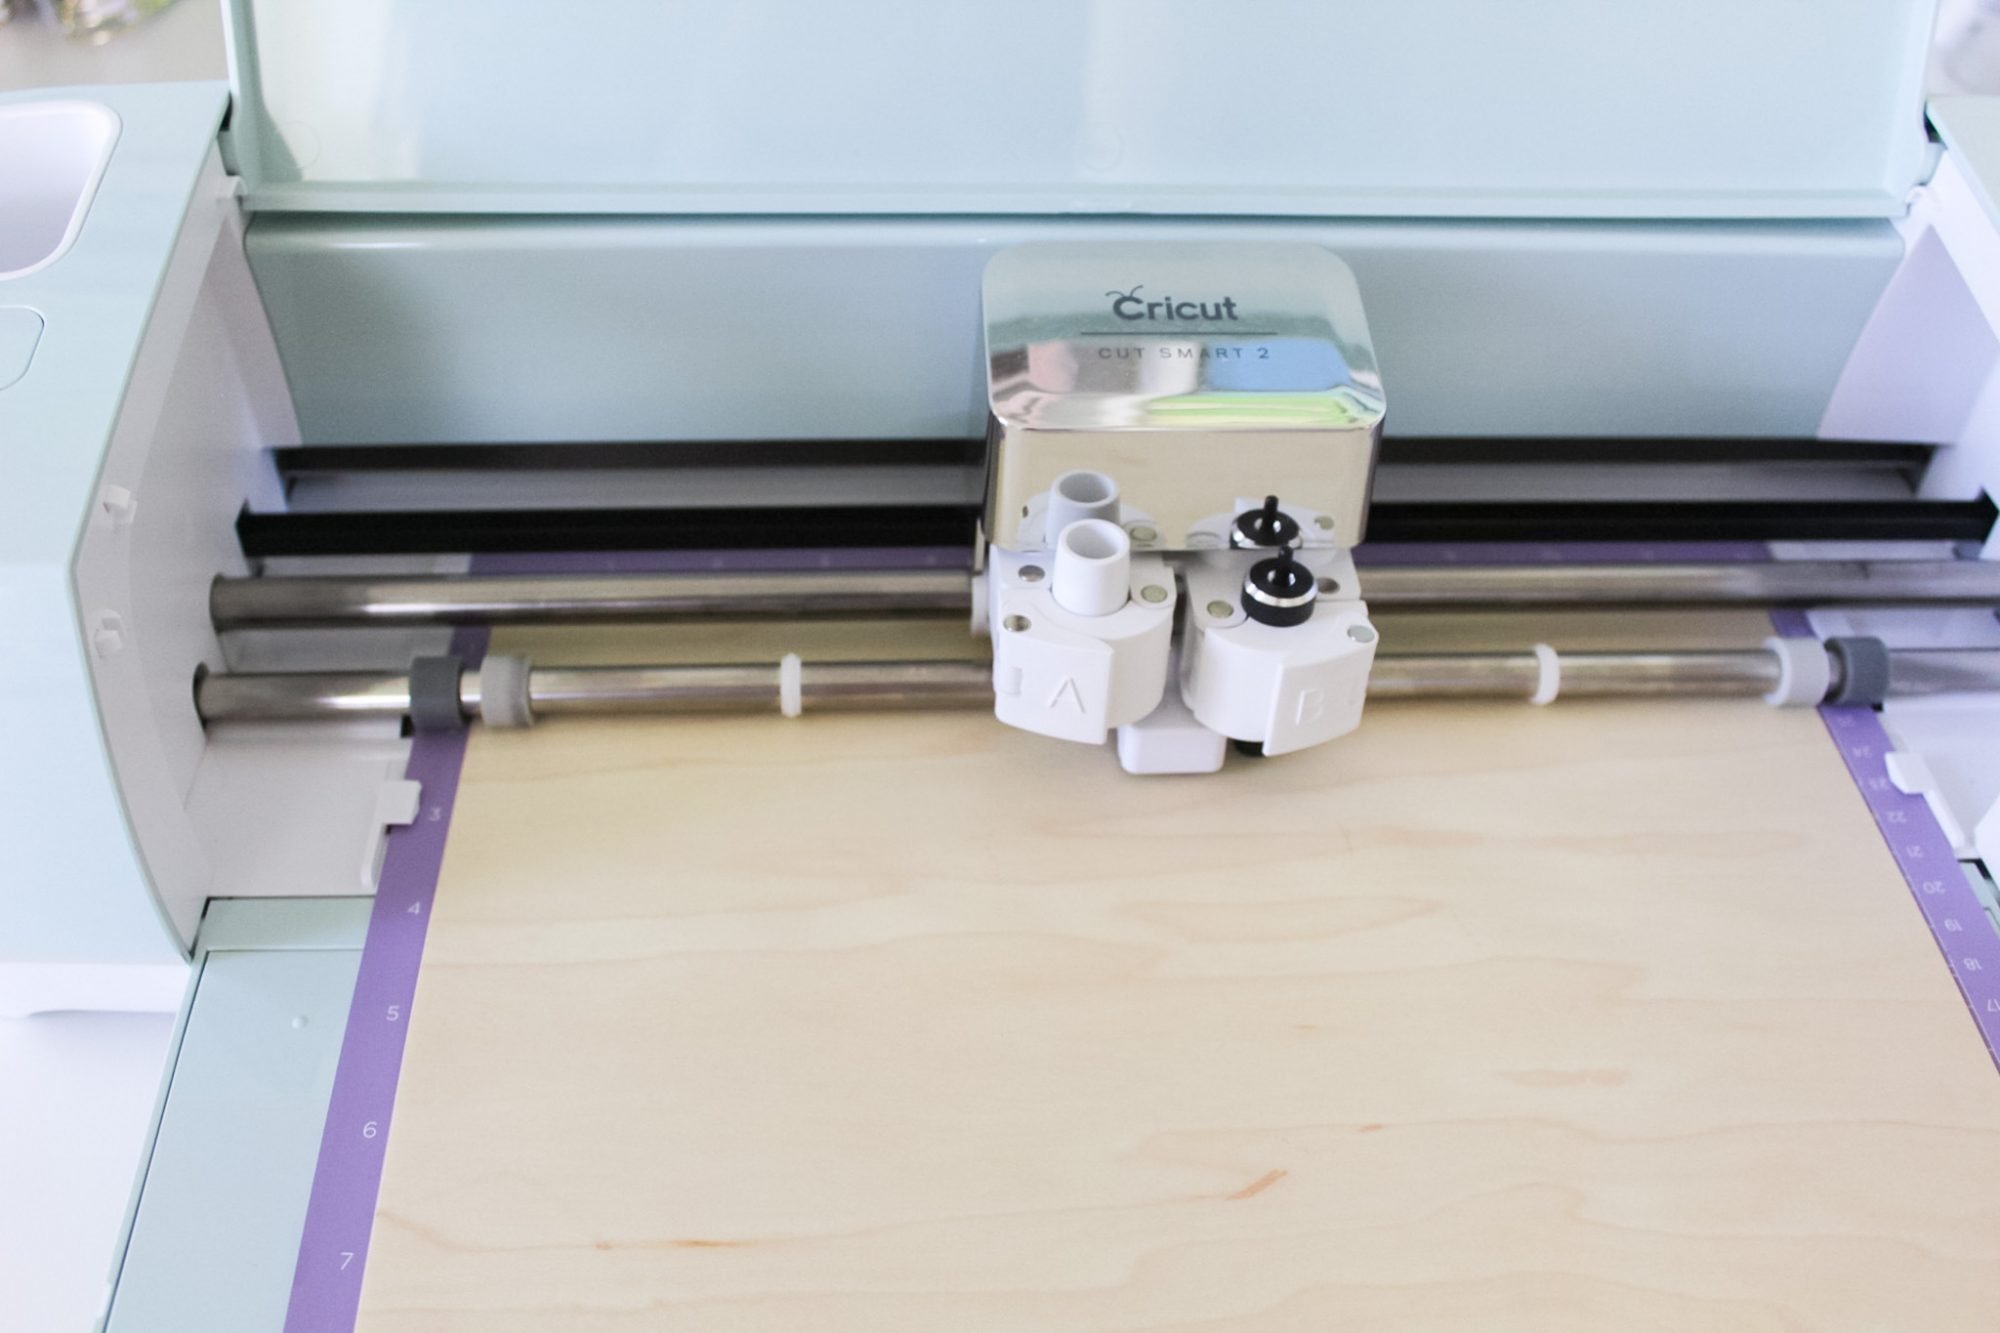
Once your Cricut is finished cutting, remove the veneer cut-outs and sheet from the mat in the same way you removed the cardstock.
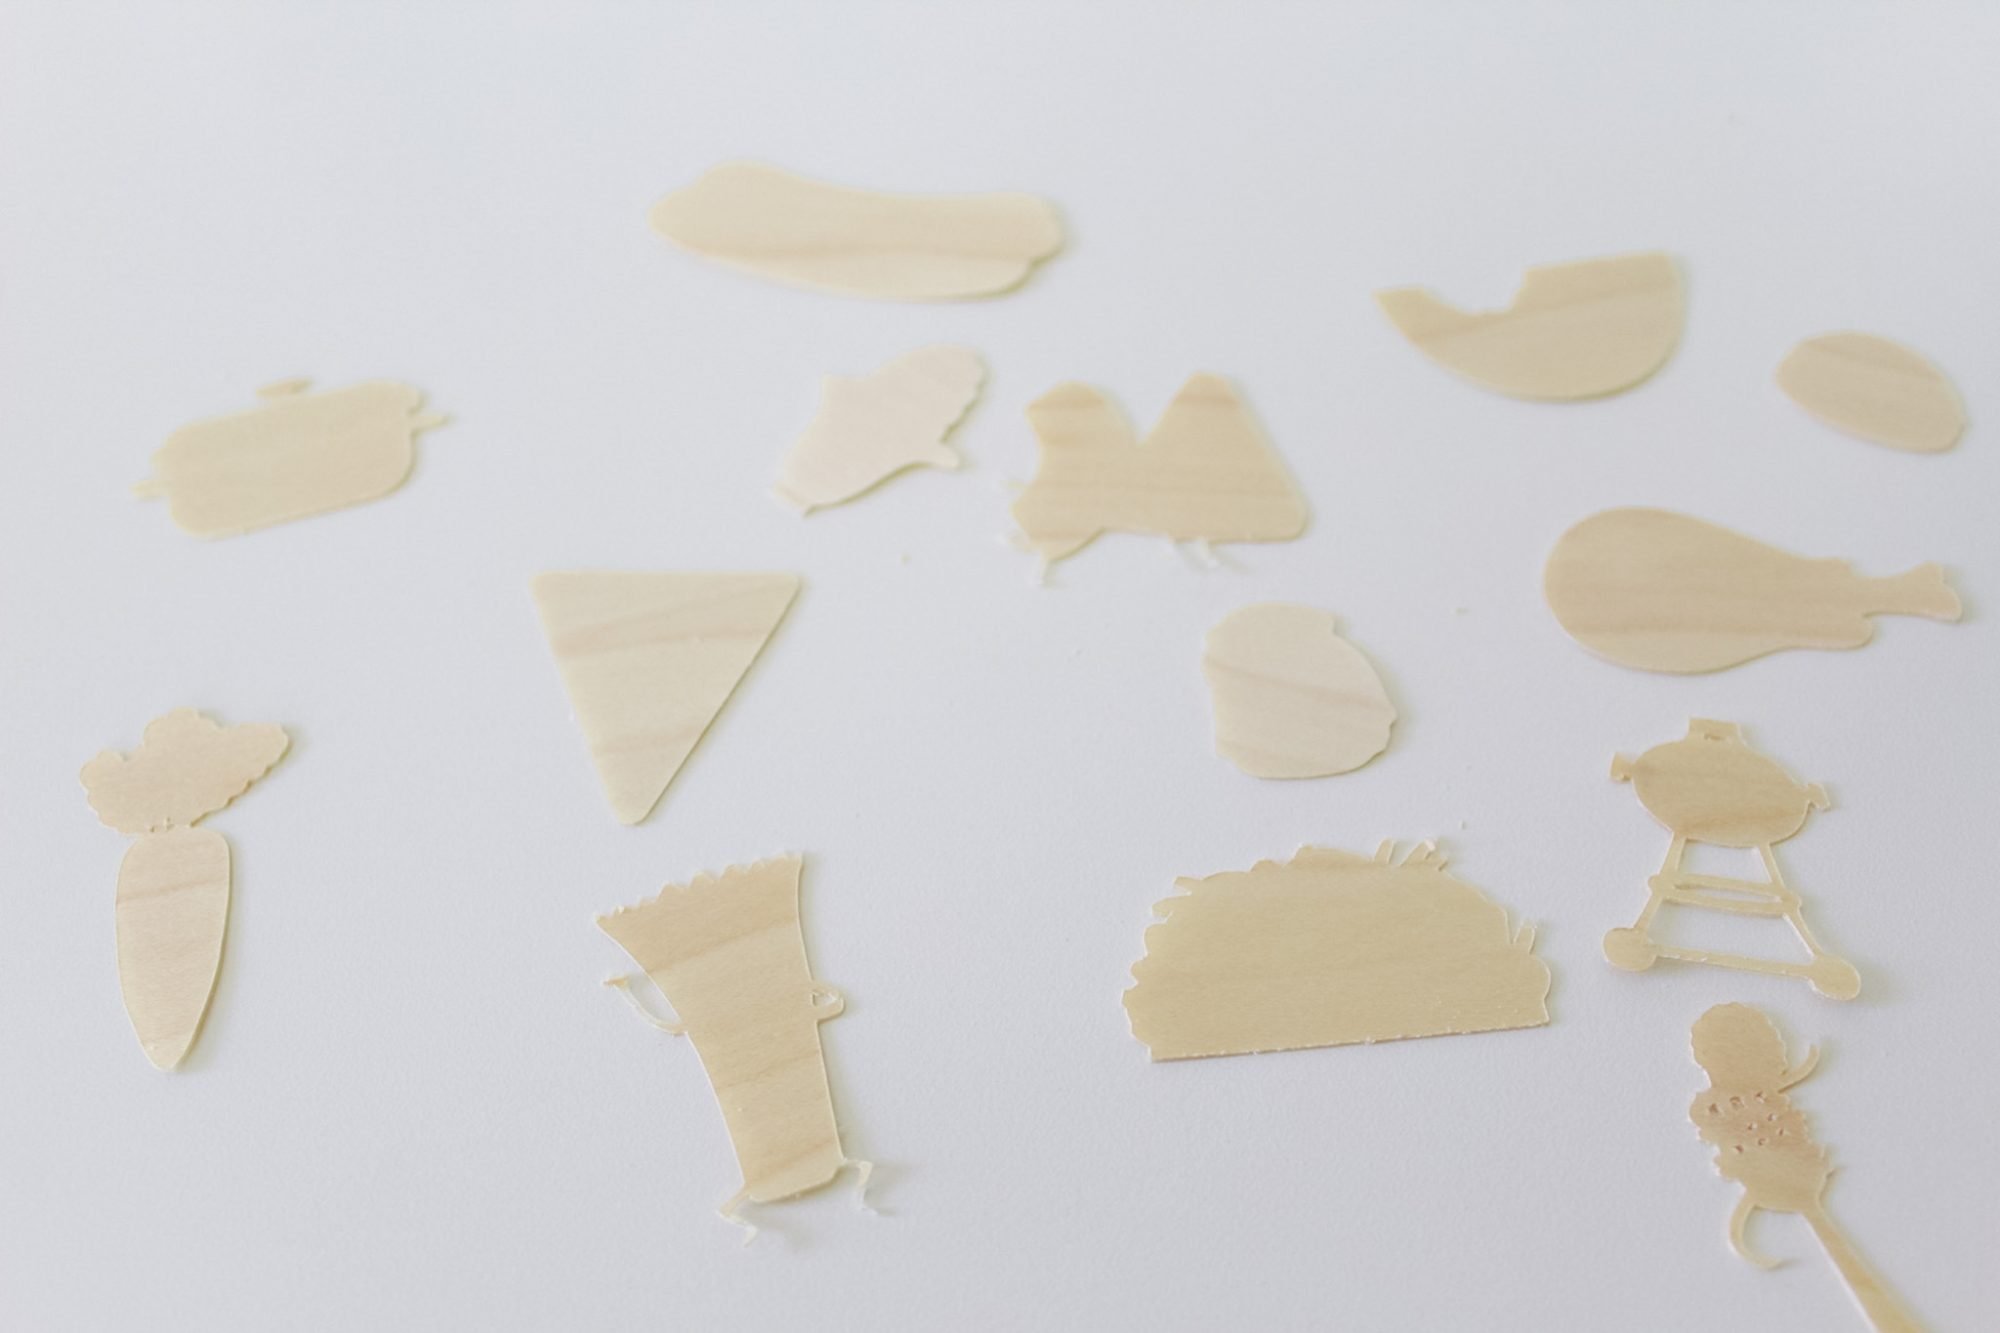
Adhering The Wood Cut Outs and Cardstock Food
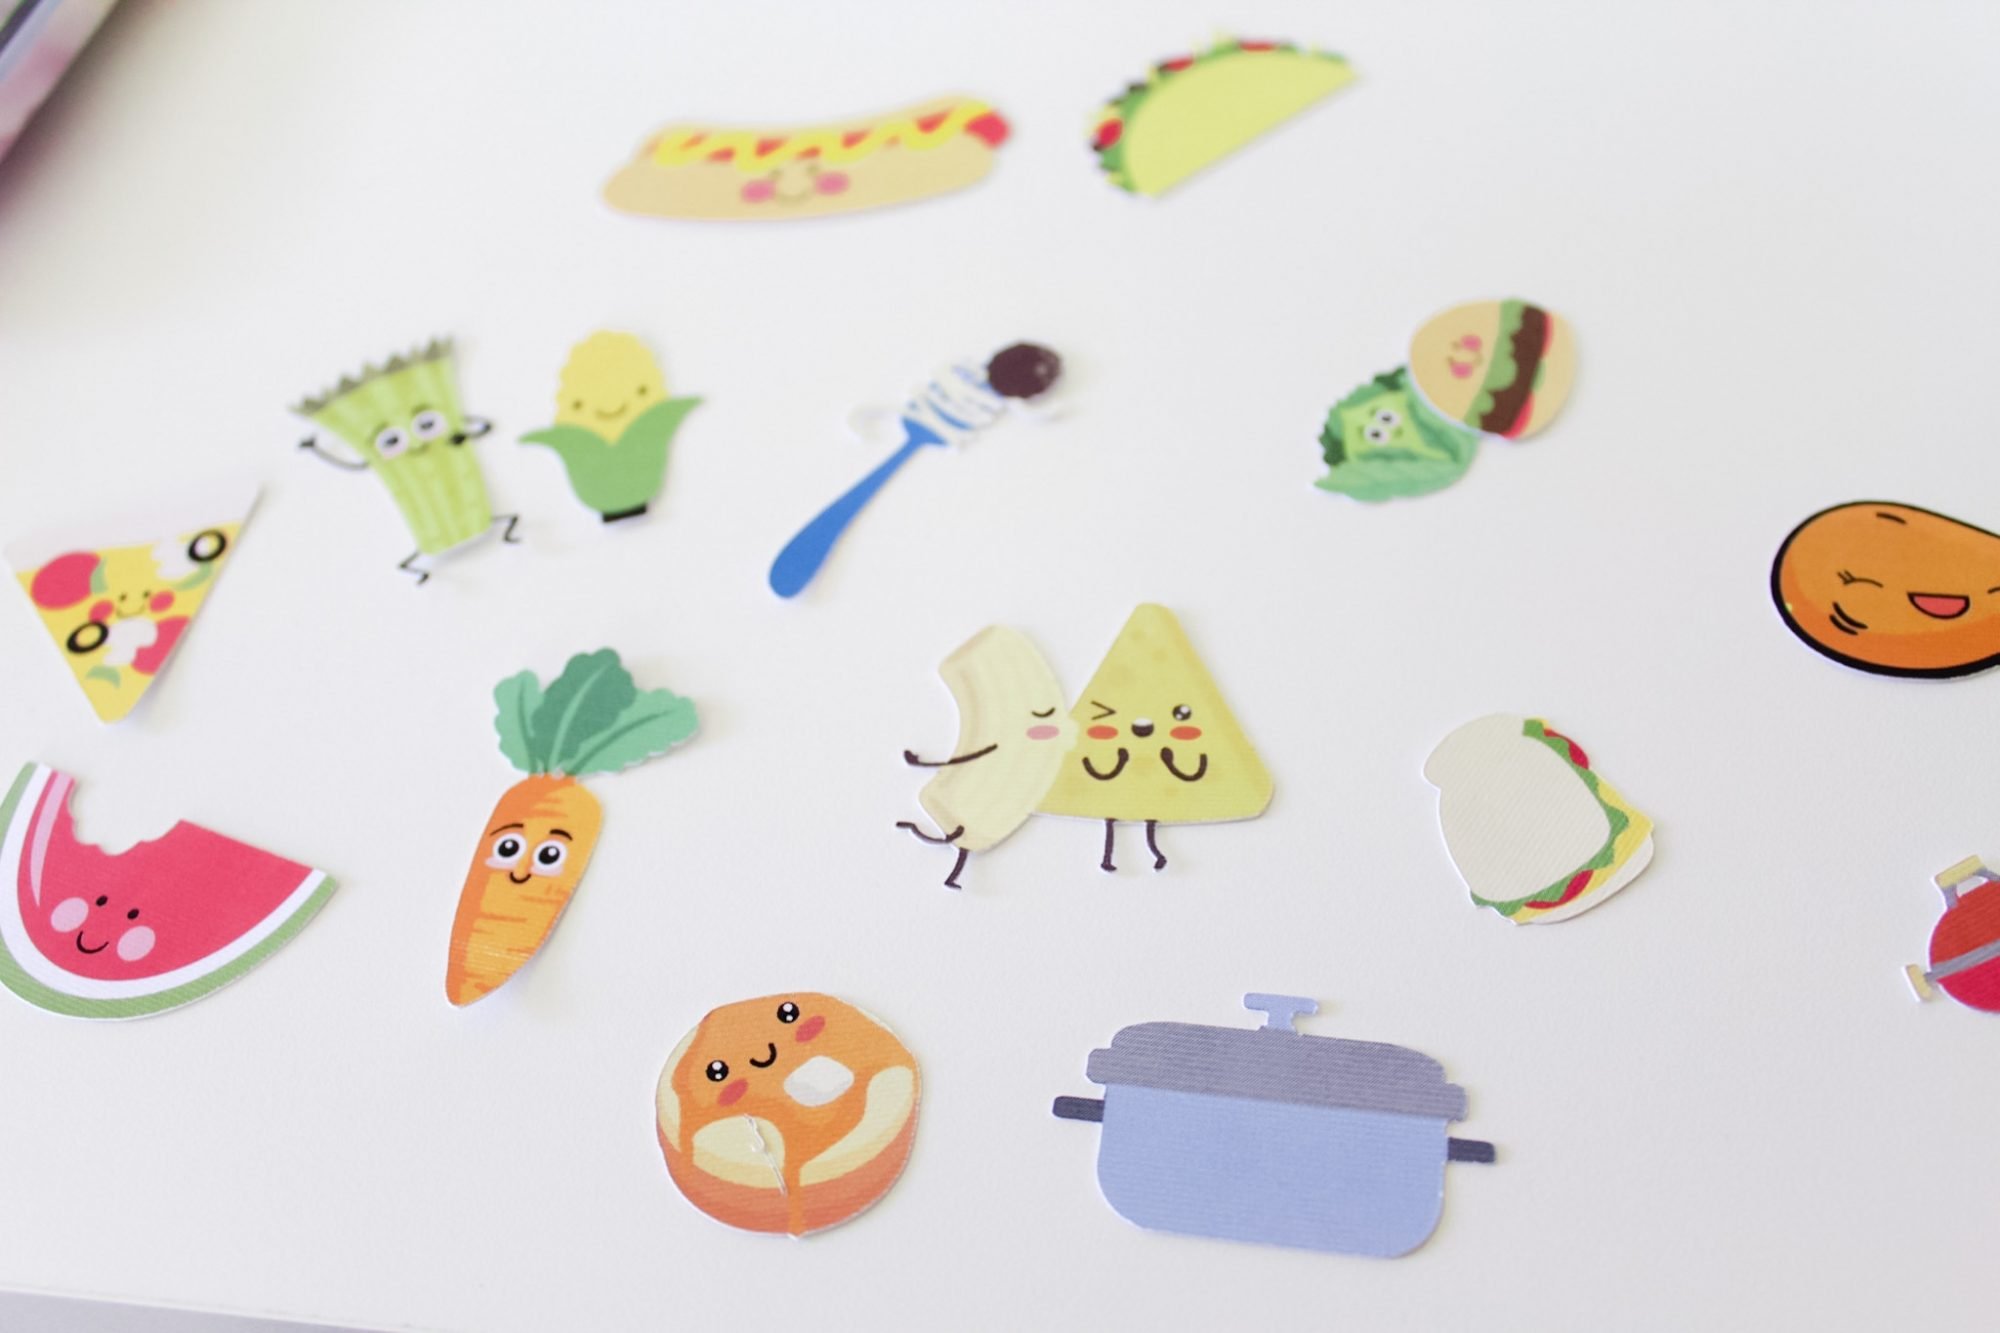
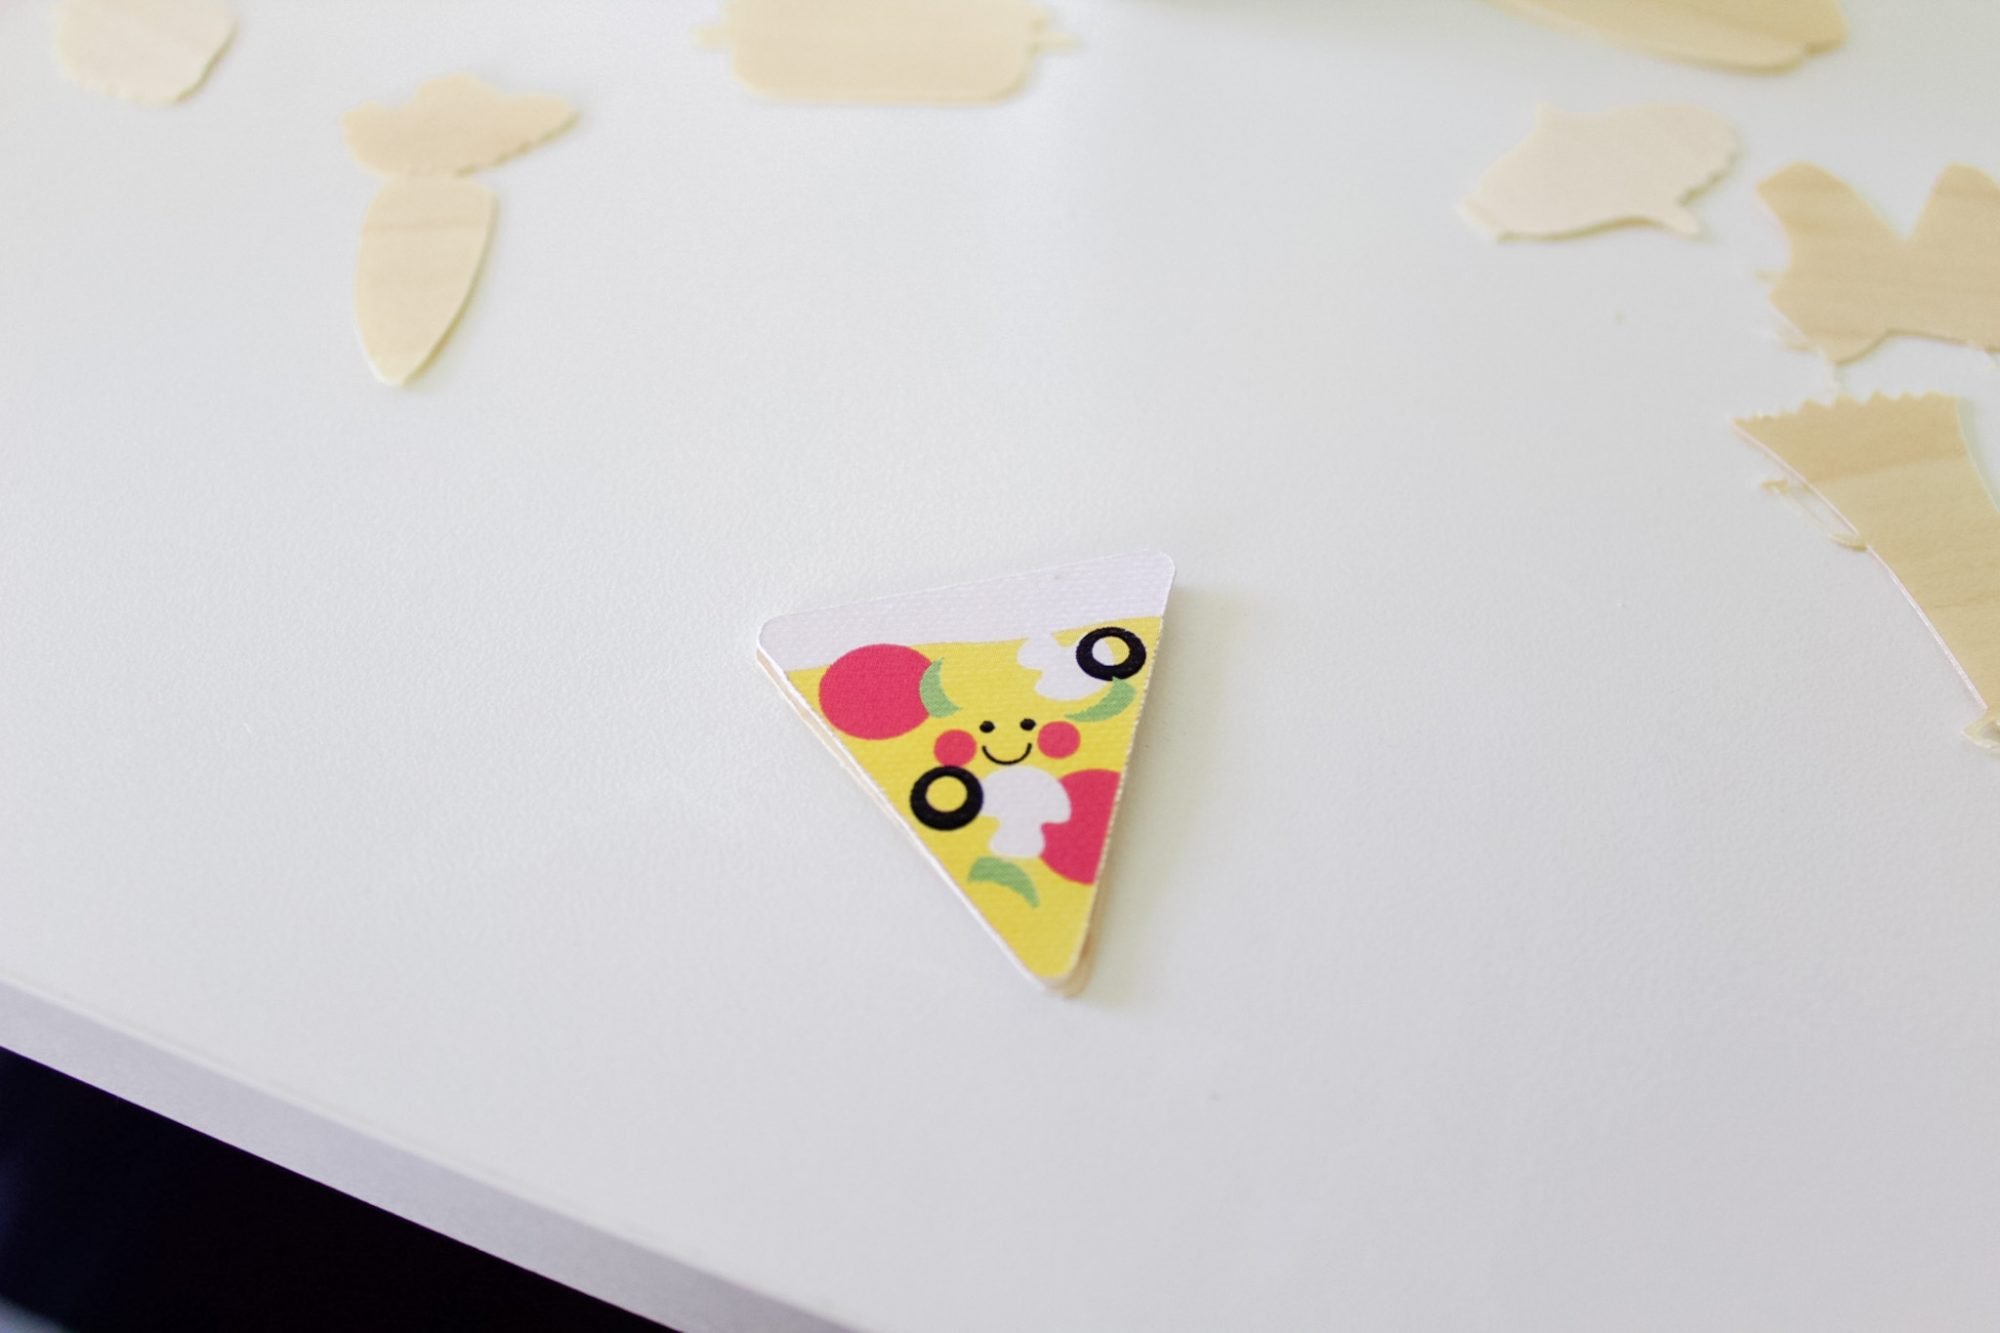
Pair up each wood cut out to its corresponding printed image, and glue them together.
P.S. I tried this with just the cardstock, and it was much too flimsy. The wood veneer adds a lot of stability so these shapes will hold up over time!
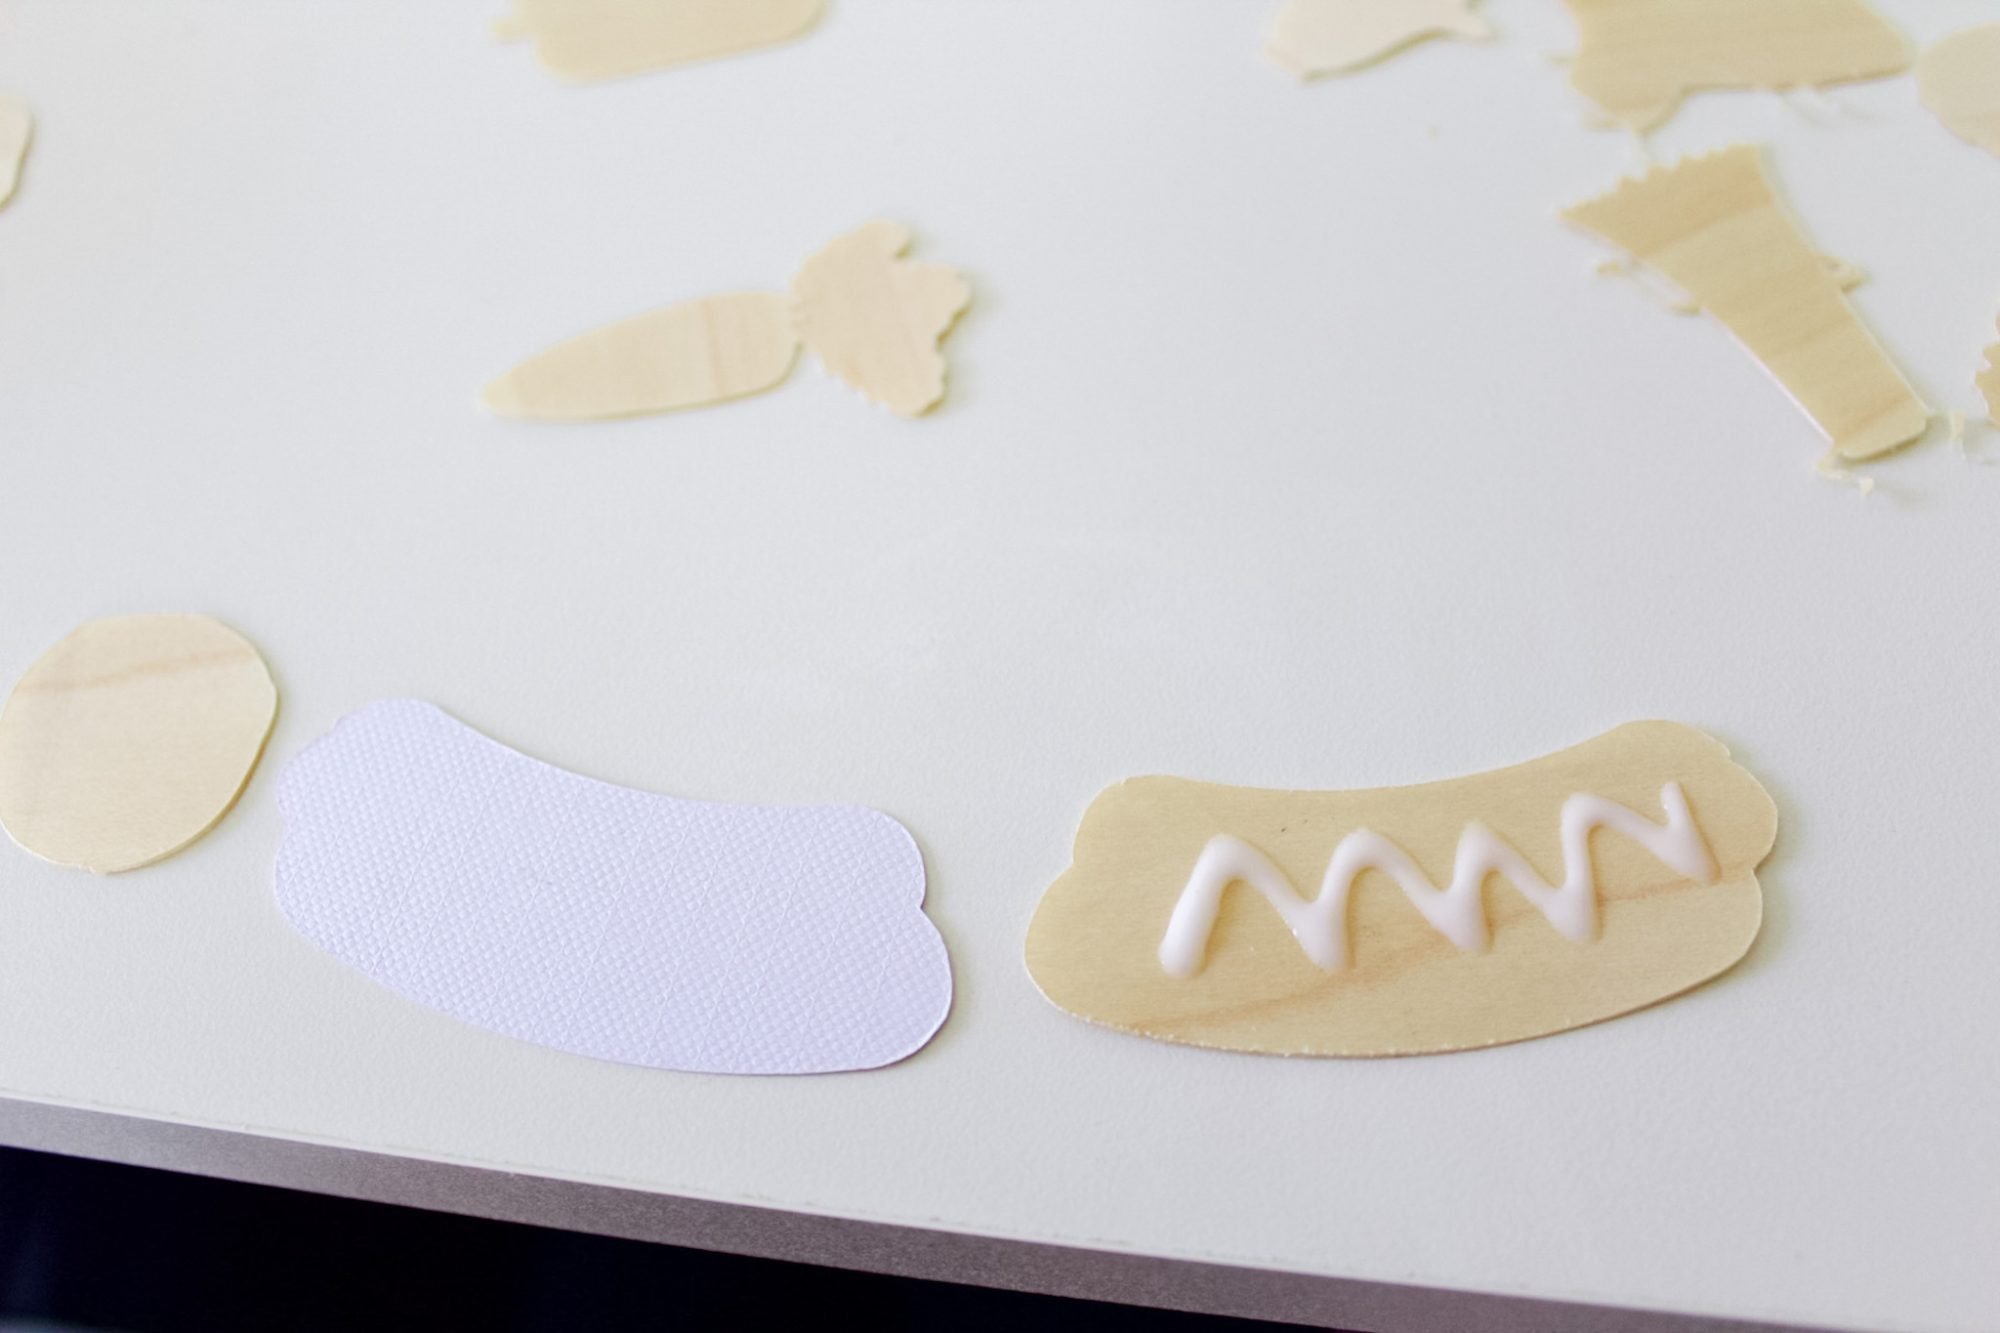
I used regular school glue to attach the wood to the cardstock.
Wipe away excess glue from the edges with a paper towel, and place under a heavy book to help keep them flat.
Too much glue can make them curl, so be conservative!
I gave my food buddies 12 hours under a heavy book to dry and keep flat, but I am a busy mom of three undergoing an extensive home renovation who forgot about them completely (ha!), so this wasn’t done on purpose and you certainly don’t have to wait that long.
After letting them dry for a few hours, peel the backing from your 18mm disc magnets, and adhere them to the backs of your food.
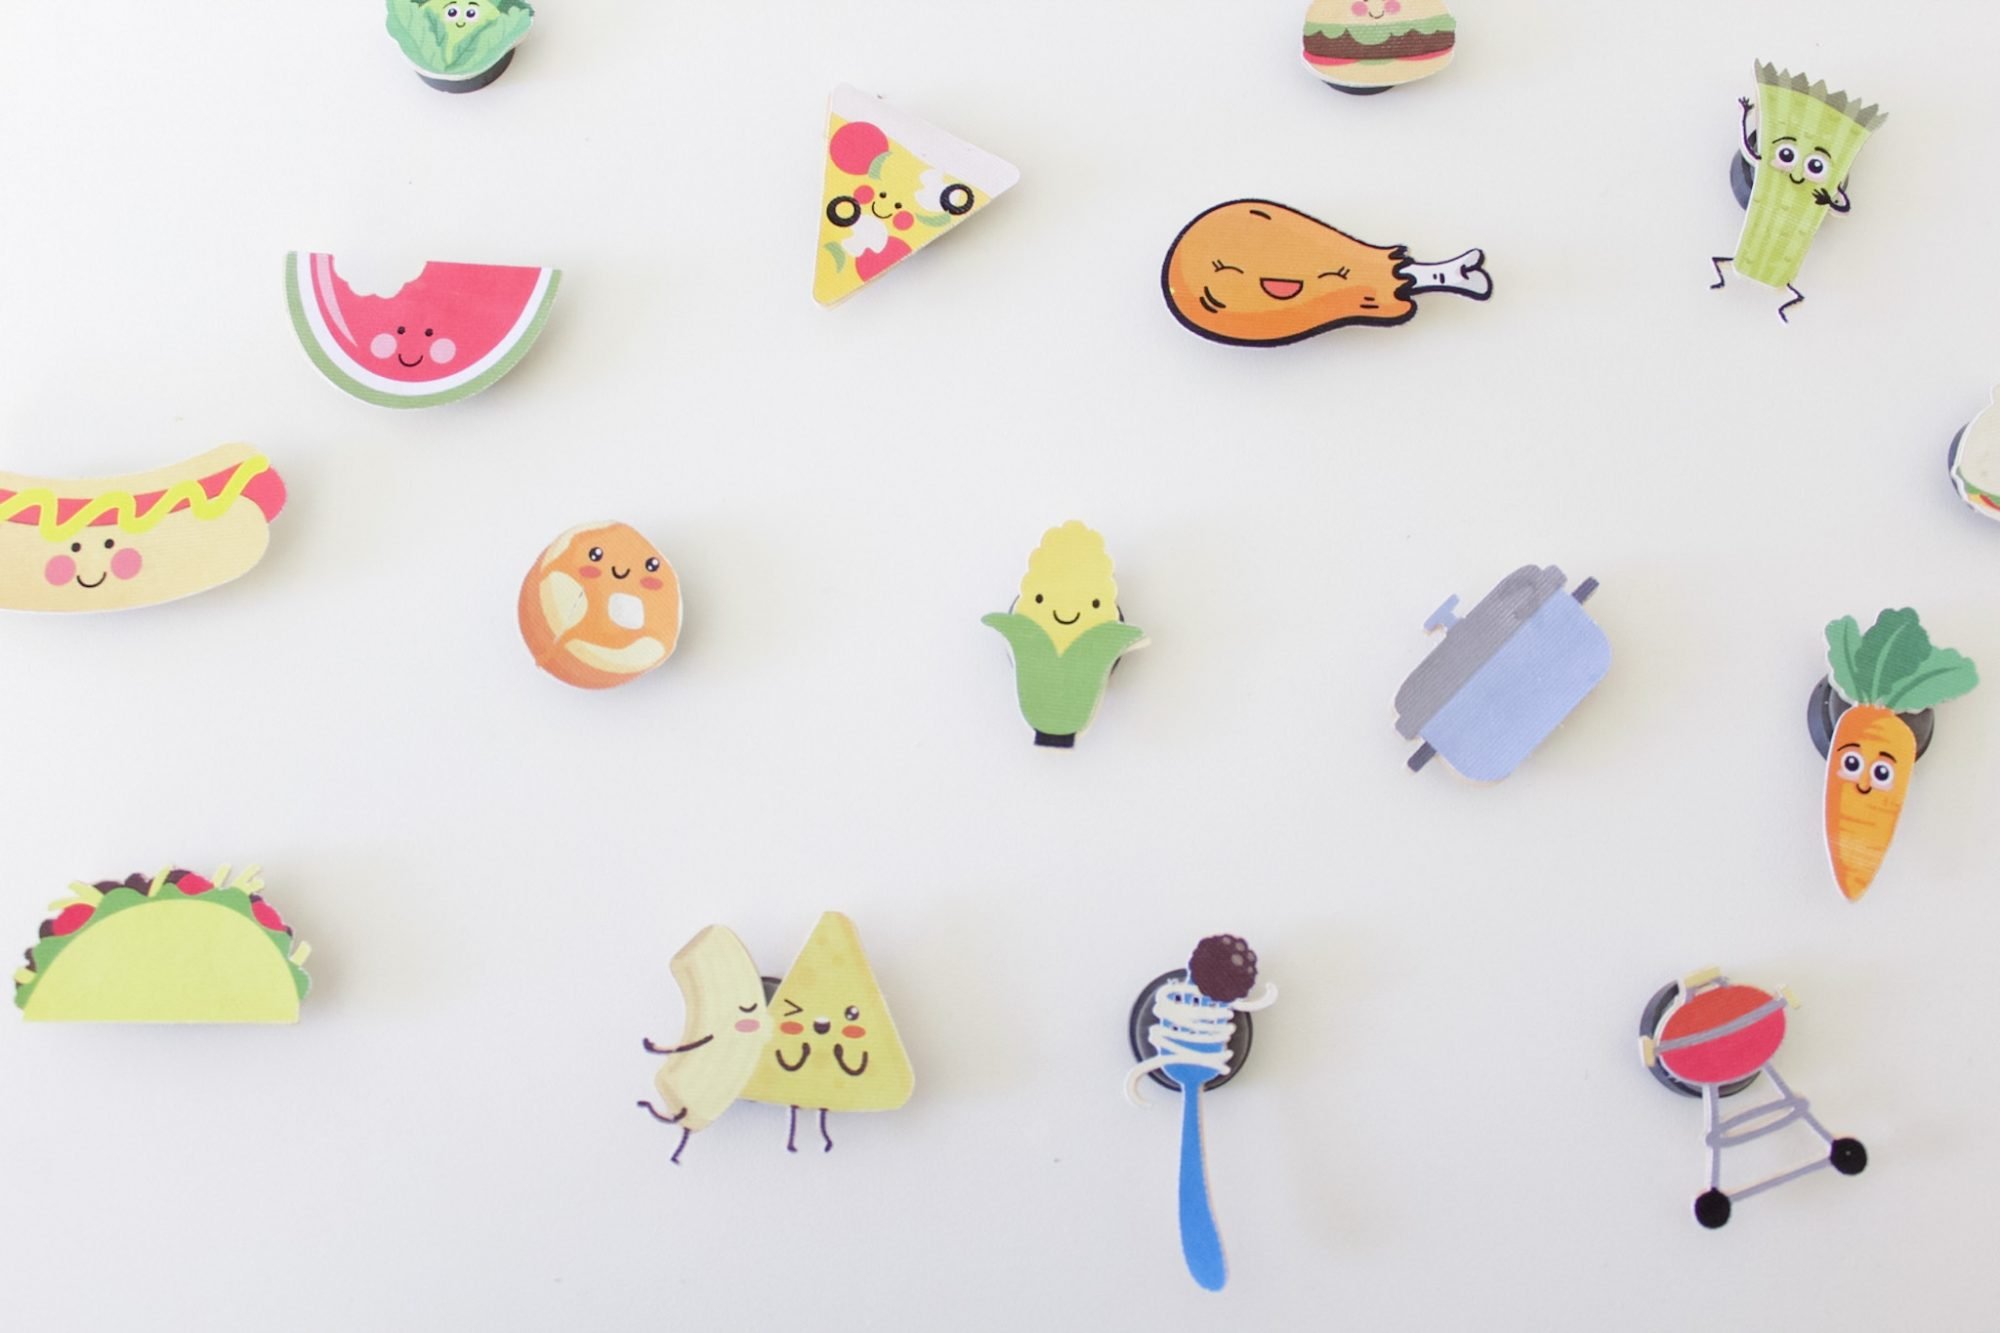
We picked pictures for:
- crockpot nights
- taco Tuesday
- Pizza
- spaghetti
- grilling
- sandwiches
- hamburgers
- hotdogs
- watermelon (our favorite summertime snack)
- veggies
- and breakfast for dinner!
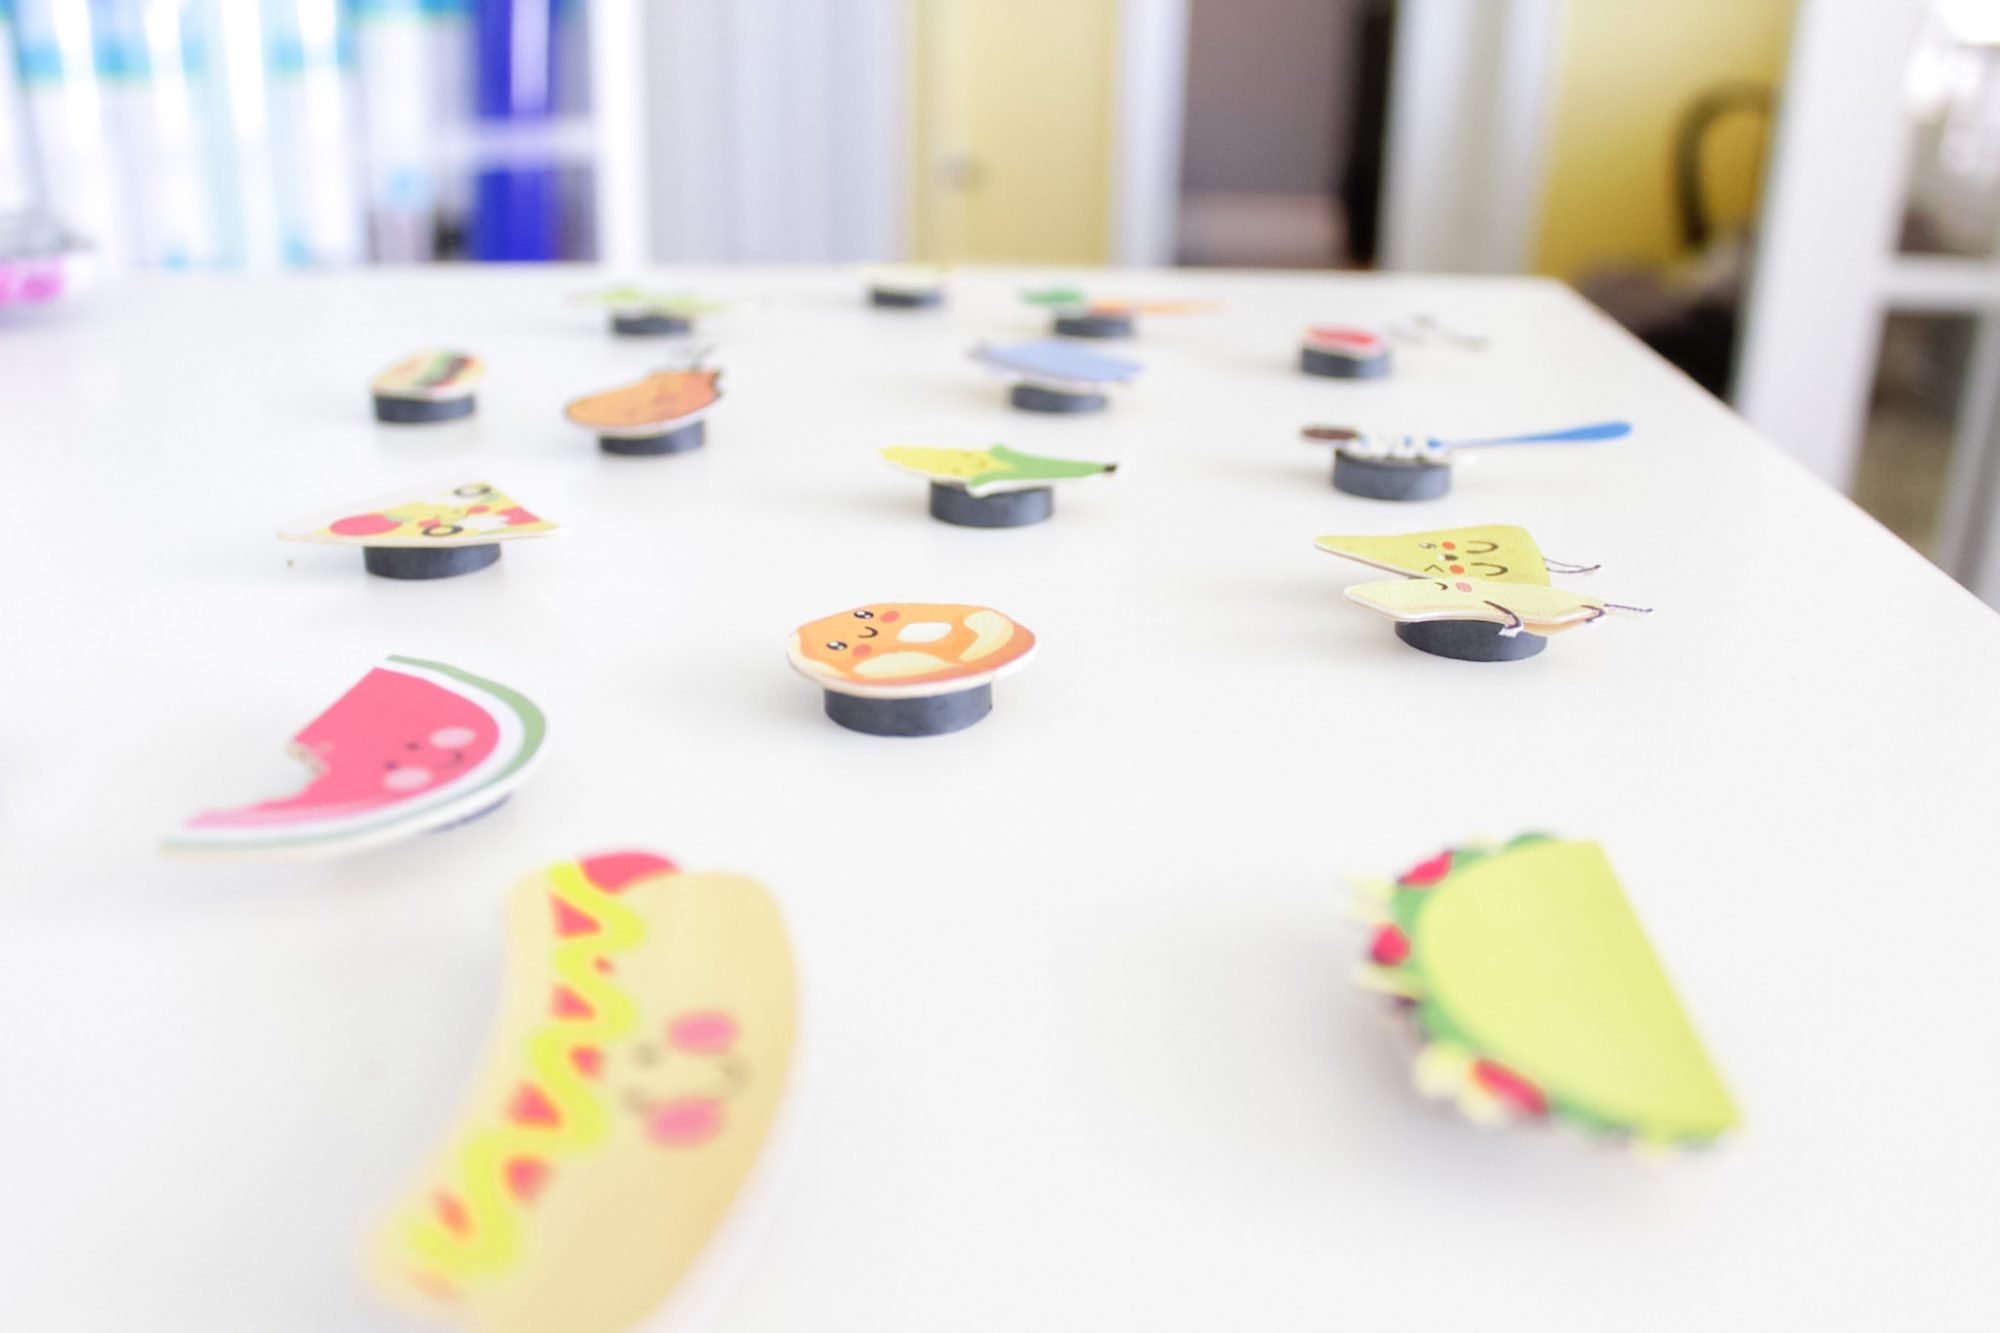
Now we’re ready to put them on the fridge!
Attach your fridge sign to its new home, and write the days of the week with a dry-erase marker.
Have the kids pick out healthy foods to eat throughout the week and place them on your new sign!
Other Print Then Cut posts you may like:
DIY Planner Stickers For $0.12!
DIY Nursery Closet Dividers Using Cricut Print Then Cut
I hope you enjoyed this tutorial and feel confident using the Print Then Cut function on your Cricut, as it’s easily one of my favorites!
Here are some other fun DIY and crafting posts that use the Cricut Explore Air 2:
-
DIY Front Door Round Welcome Sign With The Cricut Explore Air 2
-
Easy DIY Acrylic Calendar For $25 With The Cricut Explore Air 2
-
DIY Water Bottle Tracker Decals ($5 Skinny Tumbler Tutorial)
-
What Is Infusible Ink (Easy DIY Infusible Ink Coasters Tutorial)
-
How To Create A Monogram In Design Space ($5 DIY Keychains With Monograms)
-
How To Put Vinyl On A Curved Surface (Easy DIY Ornaments For Christmas)
-
DIY Gift Tags For Christmas (8 DIY Glitter Gift Tags for $0.40!)
Have you made this Acrylic Fridge Menu Planner + Grocery List? Tag me in your photo on Instagram so I can see!
What crafting or DIY project are you working on right now?
*Post originally published August 2020, last updated August 2025.

Leave a Reply